Archive for the 'Miniature Painting' Category

Miniature Painting – 3d Printed Heroquest Zombie

So to finish up the undead group I needed to add some Zombies. I did something a little different this time as I couldn’t find an alternate Zombie pose I liked (well rather I found it after I’d already decided to do a comparison). So I found a Zombie resculpt that had been done by fabbio84 that is in the same pose. So what I did was printed two of the scanned Zombies and then printed two of Fabbio84’s Zombies to show a contrast between the quality you get when printing a digital sculpt vs a very high res scan. For those after an alternate sculpt for Zombies try this one from DungeonWorks. I’ve included all the stl files at the end of this post just in case they vanish from Thingiverse.

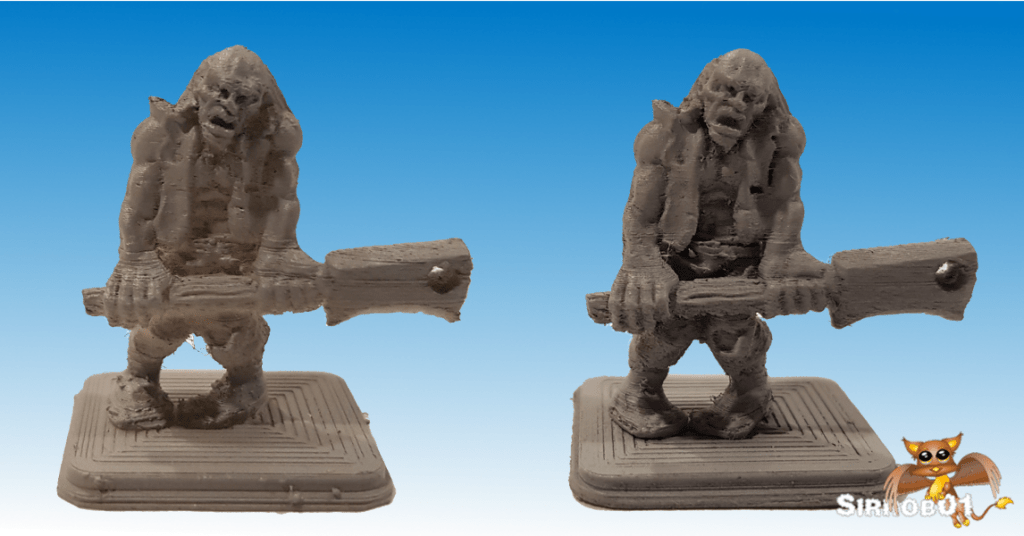
Thingiverse 3d Render – Left Rescultp, Right Orginal Scanned

From the render above hopefully it is easy to see how much cleaner and crisp the resculpt looks, as I found this does have flow on’s to printing. I did scale both these a little, so the fixed scanned Zombie I scaled down to 90% this makes it a little bigger than the normal zombies but better sized against the rest of the HQ minifigs. The resculpt I scaled down to 91% which made him about the same height as the scaled down normal zombie. In both cases I turned off “preferences>>configure cura>>Automatically drop models to the build plate”. This was so that I could sink the bases below the buildplate and print them baseless. For those intrested that means once scaled for the scanned zombie a position of Z = -2.61 and for the resculpt a Z = -3.15.

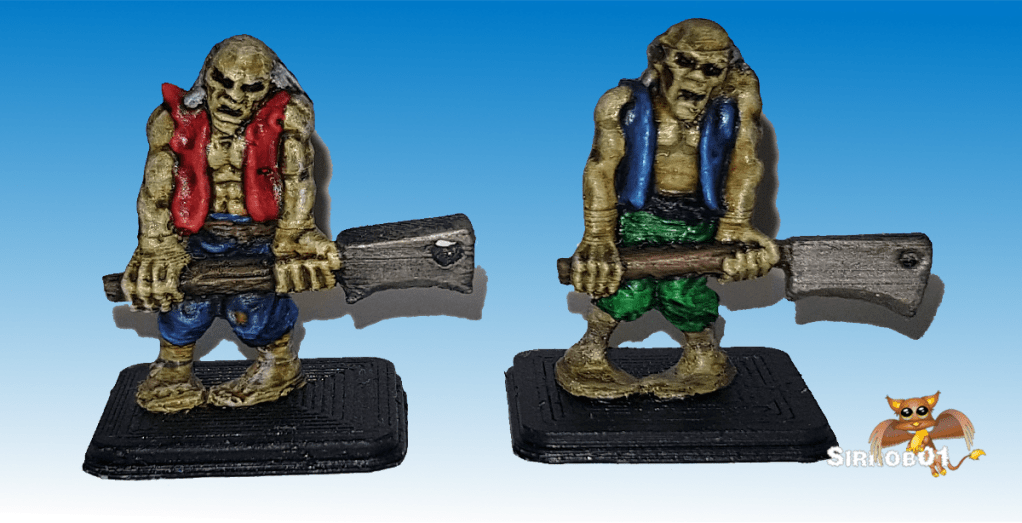
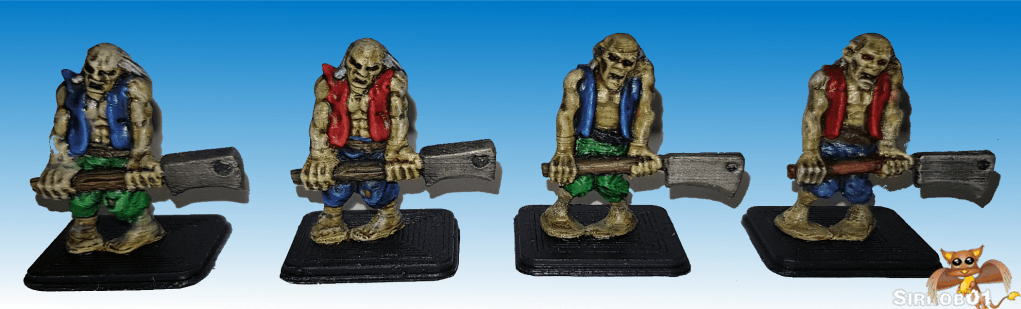
Left Resculpt, Right Scan

These were printed on the same printer using the same pla and the same cura profile. So the quality difference is purely in the sculpt vs scan. In the picture above which shows the painted resculpt vs the scanned zombie. It’s pretty clear that:

  • Overall the detail on the resculpt is much crisper and not as soft.
  • On the resculpt my printer even managed small details like the belt, although teeth are still lost as is the belt buckle.
  • The feet on both are pretty much mush, however on the resulpt I can just about make out toes. Don’t know why my printer seems to hate zombie feet…they must smell bad

On the painting front I found painting the resculpt much easier as I wasn’t guessing about detail in a few places and trying to bring it back using different paint colors.

Left – Good Pla, Right Not so Good Pla

I was going to do a comparison as well between cheap pla vs more expensive pla. Unfortunatly once cleaned and painted it’s really hard to tell the difference and even undercoated its tough to spot. I can say even if the photo dosen’t show the quality differences; Straight off the printer the better pla requires less cleaning and is also less temperamental/more reliable when printing. Additionally I also find the better pla seems to show fine detail just a hair better.

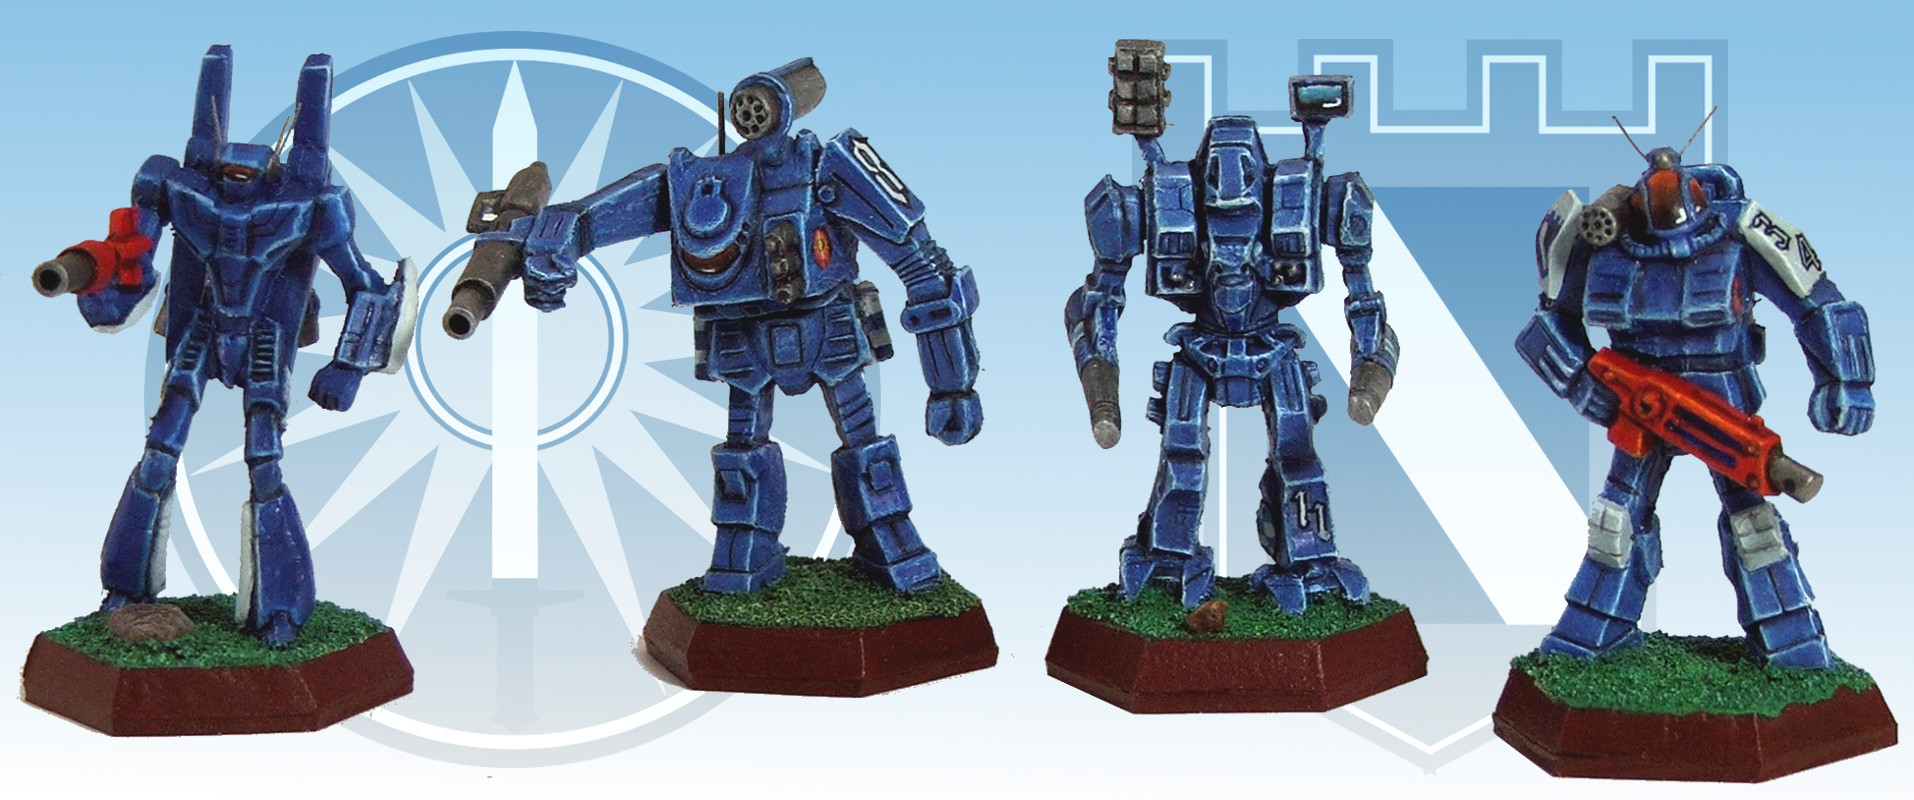
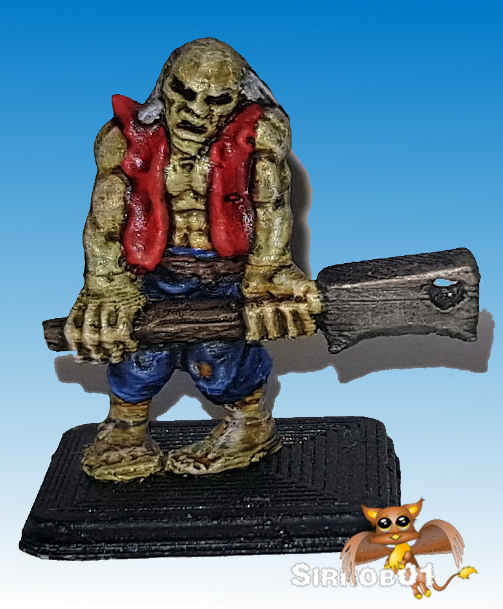
4 boys shambling off to a party

So short summary would be use the best quality 3d sculpt you can with the best quality pla for your printer. Even on a FDM printer you can see surprising improvements in quality with a more crisp/detailed sculpt. Next up will be 4 female versions of the HQ hero’s.

Skin (Less green)
1. Necrotic Flesh (Army P)
2. Green Tone (Army P)
3. Seraphim Sepia (Citadel)
4. Tanned Highlight (Reaper) (Dry Brush)
Hair
1. Ulthuan Grey (Citadel)
2. Nulan Oil
3. Ulthuan Grey (Citadel) Dry Brush


Red Shirt
1. Pure Red (Army P)
2. Carroburg Crimson (Citadel)
3. Mars Red (Army P) (Blend Highlight)
4. Wild Rider Red (Citadel) (Blend Highlight
Blue Trousers
1. Altdorf Gaurd Blue (Citadel)
2. Nulan Oil (Citadel)
3. Altdorf Gaurd Blue (Citadel)(Highlight/Dry Brush)


Blue Shirt
1. Altdorf Gaurd Blue (Citadel)
2. Nulan Oil (Citadel)
3. Altdorf Gaurd Blue (Citadel) (Blend Highlight)
4. Lothern Blue (Citadel) (Blend Highlight)
Green Trousers
1. Mouldy Clothes (Army P)
2. Nulan oil 1 drop,
Angel Green 2 drops –
water down to wash
3. Mouldy Clothes (Army P) (Highlight/Dry Brush)
Wood
1. Earth brown (Reaper)
2. Nulan Oil
3. Oiled Leather (Reaper)

Metal
1.Leadbelcher (Citadel)
2. Nulan Oil (Citadel)
3. Ironbreaker (Citadel) (Dry brush)
4. Honed Steel sword edge (Citadel) (Dry brush)
Paint Colours Used

All the below are under the Liscences specified by their creators, check inside the Zip files.

Alternate Zombie pose by DungeonWorks  Note: I havent printed this

A painting requires a little mystery, some vagueness, and some fantasy. When you always make your meaning perfectly plain you end up boring people.”

– Edgar Degas

Miniature Painting – 3d printed Heroquest Alternate Mummy

HQ_mummy_paint_one
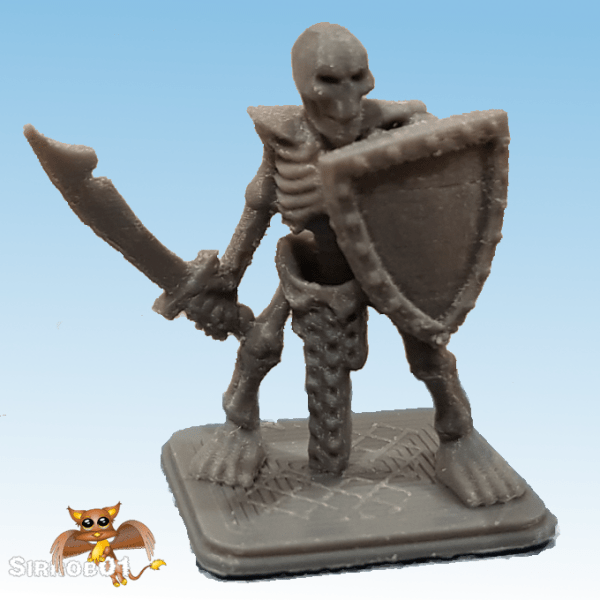
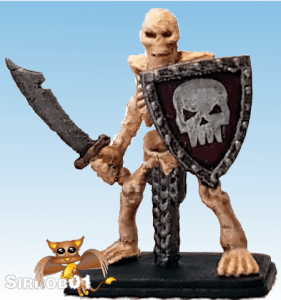
To join my little band of alternate HQ skeletons I dug up some alternate mummies to go along with them on Thingiverse.  I really like this alternate mummy by Mangforge it has a much more shambling moving look to it than the orginal HQ mummy. I guess you would say a much more classic mummy pose. As this is also under a standard cc by 4.0 licence I’ve attached a copy of the mummy stl at the bottom of this post just in case the thingiverse version becomes unavailable.


Picture of Heroquest Mummy Render from thingiverse

Thingiverse 3d Render

I printed 4 copies of the above mummy sculpt. I think because of the bandaged nature of mummies in general the layer lines are even less noticable than on the skeletons or the zombies to come. However I did encounter some strange artifacts along the tops of the mummies arms. I’m not sure why but it could still be an overextrusion issue, I’m still contiuing to tweak my cura profile.

HQ_mummy_print

3d print PLA+, 0.04mm nozzle, 0.08 layers with tree supports, nil cleanup and undercoated

I decided to upload a picy of the worst print, pre-cleanup and after I’d undercoated it. I love seeing the awesome prints people get from FDM machines but it’s really hard to find questionable prints or prints pre-cleanup and after undercoat. The undercoat really helps show the defects:

  • Shoulder layer lines – cause unknown the other 3 didnt recieve that defect and printed from the exact same cura file (it happens) – minor cleanup with a file fixes those in few seconds.
  • Little plastic tags hanging off – cause stringing – rub over with super fine sandpaper or scrub with old toothbrush and tooth paste (toothpaste is a very mild abrasive).
  • Micro blobs or pieces of plastic – cause suspect stringing – as with above for cleanup.

I did print him seperate from the base and glued him on afterwards. Unfortunatly when I was painting I lost track of which one of the four he was, however Im fairly sure the little picture of the painted mummy at the top of the article is him. So you can see they cleanup and paint to tabletop quality fine even with what appear to be terrible defects.

HQ_mummy_paint

The awesome shamblesome

Painting I chose a fairly standard and quick scheme, I needed these 4 finished fast as the skeletons took longer than I expected. The Zombies are likewise taking a bit to long as I’m having trouble getting the skin tone correct. I’m resonably happy with how they came out although there skin is a little too green for my liking and they certainly look a bit rougher than the skeletons. Although given I spent less than half the time painting these as the skeletons the roughness is to be expected.

The Bandages

  • Bleached Bone (Citadel) base
  • Wash Seraphim Sepia (Citadel)
  • Dry brush Bleached Bone
  • Dry brush 50% Bleached Bone and 50% White

The Skin

  • Necrotic Flesh (Army Painter)
  • Green Tone (Army Painter)

I’ve also included the simple heroquest base by enfenix which is in this thingiverse file pack, the bases is under CC BY-NC-SA 4.0 liscence

STL files: Walking+mummy

STL files base: Simple+HeroQuest+Base

Miniature Painting – 3d printed Heroquest Alternate Skeletons

Skeleton_toprightI caved and bought a 3d printer when it was on sale about 6 months ago. It’s one of the ones that makes the best budget lists fairly regularly the ender3 pro (check that link for info). I’ve spent a bit of time trying tune it and improve print qualities and have fairly consistent results using a 0.4mm brass nozzle with a 0.08mm layer height now. Checking over on thingiverse I stumbled on this cool alternate model for the skeleton for Heroquest created by Tezca . As this is under a standard cc by 4.0 licence I’ve attached a copy of the stl at the bottom of this post just in case the thingiverse version becomes unavailable.

Skeleton_render

Thingiverse 3d Render

As carefully as I could I printed out 4 copies of this model, however as my printer is an FDM 3d printer the quality does suffer. A resin printer would produce a far superior print. However having resin, isopropyl alcohol and UV lamps laying around my living room is not really an option so I do the best I can at the moment with my FDM printer. The quality I’ve managed to get from my printer in 6 months as I’ve been learning how to use it has improved significantly and I know it’s capable of much better quality with further tweaks and improvements.

Skeleton_print

3d print PLA+, 0.04mm nozzle and 0.08 layers with tree supports increased 8% in size (I recommend going 6% bigger)

The above picture of one of the skeletons is after I have done cleanup on the print. I spent about 5-10mins doing cleanup of stringy bits and odd lumps with sand paper, small file and clippers. Hopefully the above picture is clear enough so anyone intrested can clearly see the quality issues. ie a bit munged up at the bottom of the shield, the sword has a bit of a zigzag pattern and theres quality loss across the face (teeth and nose) to point out a few of the defects. I printed these four attached to there bases when I should have seperated them as the tree supports left a bit of a grid pattern on the base, live and learn.

skeleton_painted

The four standing skeletons of the…um…..hmmm

Before painting I added the little skull motif to there shields. I did this old school by printing a design I made up to paper, cutting it out and then glueing it on the shields and painting. If your intrested in the skull it is attached at the end (Released into Public Domain). I went with a fairly standard Skeleton painting scheme:

The Boney Bits

  • Bleached Bone (Citadel) base (yes I have an antique hex pot thats still good)
  • Wash Earth Brown (Reaper)
  • Dry brush Bleached Bone
  • Dry brush 50% Bleached Bone and 50% White

The Armoury Bits

  • Leadbelcher (Citadel)
  • Nulan Oil Wash (Citadel)
  • Dry brush Leadbelcher (Citadel)
  • Dry brush Ironbreaker (Citadel)
  • Dry brush Honed Steel sword edge (Citadel)

The Shields

  • Vampire Red (Army Painter)
  • Skull Ulthuan Grey (Citadel)
  • Nulan Oil Wash (Citadel)
  • Dry brush skull with Ulthuan Grey

The bases

  • Basic black

After all that quick spray with citadel matt clear to protect them and done. I’m pretty happy with how they have come out. They are far from perfect but they dont look out of place next to regular Heroquest Scythe Skeletons when placed side by side.

“If you are losing your leisure, look out! — It may be you are losing your soul.”
 Virginia Woolf

ZIP STL Files:- Heroquest+Skeleton

ZIP SVG Skull:- Skeleton_Skull_Shield

Miniature Painting – Battletech 3rd Edition Mechs

I finished painting four battlemechs from the old 3rd edition intro box. The four I painted are the Phoenix Hawk PXH-1, Griffin GRF-1N, Thunderbolt TDR-5S and Warhammer WHM-6R. A good friend let me take them from his stockpile of mechs to practice painting on with the understanding if I totally turned them into messy plastic blobs no problem. I think they turned out okay and should be okay for use on the tabletop.

These miniatures are not what you would call premium quality with sunken bits, holes and missing detail. The plastic itself doesn’t sand or file very well and only a really sharp blade seems capable of cleaning up the flash. The plastic itself is also very slippery with super glue struggling to adhere unless its roughed up. On each mech I did my best to clean them up as well as bending the arms around a little, I also added some magnet sheet to the bottoms to add some weight. I picked a paint scheme from the Federated Suns -1st Aragon Borderers   basically because it was majority blue which is an easier colour to paint and would fit the 3025 era mechs.

Battletech 3rd Edition Federated Suns 1st Aragon Borders

First up the Griffin, I reworked the gun and replaced it it with something more substantial and hopefully PPC looking. I’m pretty happy with how the cockpit came out on this one and the mech overall although I’m a little biased as the Griffin is one of my Favorite mechs.

Battletech 3rd Edition Griffin GRF-1N


Next up is the Phoenix hawk, minimal changes a little arm bending, leg bending  and a new gun barrel. The 4 antenna were a little painful to insert in place but they turned out okay, I used a bristle from a dustpan brush. I did paint this one slightly different to the others, on the Phoneix Hawk I tried to highlight the edges using the side of the paint brush rather than dry brushing. The result is definitely cleaner and nicer looking so I’ll continue practicing that technique.

Battletech 3rd Edition Phoenix Hawk PXH-1


Next up the thunderbolt, bent the arm up and replaced the end of the gun barrel but he still appears slightly off balance. I did not paint any of the numbers or insignia on any of the mechs they are all self print decals.

Battletech 3rd Edition Thunderbolt TDR-5S


Lastly the trusty old Warhammer, He really is the most boring of the bunch although I used him as a checker pattern practice, hard to see in the pictures but the bulbus bits on the backs of his lower legs are all checkered. If I paint another one of these I’ll try and add some different coloring around the torso area.

Battletech 3rd Edition Warhammer WHM-6R


I had fun painting these and for the first time I’m pretty happy with how they turned out. I hope to paint a few more next would be a star of Clan Mechs.

In order to succeed, your desire for success should be greater than your fear of failure – Bill Cosby


Miniature Painting Warmup

So I selected a miniature to paint from my bucket of D&D miniatures. I picked on the Azer Fighter from the War of the Dragon Queen Set, here’s the promo picy, mine didn’t look anywhere near that good out of the box:

I decided to put this guy onto a washer base to add a bit of heft and to make storage in the future easier, it also meant I could try out a different idea for a dungeon tile look base. First up I glued four small pieces of plastic to the top of the washer and filled the hole with some cheap air dry clay. I then removed the fighter from his plastic base:

Next I had to get the little guy ready for painting, the only effective way I’ve found to strip the paint wizards puts on the mini’s is to use acetone. It does damage the plastic the mini’s are made of so I have a soft toothbrush I dip in the acetone and then softly rub the mini and then rinse in water. Normally the paint comes right off although sometimes I can’t get it out of all crevasses without risking damaging the mini. It’s surprising how much detail is normally covered up by this layer of goo paint. After the paint stripping I stuck a pin in the base of each foot and mounted him to an old plastic soft drink bottle top. Then it was of to be primed with a gentle dusting of white primer. Sorry I didn’t get a picy of him undercoated but here he is cleaned up and mounted:

Then I started to paint him. I tend to do metals first followed by plain colours, I’ve found I get less odd glittery bits that way. I’d also decided to paint him up as a standard dwarf rather than as an Azer Fighter. I’m fairly happy with how he turned out although the shield is pretty terrible, I struggled with trying to get any kind of shading/highlighting onto the flame patten on the shield. I also need to go to lighter shades when highlighting as he still appears fairly dark and muted. His dungeon tile base turned out fairly good although it could use some bones or something else. He’s not about to win any mini painting contests but he’s good enough for gaming with, He looks slightly better in person I find the camera is always a harsh critic when you photograph miniatures (probably just me):

I also finished off two others I was painting mid last year before I got sick. First up was my metal practice guy Hammerer from Blood war, heres the promo wizards shot:

I basically wanted to practice metal highlighting and blending, initially I really didn’t like how this guy turned out, but looking at him now I don’t think he turned out to badly. As with all my miniatures I need to work on my blending and paint smoothness. Mine always seem to come out grainy, I did like how his mud base turned out:

Last one I finished up was a ranger originally a Grey Cloak Ranger from Archfiends, here he is in his promo shot (sorry it’s pretty small):

I gave him a forest themed base and mounted him so he’s balanced on a log, This does make his cloak look bunched slightly funny but I’m not really ready for sculpting yet. I’m not convinced using herb’s and spices as leaf litter in a forest really works but I figured it was worth a try. I’m happy with how he turned out although he still suffers from graininess the other two suffer from as well:

I may post these up onto coolmini but I’m not sure I’m ready for that again. Hopefully with enough practice my painting will get better.


Project Status


WWII Project First Release

80%


B-tech Buildings Five

20%


Design Victorian era City

15%


Something Different

5%


Enter your email address to follow this blog and receive notifications of new posts by email.

Join 110 other subscribers

Content Released Under

Creative Commons License
This work is licensed under a Creative Commons Attribution-NonCommercial 3.0 Unported License.
Please Attribute to Sirrob01 with a link back to my blog