Archive for January, 2010

Dragonfly-Wargamming Model(Design:Part 1)

I finished up stage one of the design of my flying wargamming model. So I’ve decided to do a 3 part post series rather than one big post once it’s finished. So this one will cover the evolution of the sketchup design.

The idea behind the design is that it’s a single seat attack craft VTOL capable, while packing a significant punch to be a credible threat to more heavily armored  tanks and vehicles.  Two light weapon mounts  are present on the lower sides of the model, I’ll texture these as MG ‘s and possibly small lasers as an alternate. Under each wing are some small 5-6 shot rocket launches which can be filled with anti-vechile rounds.

The design went through 4 main phases:

  1. The first was very blocky, although easy to build other than launcher pods
  2. The second provided some shape to the front cockpit so as to appear more glass like,
  3. The third improved the lower weapon design so they are triangular and easier to build,
  4. The fourth and last lengthed the wings slightly and turned the round missile racks to hexagons for simplified building.

The below photo shows the four sketchup models, Top left=One, Top Right=Two, Bottom Left=Three and Bottom Right=Four

I did three test builds in paper to help refine the design and developed the clear mounting post from transparency to give the impression of flight. Below is a picture of the final design although I did move some of the fold tabs around to simplify building in the future, the builds pretty rough but I was in a little bit of a hurry :):

Next step is to move onto texturing which I’ll detail in part2

Mini Caramel Cups (Both versions)

Busy weekend for me with a friends birthday and Australia day coming up. This is a recipe I put together/modified last year, it’s a bit fiddly (the gluten free version is more so) to make but always a hit when served. Both the gluten free and regular recipe are below but the photo’s are from my latest batch of gluten free one’s. Feel free to sub my Potato and Rice flour mix for an off the shelf SF raising and plain gluten free flour. The gluten free version of the recipe below was assembled for a friend who’s also corn intolerant.

Ingredients (makes 24-26)

Base

Regular Gluten Free
85grams Butter 85grams Butter
50grams Self raising flour 60grams Rice flour
50grams Plain flour 70grams Potato flour
115grams Brown sugar 140grams Brown sugar
55grams Desiccated shredded coconut 1/2 teaspoon Bicarb Soda
1/8 teaspoon Guar gum (optional)
  1. Preheat Oven to 180C
  2. Melt Butter in large mixing bowl in microwave

  3. Add the Brown sugar to the butter and mix in then add the Coconut and mix in.
  4. Add both plain and self raising flour (or Rice and Potatoe Flour with guar gum mixed through) and mix in well (ensure no lumps). The mix will be dryish but should stick together.
  5. Loosely spoon the above mix into the 24 depressions in a Mini Muffin Tin (grease tin if not non-stick or silicon) each depression should be filled neatly to the top.
  6. Grab something with a flat end which is round and approximately 25 mm across (potatoe peeler end or wooden spoon) and push this into the middle of each of the mini muffin pan depressions, rock the object as you push down to help compact the sides. The mix should compact on the bottom and push into the sides firmly but the top edge will be ragged and untidy. Using your fingers level of the mixture with the top of the mini muffin pan (this is fiddly and time consuming) to make a neat edge. If you can see the bottom of the tin through the bottom of any cup add a little mix to the bottom and compact softly. Aim for a cup thats 1.5 to 2mm thick.
  7. Place the Cups into the Oven for approximately 5mins and watch them. They will expand and slowly fill the muffin depression. When you see this grab them out of the oven and push the sides and base back down using the wrong end of a butter knife or your wooden tool, so they are back into shape. Place back into the oven and watch again repeat the above if they deform, they will take approximatly 15-20mins to cook. Keep this up until the shells turn a golden brown (The gluten free ones don’t brown very much) then remove from oven and using your knife end or wooden tool push shells back into shape for the last time. Leave to cool for at least 20mins.
  8. Carefully turn the muffin pan upside down and bang (Wooden spoon) or pop/lift (if using a silicon tray) the shells out of the muffin pan and leave upside down on another tray to cool fully. As they cool the cups will harden. If your making the gluten free one’s do not bang or jar the shells they are a very fragile it’s best to make them in silicon bakeware and simply lift them out when they are cool or fill them with caramel and then lift them out.

In the below picture you can see the mixture has been compacted in and is ready to go in the oven, the object in the top left of the picture is what I use to compact the mixture into the muffin pan, a short piece of 25mm dowl.

Fresh out of the oven and finishing off their cooling

Filling (Same for both)

Regular/Gluten Free
30grams Butter
40gramsGolden syrup

(ensure it doesn’t use any nasty gluten thickeners if it does sub in 30grams brown sugar)

1 tablespoon Brown sugar
2 teaspoons Vanilla Essence
395g Sweetened Condensed Milk ( 1 Tin

I make my caramel in the microwave in a large rice cooker but you could use a microwave safe bowl with high sides. A word of warning caramel gets very hot (hotter than boiling water 150-200C) and can easily cause 2nd degree burns if you drop any on yourself while cooking it or spooning it into the cups. I have a nice 20 cent sized burn scar on my left hand where I got careless one day and some dripped on me. Don’t let anyone (or pet) lick the bowl until it’s well cooled.

  1. Place Butter into your microwave safe bowl

  2. Melt the butter in the container then add Golden Syrup/Vanilla Essence and Brown Sugar, Stir in well and then microwave on high for 30secs and re-stir, the Syrup should have gone more fluid. (My microwave is small and low powered 800 watt max so adjust times or power settings as needed)

  3. Add the can of sweetened condensed milk and mix in well.
  4. Warning with the following steps you must watch when microwaving and if you see the mix boiling over stop microwave immediately and stir the mixture. You’ll see it coming up the sides of the bowl.

  5. Microwave mix on high for 1 min remove and stir. Microwave mix on high for 1 min remove and stir. Microwave mix on high for 1 min remove and stir. Microwave mix on high for 1 min remove and stir.
  6. Microwave mix on high for 30secs remove and stir. Microwave mix on high for 30secs remove and stir. Microwave mix on high for 30secs remove and stir.
  7. After the above it should be nearly thick enough if not microwave for another min and stir repeat until it thickens. The caramel when at the right stage will be just a little runnier than whipped cream. When you stir the mix it will take 15-20 secs to settle back to a level surface. You can’t over thicken the caramel but if it’s to runny the caramel will make a mess when people eat them.
  8. Once your happy with the consistency of the caramel grab your tray with your 22-26 cups on it and flip the cups up the correct way.
  9. Using a large teaspoon/small desert spoon, spoon the caramel into the cups each cup will take 1-2 spoonfuls. I usually fill each cup to almost full then come back and top them up with any left over caramel. The caramel will hopefully end up with a peak in the middle just above the level of the cup wall.
  10. Leave the cups with caramel in them to cool fully. 3-4 hours in the fridge works best, but if your pushed for time 1 hour int he fridge works.

Below is a picture of my Caramel after it’s thickened, you can clearly see the stirring marks in the surface.

My cups filled with caramel and ready for the fridge, prior to them being capped with chocolate and/or coconut

Topping (Same for both)

Regular/Gluten Free
75grams Milk cooking/normal chocolate
75grams Dark cooking/normal chocolate
Desiccated Coconut to Sprinkle (optional)

For the gluten free ones you’ll have to locate gluten free chocolate (not to hard). I’ve topped with cooking chocolate and regular chocolate. If you use regular chocolate melt it more carefully as it burns easier and it’ll take longer to re-set.

  1. Melt the Dark or Milk chocolate. I do this in the microwave in a small bowl with about 30grams of the chocolate each time 30-40 secs on high is all that’s needed. It’s better to under melt the chocolate, stir and then do another 5 seconds than over melt and burn the chocolate.

  2. Using a Teaspoon spread the dark/milk chocolate over the top of one of the cups so the caramel is completely covered. Then sprinkle the top with desiccated coconut (if wanted). Move to the next cup and repeat Once you have done 12 with dark/milk chocolate repeat for the other 12 with milk/dark chocolate. Or if you prefer do all the cups with one type of chocolate
  3. put them back into the fridge until the chocolate has set. Once set the caramel cups can be eaten straight away, refrigerated and saved for later or frozen for a short time and used later on.

I need to make these quick

Okay sometimes you just don’t have the time to make the cups if this is the case grab a shallow rectangular tin approximately 25cmx15cmx3cm (line with baking paper for quick removal). Push the base into the bottom of the pan extending it a little up the sides and bake, then spread the caramel on top allow to cool for bit then spread the chocolate on top, leave to cool in fridge, lift it out of the tin and cut into squares.

Enjoy 🙂

Miniature Painting Warmup

So I selected a miniature to paint from my bucket of D&D miniatures. I picked on the Azer Fighter from the War of the Dragon Queen Set, here’s the promo picy, mine didn’t look anywhere near that good out of the box:

I decided to put this guy onto a washer base to add a bit of heft and to make storage in the future easier, it also meant I could try out a different idea for a dungeon tile look base. First up I glued four small pieces of plastic to the top of the washer and filled the hole with some cheap air dry clay. I then removed the fighter from his plastic base:

Next I had to get the little guy ready for painting, the only effective way I’ve found to strip the paint wizards puts on the mini’s is to use acetone. It does damage the plastic the mini’s are made of so I have a soft toothbrush I dip in the acetone and then softly rub the mini and then rinse in water. Normally the paint comes right off although sometimes I can’t get it out of all crevasses without risking damaging the mini. It’s surprising how much detail is normally covered up by this layer of goo paint. After the paint stripping I stuck a pin in the base of each foot and mounted him to an old plastic soft drink bottle top. Then it was of to be primed with a gentle dusting of white primer. Sorry I didn’t get a picy of him undercoated but here he is cleaned up and mounted:

Then I started to paint him. I tend to do metals first followed by plain colours, I’ve found I get less odd glittery bits that way. I’d also decided to paint him up as a standard dwarf rather than as an Azer Fighter. I’m fairly happy with how he turned out although the shield is pretty terrible, I struggled with trying to get any kind of shading/highlighting onto the flame patten on the shield. I also need to go to lighter shades when highlighting as he still appears fairly dark and muted. His dungeon tile base turned out fairly good although it could use some bones or something else. He’s not about to win any mini painting contests but he’s good enough for gaming with, He looks slightly better in person I find the camera is always a harsh critic when you photograph miniatures (probably just me):

I also finished off two others I was painting mid last year before I got sick. First up was my metal practice guy Hammerer from Blood war, heres the promo wizards shot:

I basically wanted to practice metal highlighting and blending, initially I really didn’t like how this guy turned out, but looking at him now I don’t think he turned out to badly. As with all my miniatures I need to work on my blending and paint smoothness. Mine always seem to come out grainy, I did like how his mud base turned out:

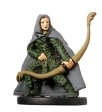
Last one I finished up was a ranger originally a Grey Cloak Ranger from Archfiends, here he is in his promo shot (sorry it’s pretty small):

I gave him a forest themed base and mounted him so he’s balanced on a log, This does make his cloak look bunched slightly funny but I’m not really ready for sculpting yet. I’m not convinced using herb’s and spices as leaf litter in a forest really works but I figured it was worth a try. I’m happy with how he turned out although he still suffers from graininess the other two suffer from as well:

I may post these up onto coolmini but I’m not sure I’m ready for that again. Hopefully with enough practice my painting will get better.

WordPress Project Bars

So I was hunting around for some project bars to provide a rough graphical representation of the completion stage of my top 4 current projects (progress meters). Unfortunately I couldn’t find a widget that was available on wordpress (did I miss it?).

I spent a fair chunk of time exercising my google-fu and stumbled upon this site:

CSS Global Progress Bar

Thinking all my problems were solved I attempted to upload the solution to a sidebar text widget…no good, seemed the text widget would only accept inline css. I spent an hour or so rewriting the above solution so that it was fully contained inline. I thought for sure it’d work this time but it would appear wordpress filters all styles from dl, dt and dd tags…Frustrating as other tags are allowed styles but apparently not those 3 or the em tag (query sent to technical support). I really wanted a solution now so I spent another hour playing around with the code replacing the above tags but trying not to destroy the look of the bars and got some working css code:

I did a few versions of the final code as I wasn’t sure what I’d use,  I then ended up needing a customized one anyway as my sidebar is a bit of a funny size;  examples below:

Stock Bar

65%

Stock Bar
<p style=”margin:0;padding:0;”>Blue Bar
<div style=”margin:0;padding:0;width:216px;height:41px;background:url(bg_bar_25.gif) no-repeat 0 0;position:relative;”>
<span style=”position:absolute;display:block;width:200px;height:25px;background:url(bar_red_25.gif) no-repeat 0 0;top:8px;left:8px;overflow:hidden;text-indent:-8000px;”>
<div style=”position:absolute;display:block;width:200px;height:25px;background:url(bg_cover_25.gif) repeat-x;top:0;left:130px”>65%</div>
</span></div></p>

Narrow Bar

50%

Narrow Bar
<p style=”margin:0;padding:0;”>Small Blue Bar
<div style=”margin:0;padding:0;width:216px;height:23px;background:url(http://somewhere/bg_bar_15_196.gif) no-repeat 0 0;position:relative;”>
<span style=”position:absolute;display:block;width:200px;height:15px;background:url(http://somewhere/bar_blue_15.gif) no-repeat 0 0;top:4px;left:8px;overflow:hidden;text-indent:-8000px;”>
<div style=”position:absolute;display:block;width:200px;height:15px;background:url(http://somewhere/bg_cover_15.gif) repeat-x;top:0;left:130px”>65%</div>
</span></div></p>

Short Stock Bar

65%

Short Stock Bar
<p style=”margin:0;padding:0;”>Blue Bar
<div style=”margin:0;padding:0;width:108px;height:41px;background:url(bg_sbar_25.gif) no-repeat 0 0;position:relative;”>
<span style=”position:absolute;display:block;width:100px;height:25px;background:url(bar_blue_25.gif) no-repeat 0 0;top:8px;left:4px;overflow:hidden;text-indent:-8000px;”>
<div style=”position:absolute;display:block;width:100px;height:25px;background:url(bg_cover_25.gif) repeat-x;top:0;left:65px”>65%</div>
</span></div>
</p>

Short Small Bar

35%

Short Small Bar
<p style=”margin:0;padding:0;”>Blue Bar
<div style=”margin:0;padding:0;width:108px;height:23px;background:url(bg_sbar_15.gif) no-repeat 0 0;position:relative;”>
<span style=”position:absolute;display:block;width:100px;height:15px;background:url(bar_blue_15.gif) no-repeat 0 0;top:4px;left:4px;overflow:hidden;text-indent:-8000px;”>
<div style=”position:absolute;display:block;width:100px;height:15px;background:url(bg_cover_15.gif) repeat-x;top:0;left:65px”>65%</div>
</span></div></p>


You can grab an example zip from here. I suspect I’ve butchered good css and html practice but it works so that’s all I really wanted but feel free to take what i’ve done and correct the code. As you can see it’s working on the side bar of my blog so I’m counting this one as a win :).

Initial Mapping Finished for D&D Group

Well I’m finding the new projects page very useful, it lets me see what I could be working on and provides motivation to get a project finished so I can cross an item off. Seems the old Psychology of crossing items of lists still works on me. If it helps me finish more things I’m more than happy to use what helps.

These are the initial maps for the world my D&D group will frequent, half the fun for me as a DM is building a world and being able to throw whatever I need into a setting without me feeling like I’m breaking one of the predefined settings.

The World is called Etana and the main continent/island the group/s will start on is Mytivia. For the moment we are running 2 seperate sets of characters a primary set with full storyline and RP elements and a secondary set who are pretty much used for trawling around dungeons and receive double the experience award you normally receive as per 4ed. The Primary set will affect the geopolitical landscape were as the secondary set will be used for off the cuff adventures were I literally just sit with a laptop a pen and a piece of grid paper and make up some dodgy monster bash on the fly :).

A little info on the maps, the world map has been done in Winkel Tripel Projection, well as close as I could get doing it by eye in Gimp. Very few details are on the world map at this stage as I want to be able to use player input to add features details and names, it’s their world as well. The smaller continental map of Mytivia itself shows the major cities and main roads.

The Continental map was made using a combination of inkscape and gimp. I had to move the map to gimp as inkscape began to have serious performance issues with the 200-300 mb file. When the map is open in Gimp it is 50cmx30cm @ 300dpi with a rather large number of layers and can take along time to refresh, but I gave the map a lot of space so that I can zoom in and add more details later on. I suspect I may just end up copying segments of the map out however and making more zoomed in local maps in a new Gimp file to help with performance.

All of the icons etc I drew up in inkscape with the exception of the Compass rose which I downloaded from wikimedia commons. Again names of some places etc have been left off so that my players can suggest names and help build the world up and they feel more attached involved with the game world.

I’m fairly happy with the resulting maps, although there no were near as good as what some of the people churn out across at the Cartographers guild. If you want to learn anything about mapping check out their forums.

I’ll post up more detailed/geopolitical information about the world later on as time permits, I have far chunk of info written down and some still in the old brainbox. In the long term I’ll put all the info into a wiki so I can sort the information in a more logical fashion rather than just a pile of loose Blog posts and make it easier on me to reference when DM’ing.

Click the images to load the large version

Etena

Mytivia

I think I might do some miniature painting next 🙂

Vanilla and Fruit Cheesecake

Wanted to work out a chilled Cheesecake recipe. Played around with the ingredient quantities so as to make 12 smaller muffin sized/single serve cheesecake portions rather than a  large single serve cheesecake.  Swapped in different biscuits for the base and adjusted the butter quantity to match. Added my favorite ingredient to the mix; vanilla,  everything tastes better with vanilla. Very happy with the outcome and it tastes nice as well. The below pictures are from my 2nd run through, I used raspberries on the first go through and strawberries with this one. I’m also working on a gluten friendly version.

Ingredients (makes 12-16 muffin sized cheesecakes)
Base
2 pkts Scotch Finger biscuits (500grams)
200 grams of butter melted

Cheesecake filling
250 grams Cream Cheese (Room Temp)
50 grams Caster Sugar
150 ml Cream
1 Teaspoon Vanilla Essence
30 ml boiling water
1.5 teaspoon Gelatin
80g fruit of your choice

Topping
80g Fruit (same as above)
30g Caster Sugar
1 Teaspoon Gelatin

Directions

1. Crush the biscuits up in a Food processor or by hand

2. Melt the butter and mix into the Crushed biscuit mix

3. Place a 1-2 tablespoons of the above mix into each muffin segment of the muffin pan (I used a silicon pan for easy removal). And squash the mix into the base of the pan and up around the sides, cover with plastic wrap and place in the fridge to set.

Chessecake casings in pan

4.  Put the Cream Cheese in a mixing bowl and using a mixer or a wooden spoon mix the cheese and sugar together well

5. In a small bowl mix the boiling water and Gelatin and allow to sit

6. Add the cream and vanilla essence to the  Cream Cheese and Sugar, mix well

7. Add the gelatin and water to the above Cheese/Cream/Sugar and mix in

8. Gently fold in the fruit of your choice into the above mix , make sure fruit chunks are no bigger than 2cm square (about blueberry size)

9. Spoon the mix into the base cups and place in the fridge to set:

10. Place some pieces of fruit to the  side to decorate

11. Blend remaining Fruit, Sugar and Gelatin until smooth

12. Place blended mix in microwave safe bowl and cook on high (mines a low powered microwave; 800watt) for 2mins and stir, 2mins and stir, 2mins and stir, 2mins and stir. Mix should be fairly thick, leave to cool.

13. While the above is cooling cut the fruit up if needed

14. Either decorate the top of the cheesecakes with the fruit and then spoon on the topping mix or spoon on the topping mix and put the fruit on last whichever you prefer. Place into fridge to finish setting (1-2 hours). Serve and enjoy. Don’t freeze the cheesecake, eat within about 3 days and keep in the fridge.

Hopefully I didn’t forget any steps 🙂

Bookcase One

We needed another new bookcase in the house (quickly) as we had gained another pile of books. If Kindles ever catch on I may have an over supply of bookcases. I decided to try out some new ideas on this bookcase as well as designing around the fact my router had burnt out.

After viewing a few ideas and bookcase around the net, decided on a double thickness side design. Basically you double the thickness of the side uprights but cut the inner piece into 5 segments and space and glue them the width of the shelf apart. The uprights appear routed but are double the thickness, the edges are then trimmed with a thin piece of timber to cover the lamination.  I added a lip to the front of the shelves and back brace at the back of each shelf to help absorb some wobble/shelf bend and stop books falling of the back.

The bookcase stands about 85 cm high and is around 140 cm long. I trialed using only screws to hold the bookcase together so it can be pulled into it’s component pieces for easy transport. This seems to have worked okay but in future I’ll use tusk joints rather than screws more work but much more stable and no chance of screws ripping out. I have a 2nd Bookcase to build for some friends and this will utilize tusk joints.

Overall I’m pretty happy with how it turned out, I should have spent more time sanding and used tusk joints but the side upright doubling worked very well and the bookcase looks and is very solid if the screws ever present a problem I’ll drill the holes out and glue and dowel the whole thing together. Time to move on to the next project.

Few pictures

First up One of the bookcase assembled but un-finished

Second One of the bookcase stained and varnished un-assembled

Third one of the bookcase assembled and Ready for books

Few additional details
Timber: Pine
Stain: Walnut Brown
Finish: Estapol Gloss (Not Water based)
Cost: $80-$90 AUD
Time : 1 weekend and a few evenings


Project Status


WWII Project First Release

80%


B-tech Buildings Five

20%


Design Victorian era City

15%


Something Different

5%


Enter your email address to follow this blog and receive notifications of new posts by email.

Join 110 other subscribers

Content Released Under

Creative Commons License
This work is licensed under a Creative Commons Attribution-NonCommercial 3.0 Unported License.
Please Attribute to Sirrob01 with a link back to my blog