Archive for the 'Builds' Category

Flipit Black X – Commanders

Flipit Black X Commander Hanz Gewehr Mini
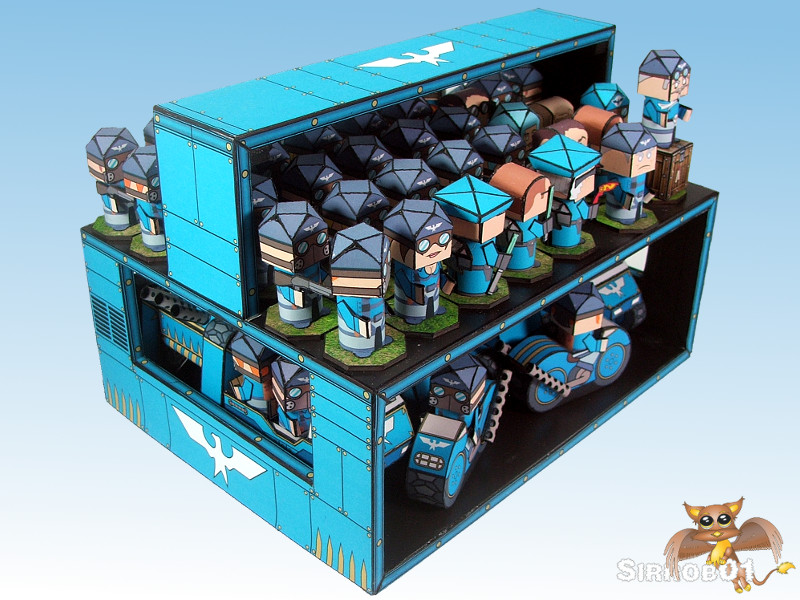
I’ve been slowly working my way through building the Black X faction for Flipit. I’ve got a tub full of half finished Black X troops still to go but the commanders and almost all the vehicles are finished (One Tank to go).

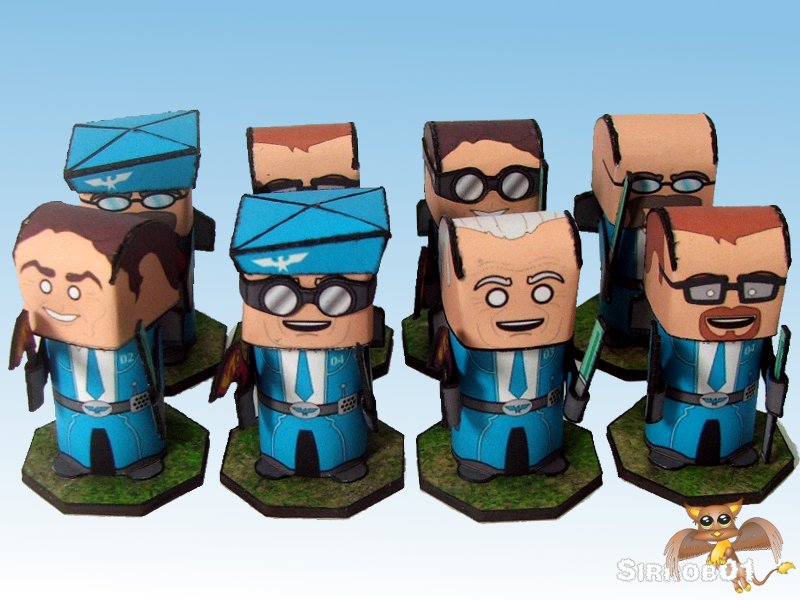
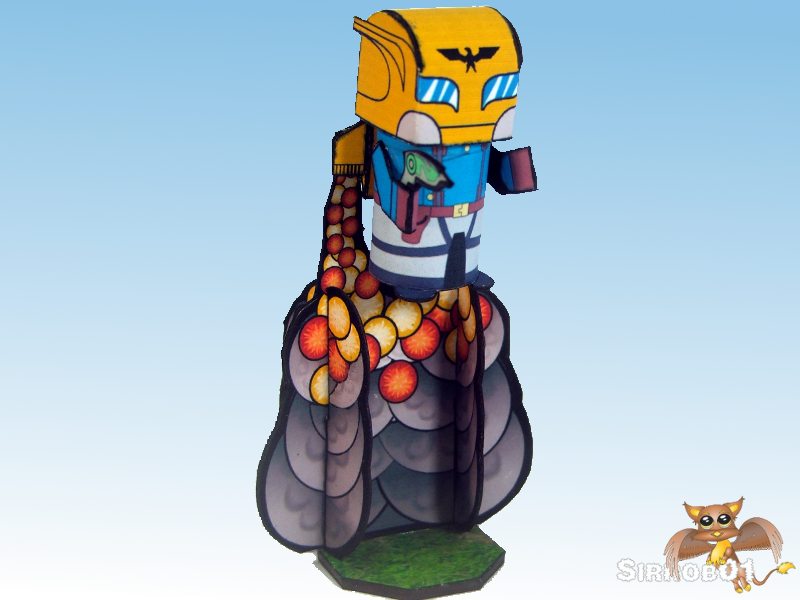
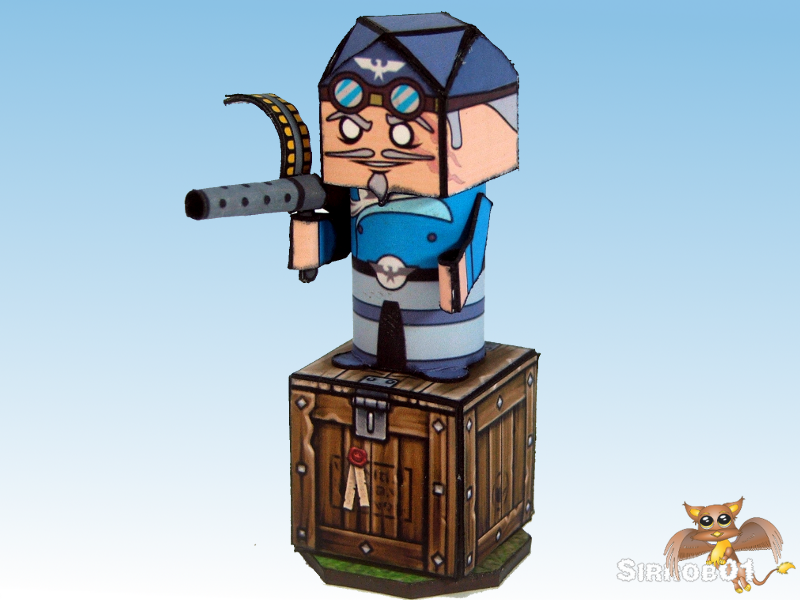
The Black x faction for Flipit has four commanders as someone pulled together an extra commander who suspiciously resembles Colonel Klink. The three commanders done by Newobmij have special abilities I was unable to locate any special rules for Hauptman (Col Klink πŸ™‚ ). I’ll either have to make up some of my own or simply sub the abilities for one of the others in.

Flipit Black X Commanders
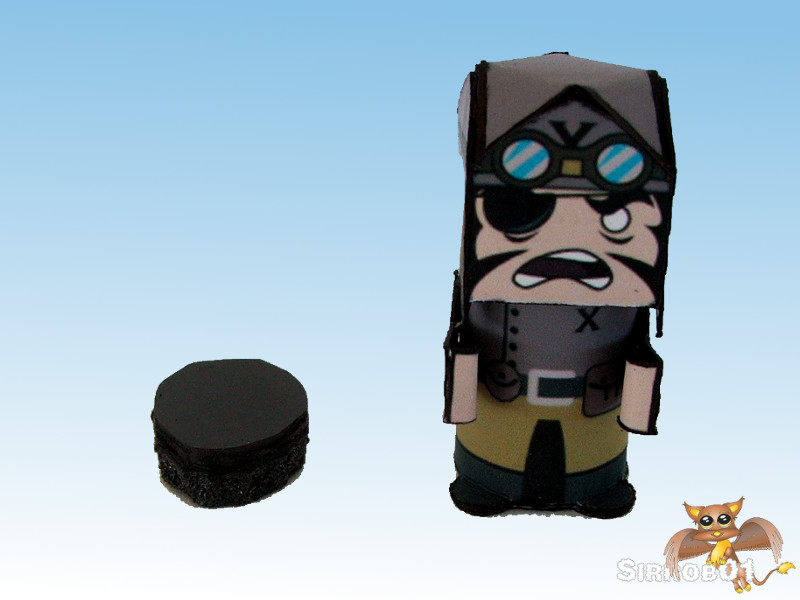
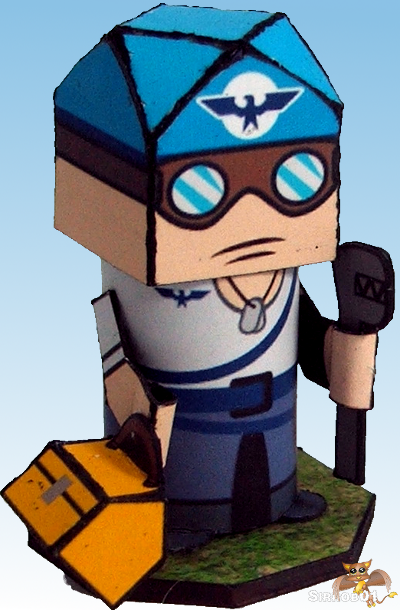
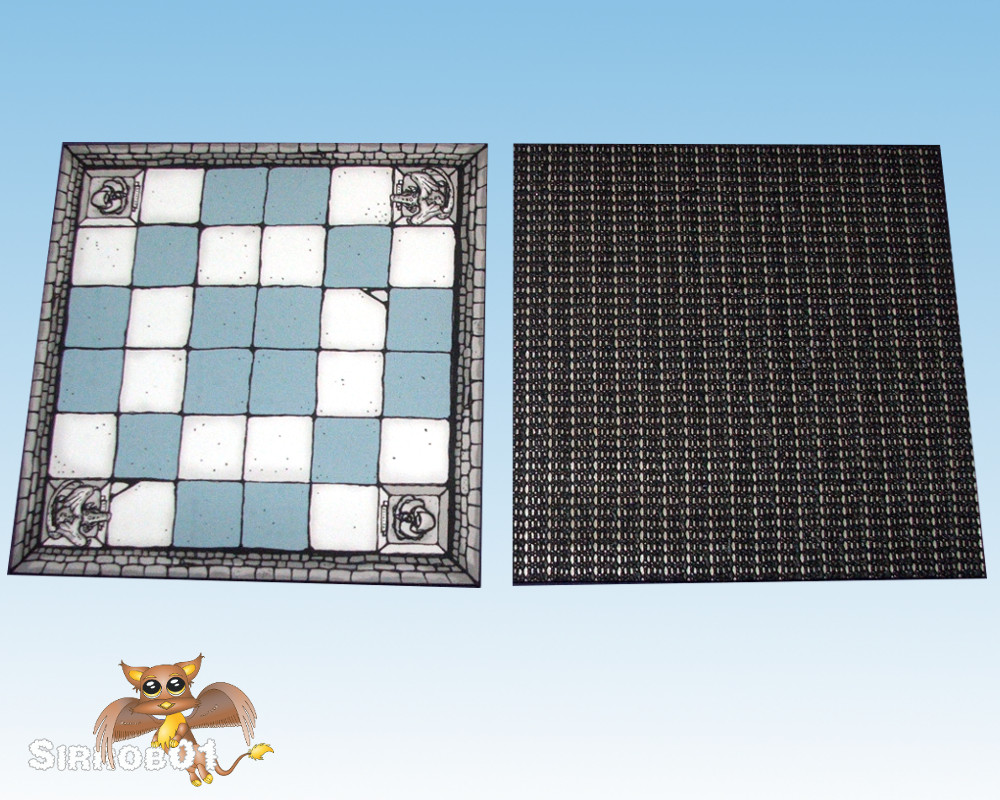
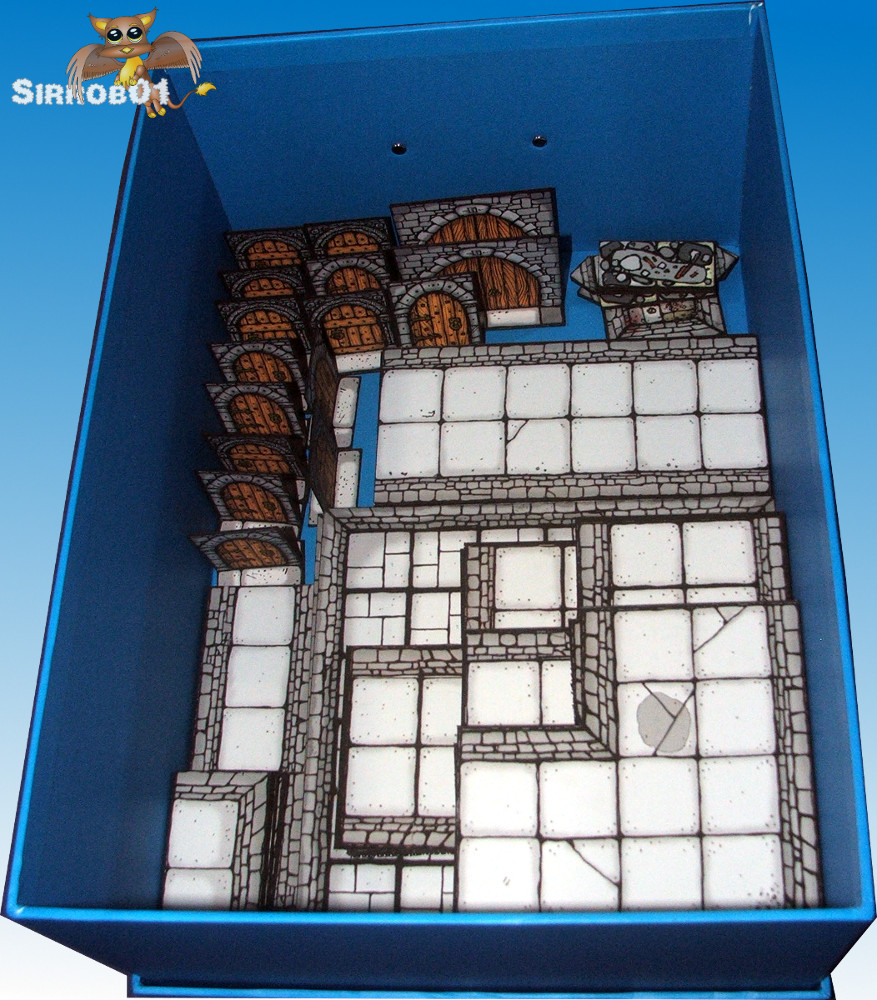
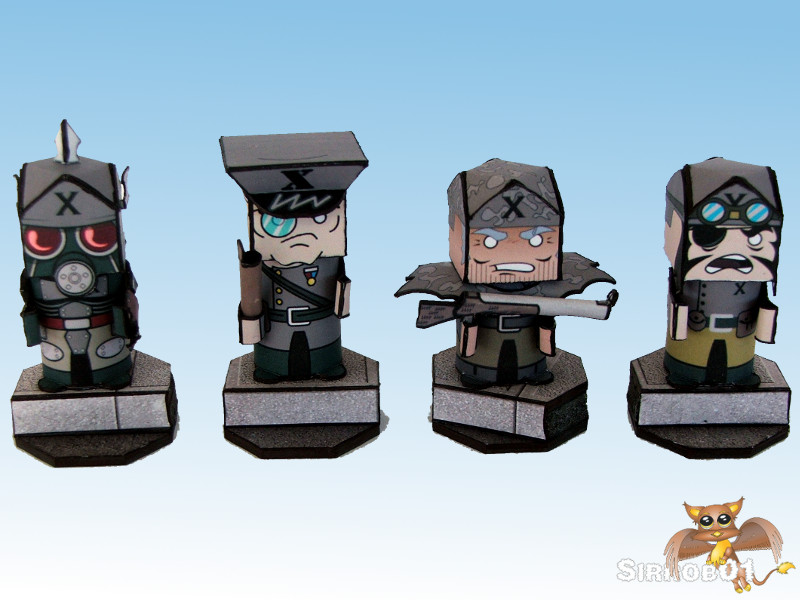
I wanted to give my Black X faction for flipit a city base theme, It probably seems odd to some people to have a basing theme for paper miniatures. However paper, plastic or metal good basing can really help finish off the miniatures and tie the army together. For the four commanders I made up some slightly raised bases so it looks like they are standing on the pavement in front of a road. I’m not sure it quiet works. It does give them a slight lift that should make them stand out from the regular troops so for the moment I’m happy with the effect. As I wasn’t sure this would work I magnetized the base of the miniatures and the top of the pavement surface so the miniatures can be removed from their bases easily (Erwin Muttonschnitzel needed this anyway).

Flipit Black X Commanders Magnetic Bases
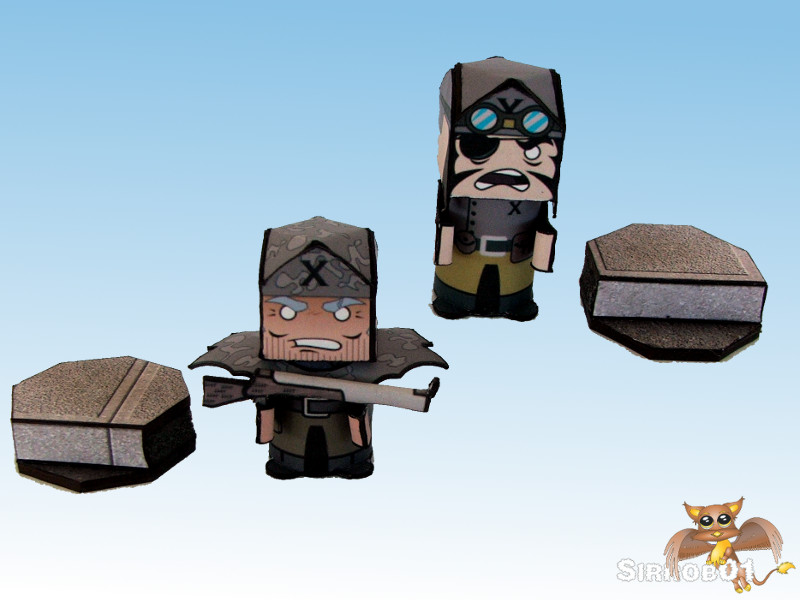
Fat Dragon Games Capital City used for bases

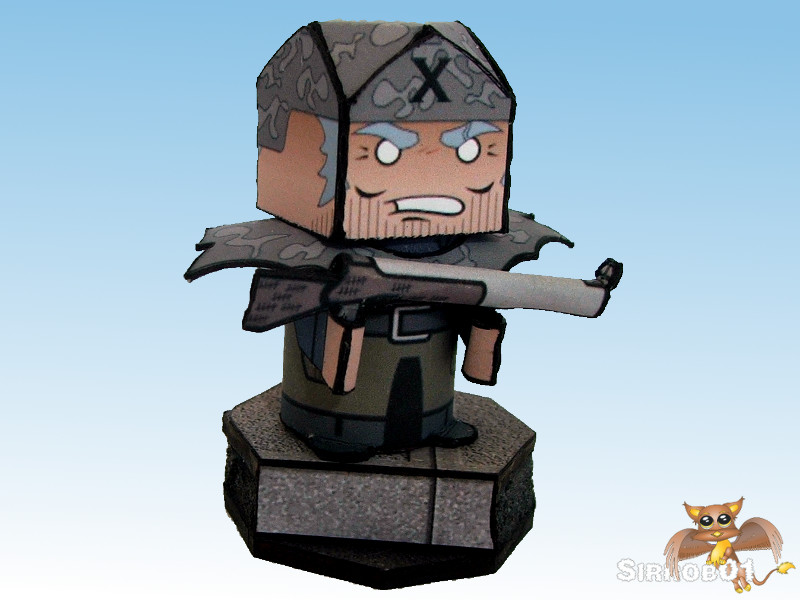
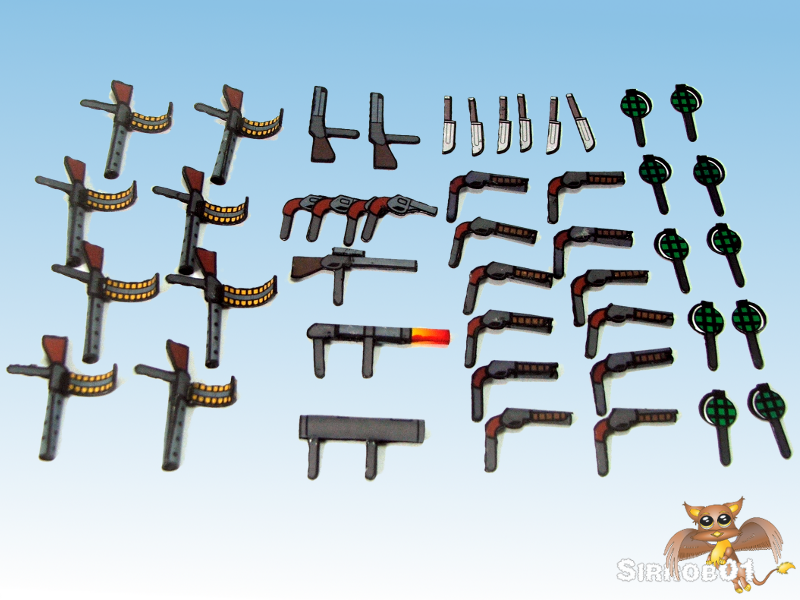
Nothing much to mention in the assembly of Four Black X commanders for Flipit. Hanz Gewehr, Gunter Donnerfaust, Muttonschnitzel andΒ Hauptmann all go together fairly easily. Donnerfausts claw and Hauptmanns crop were a little fiddly but this will have been because I’m building at 75% of full size.

Flipit Black X Commander Hauptmann

Flipit Black X Commander Hanz Gewehr

Flipit Black X Commander Gunter Donnerfaust

Flipit Black X Commander Erwin Muttonschnitzel

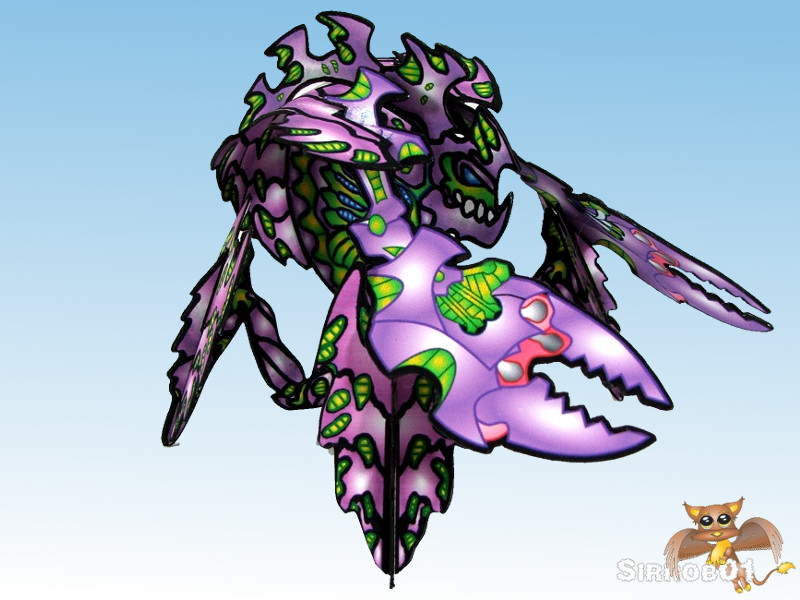
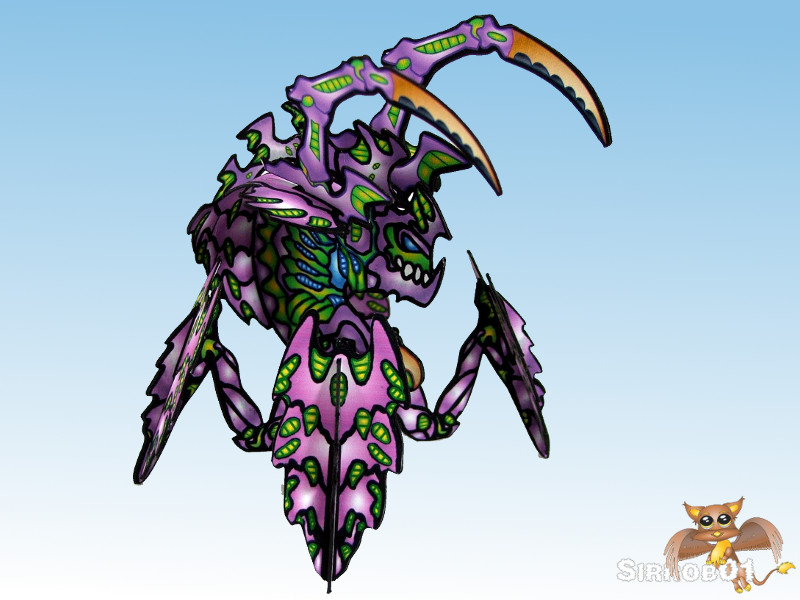
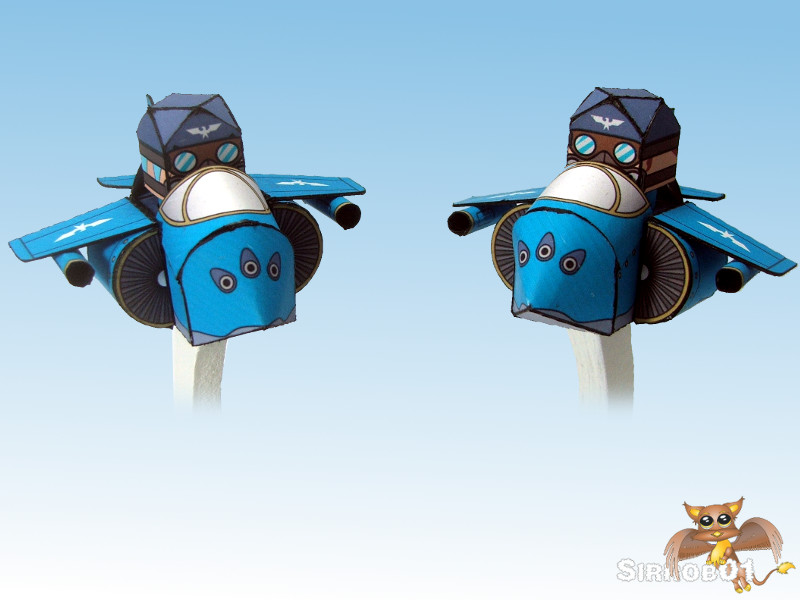
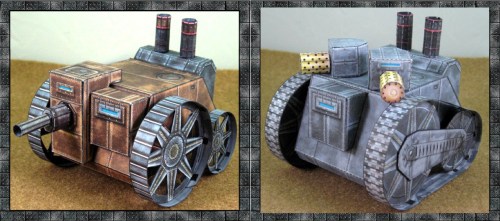
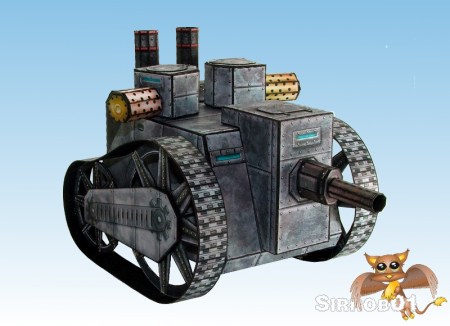
Captian Erwin Muttonschnitzel is a little different his special ability lets him drive (command an Uberpanzer). When I dropped him into the top of the Uberpanzers turret his arms naturally caught and he was suspended at a terrible angle. I created a little magnetic stool for him to stand on when driving the tank this means he pokes out a little more than normal but lets him stand straight. This issue was probably caused as I built the Uberpanzer as with the Blue Falcons Tank at 100% not 75%.

Flipit Black X Commander Erwin Muttonschnitzel Tank Riser

Flipit Black X Commander Erwin Muttonschnitzel Uberpanzer (Tank)

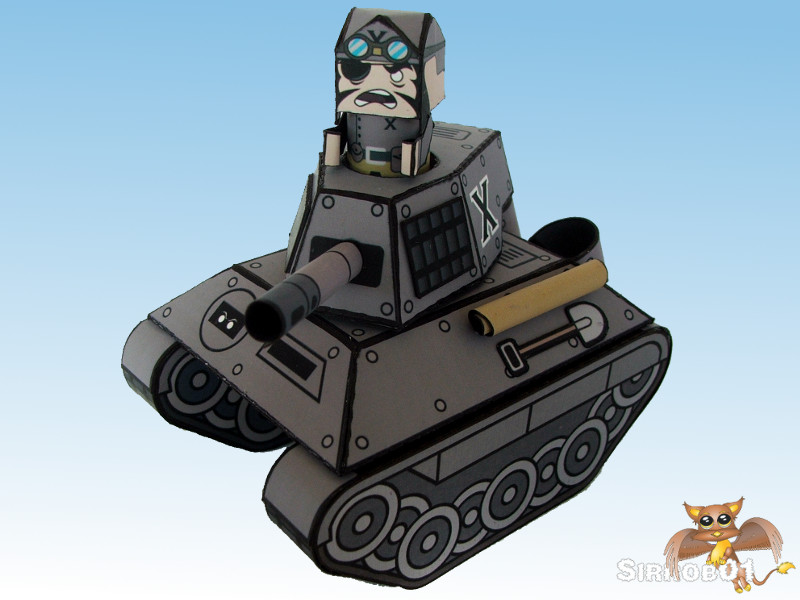
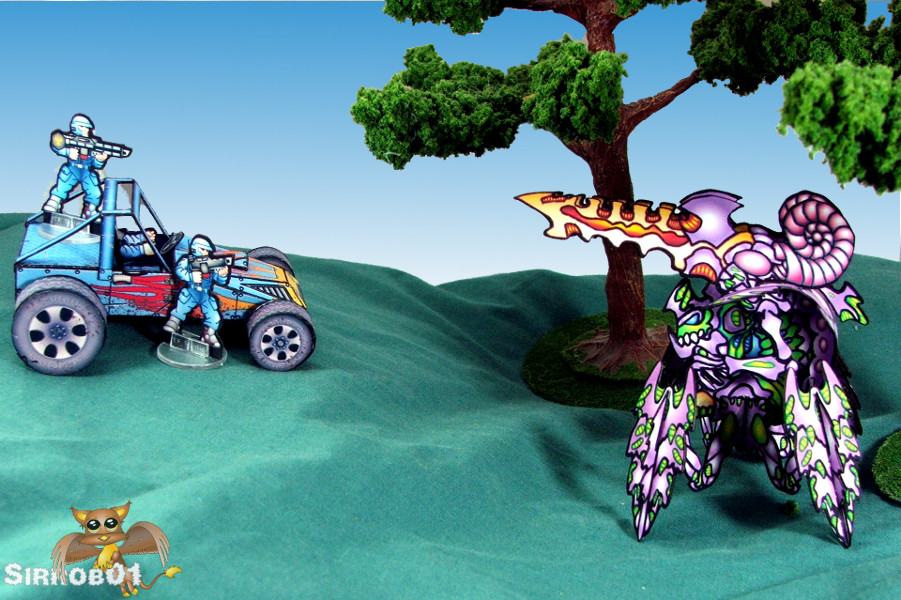
The commanders for the Black X army are now ready to lead there troops into battle. Muttonschnitzel is peppering me with tiny tank fire demanding I hurry up and finish the troops so they can face off against their adversaries the Blue Falcons….I better get back to building those troops before he ups the fire rate πŸ™‚ .

Thousands of candles can be lit from a single candle, and the life of the candle will not be shortened. Happiness never decreases by being shared. –Β Buddha

Papercraft Build – Onemonk Hybrid Cannoneer

Onemonk Chimera Hybrid Cannoneer SmallTheΒ onemonk site has not had a new release in a while but two days ago the Chimera Hybrid Cannoneer was released.Β  For those who missed itΒ  Squirmydad took over custodianship of the onemonk website and all the content 4-5 months ago. Squirmydad has spent the past few months re-releasing all the old sets.Β  NowΒ  the back catalog is back up he has released the first new set the Chimera Hybrid Cannoneer. Many of us have been waiting a longtime for this model ever since Onemonk showed some concept art 2-3 years ago… hmm maybe longer. I needed a break from building Flipit Black X troopers (25 waiting for arms) so I decided to build a Cannoneer.

Onemonk Chimera Hybrid Cannoneer all

The Cannoneer is a large model, think of it as either a light vehicle or small mech rather than as a single human sized model. The Cannoneer comes with four different weapons an Acid Lobber (right end), Spike Cannon (Left end) and two different types of claws (middle). These all mount to the top edge of the carapace, although I think I’ll be using the claws more for mods or possibly mount them down lower.

Onemonk Chimera Hybrid Cannoneer Spike Cannon

Onemonk Chimera Hybrid Cannoneer Acid Lobber

You can mount the weapons permanently or the Spike Cannon and Acid Lobber fit tightly enough that you can leave them as swappable weapon options (what I’ll be doing). I will be spraying mine with clear matte varnish so that the printed surface doesn’t take to much wear when sliding them on and off.

Onemonk Chimera Hybrid Cannoneer Claws Two

Onemonk Chimera Hybrid Cannoneer Claws One

Once I finished wrestling with my printer (its getting a little old πŸ™‚ )the assembling of the model wasn’t difficult but it did take some time, this is fine if you remember the model equates to a light mecha or vehicle rather than a singleΒ  humanoid trooper. The Chimera Cannoneer will certainly help round out the Chimera Brood as they have been sorely lacking some heavier units/fire support. Unfortunately all the other Chimera models I had built were destroyed when the roof leaked in our back sun room so I’ll have to rebuild all the others from scratch again. This will be after the Black X army and the Orcs I’m working on, so many fun things so little time.

Onemonk Chimera Hybrid Cannoneer Ambush

If your looking for a Xenomorph styled Army but don’t want figure flats or are willing to spend a little more time building up the 2.5d Chimera Brood, drop across to RPGnow and pick up the whole set and then grab the Chimera Hybrid Cannoneer. I’m pretty sure you wont be disappointed and the sets even though a little oldΒ  (except the Chimera Hybrid Cannoneer) are still great value for money.

The mind is everything. What you think you become.Β  – Buddha

Flipit Blue Falcons – Vehicles

Blue Falcons JetHere are the Blue Falcon Vehicles from Flipit, I’ve built all the vehicle types except the Agile II. I will only build that model if I can find a copy of the Red Hammer mech. I’veΒ  included some notes and handy pointers from when I assembled each vehicle, hopefully these will be helpful for anyone else who may wishΒ  to build their own Blue Falcon army.

First up for the Blue Falcons Motor pool we have the bikes. These are a pretty simple build cut out and score the lines, then fold up one side and glue the front back strip in place, then glue the other side up. I then glued some small rocks into the inside of the bike to help weight the base down. I did push my riders down a little far when I glued them in.

Flipit Blue Falcons Bike Vehicle

Next up is the AA Microtank (Night Owl), I found this model the hardest of all the Blue Falcon vehicles to assemble. Scaling it down to 75% meant the little gun barrels were extremely difficult to roll. So on one of my Microtanks I cheated by replacing the paper gun barrels with toothpicksΒ  cut to the correct length and coloured yellow. The tracks were also a little fiddly but the best way I found to assemble them was to glue the track base to both sides and then wrap the ends around and glue in place. There are not many references around about how to build the Microtank so I pulled together a quick reference page which will hopefully be a helpful to others who might wish to build one.

Flipit Blue Falcons Night Owl Microtank Vehicle

Flipit Blue Falcons AA Microtank Reference

Β All Troops need some form of APC and the Blue Falcons come equipped with a rugged 4×4 called the Osprey. The model came together pretty easily, I did modify the windshield and inserted a small clear panel. I glued 4 troops into the vehicle permanently for two reasons; firstly as I based all my soldiers they wont fit in the vehicle with bases and secondly I didn’t want to be fiddling around pulling out and putting troops into the transport mid game much easier to just deploy a unit and mark the vehicle empty.Β  There are a number of completed pictures of the transport around the place but as with above Microtank I pulled together a quick 1 page assembly reference.

Flipit Blue Falcons Osprey Transport Vehicle

Flipit Blue Falcons Transport Reference

To protect the skies the Blue Falcons can deploy a Fighter Jet (Peregrine).Β  This is my favorite model for the blue falcon army (followed by the Micro tank), there’s something about it which just makes it cool and fun lookingΒ  (I deny all knowledge of sitting around swooshing jets through the air making engine noises). They were however a little fiddly to pull together at 75%. Make sure you have a pen or something thin handy to push/pull/press tabs into place while they glue. Newobmij put together some assembly instructions for the jets. I did build my own custom flight stands which are magnetized and let me store the jets much more easily, I did however make them a little tall and may need to shorten them a little in future.

Flipit Blue Falcons Peregrine Fighter Jet Vehicle One

Flipit Blue Falcons Peregrine Fighter Jet Vehicle Two

Lastly we have the Blue Falcon Tank. I did build a 75% version of this tank but it just seemed a little small for the main line Tank so I rebuilt the tank(s) at 100%. With everything else scaled to 75% this gives the tanks a much more impressive presence on the table, well to me. I’ll be building the other faction tanks at 100% as well. Newobmij has also done a very nice sequence of pictures showing assembly of this tank. The only other minor change I made was that instead of using the paper/card axle I replaced this with a Kebab skewer cut to correct length, it was the perfect size as an axle and much straighter and stronger than anything I could roll from card/paper.

Flipit Blue Falcons Tank Vehicle One

Flipit Blue Falcons Tank Vehicle Two

Lastly I needed some way to store my miniatures, so I grabbed two blue CD box’s from an Office supply store. For one of the CD boxesΒ  I created a lift in and out module to hold the soldiers. The 2nd box will be used to store the Agile II (assuming I build it) and all the vehicles, if I need I can fit several units of troops on the top floor of the lift in and out module and several vehicles on the bottom so if I’m traveling anywhere I can take a single box with enough troops to game with.

Flipit Blue Falcons Carrier Storage One

Flipit Blue Falcons Carrier Storage Two

Well that’s enough troops to field a fairly hefty Blue Falcon army so I’ll move on a build a similar sized black X army. Although I’m really not looking forward to making another 50+ Soldiers :).

Try not to become a man of success, but rather try to become a man of value – Albert Einstein

Flipit Blue Falcons – Troops

Flipit Blue Falcons Mechanic SmallA Flipit army wont get very far without troops and support personnel, so here are the Blue Falcon troops. There is not very much I can say about these as the pictures pretty much say it all. I did modify the base Blue Falcon troops so I had a male and female version but all the rest are pretty much stock except printed and built at around 75%. I did mount them all to 1 inch Octagon bases for extra stability (2mm mag sheet) and it seems to help finish them. Some of the edging looks a little rough but I was having issues with edge bleed. The pictures pretty much show the whole story so enjoy :). If you need help building the troops check out this you tube video.

Flipit Blue Falcons Male and Female Soldier Troop

Male and Female Soldiers

Flipit Blue Falcons Soldier Troop Milling AroundAwaiting Parade

Flipit Blue Falcons Soldier Troop In UnitsIn Units On Parade

Flipit Blue Falcons Soldier Troop Single UnitClose Up Single Unit

Flipit Blue Falcons Mortar CrewMortar Crew (Need to build two more)

Flipit Blue Falcons ScientistsScience Team Equipped with Jet Packs

Flipit Blue Falcons Mechanic Medic Veteran SpyMechanic, Medic, Grumpy Sergeant and Saboteur

Flipit Blue Falcons WeaponsArmory – Little Low On Standard Rifles – Weapons tubes were fiddly at 75%

Flipit Blue Falcons Size Scale

Flipit Blue Falcons Size Scale TwoShowing Size Scale

Next up will be all the Blue Falcon vehicles and then I’ll move on to the Black X’s so the Blue Falcons have someone to fight against. I’ll try and find someway to share the female troops somewhere so keep a weather eye open if your interested in those.

There is only one way to avoid criticism: do nothing, say nothing, and be nothing. –Aristotle

Flipit Blue Falcons – Commanders

Flipit Blue Falcons Air Marshal Roce Bleauciel SmlI really like the models for the flipit wargame made by newobimj, probably as they have a fun chibi look. As a bonus they come with there very own wargame called flipit for which newobimj has designed 4 full factions. The game has been around a fair while 4+ years and basically these have been on my to build list for about that long.

I finally settled on a scale to build the armies at I spent way to much time trying to decide on a scale with numerous test builds occuring between 100% and 65%. After comparing all the test builds I finally settled on a 75% scaling. This makes the little weapon tubes still build-able and the miniatures themselves stand about 28mm to the eye or 35mm to the top of the head/helmet. I plan on building all four factions and using them for flipit but also defianceΒ  and of course flying lead.

First up I decided to build the Blue Falcon faction, I spent sometime working out how to assemble a few of the models as well as throwing together a few Custom models. First up I’ve completed the Commanders of the blue falcons faction; Air Marshal Roce Bleauciel, Serge Cargoe and Acel DeSparrow, I modified all of them so they use the karate chop hands and mounted them permanently to octagon bases.

Flipit Blue Falcons Commanders

First up we have Serge Cargoe, semi cyborg mad scientist type who gets around in an exo-skeleton wielding a nasty zap pistol and lightning glove. The assembly of the standard figure was pretty easy simple cylinder and a round top head. The exo-skeleton was a little tougher, I re-enforced each of the legs with wire in the middle and then mounted them to the backpack, bending them a little. I couldn’t find any instructions or any pictures ofΒ  an already complete Cargoe so I made a best guess with the leg locations. Hopefully the wire will prevent any future miniature sag through the paper bending.

Flipit Blue Falcons Serge Cargoe

Next up we have Acel DeSparrow, Rocketeer and all round smiling hero. I made some minor adjustments to his helmet colour so it was more gold/brass then silver and knocked together a rocket blast so it looks like he is just lifting off the ground. I used a tank explosion available on the flipit forum to make the rocket fire and smoke.Β  Looking at it I probably made the smoke and fire a little long.

Flipit Blue Falcons Acel DeSparrow

Lastly we have the big cheese of the Blue Falcons Air Marshal Roce Bleauciel. I didn’t want to have him sitting at the same height as the other falcons so I found a nice Crate papercraft (scaled to about 80%) and placed the Air Marshal on top of the Crate. I was trying to make it look like the Air Marshal was giving a speech before the troops head into battle and so he’s not looking the same as all the other regular troops when placed on the table.

Flipit Blue Falcons Air Marshal Roce Bleauciel

I found these a lot of fun to build and I’ve got more builds in the Blue Falcon faction coming shortly. If I could I’d share my 75% version of these files but unfortunately I can’t post in the flipit forum so for now you’ll have to scale them yourself. Later on if I get an okay to share or can post them in the flipit forum I’ll share them as I’ve done cut files as well. If I was building these guys again I would definitely edge in matching colour rather than in black but as I’ve now started in black edging they’ll all be black edged for consistency :).

Troop Builds here

Today was good. Today was fun. Tomorrow is another one. – Dr. Seuss

Papercraft Build – Dungeon Plungin The Monsters

Dungeon Plungin Lich King Monsters ThreeAs part of getting myself back into the old paper craft miniature rhythm I had to (re)learn how to use my new cutter properly on my new PC. So for practice I decided to pull together another copy of Dungeon Plungin. I’d wanted to recreate a copy of Dungeon Plungin (DP) after my last half finished copy got soaked when the roof leaked, that was nearly 3 years ago so I’m well overdue to start a rebuild. I decided to print out and build all the monsters need for the current DP V3 and the new under development DP V4 (V3.8ish).

I’ve had some problems in the past with tall flat paper miniatures bendingΒ  under there own weight, even when using 220gsm card glued back to back. To help strengthen the taller miniatures I added a wire spine. Basically I grabbed a cheap wire garbage bag tie (mine were paper wrapped) and cut it to length . Then I glued the tie vertically from the top of the miniature to the bottom. This gives the miniature some additional rigidity, it can still be bent and flattened but hopefully wont self bend/bow when in use.

paper Miniatures Wire Spine

Wire tie in approximate location were it’s glued between front and back

IΒ  built the DP V3 quests and monsters first, some of these already had cut files. For the practice I recreated most of the cut files from scratch. First up the Knocking Wall Quest, full of Imps, Devilings, Gremlins, Gargoyles and one minor Demon (big guy with wings). I played around with the colours on the miniatures so they are not all the same colour, other than that they are all stock standard.

Dungeon Plungin Knocking Wall Monsters

Next we have the Orcish raider and Troll Lair Quest. Instead of building the basic miniatures needed for these two quests I built the full extended pack of Orc’s, Trolls and Goblins. I haven’t counted them all but I’m sure if I wanted to I could field a fairly decent Orc based Army and I’m not even certain all the miniatures are used in those two quests, still variety is the spice of life. I once againΒ  messed around with the colouring on a few of the miniatures.

Dungeon Plungin Orcish Raider Monster One

Dungeon Plungin Orcish Raider Monster Three

Dungeon Plungin Orcish Raider Monster Two

Dungeon Plungin Orcish Raider Monster Four

Dungeon Plungin Orcish Raider Monster Five

The next quest is the Witch of the West Wood, Onemonk created the miniatures for the quest back in 2008 so they have a more Onemonk feel and the whole quest and the monsters has a tongue in cheek feel with dire bunnies, squirrels and O-Wee-O guards. As with the other monsters in the other quests I did some minor recolours.

Dungeon Plungin Witch of the Wild Wood One

Dungeon Plungin Witch of the Wild Wood Two

Last official quest for V3 DP is the Tomb of the Lich King. No recolours this time although I did spend sometime adding backs to the skeletons and reapers, then discovered Erf_Beto had already done this, you can grab his back and front versions here and here. A long time ago I did mod some standing rats and you can see those in my builds below, you can grab those from the Oversoul Games forum.

Dungeon Plungin Lich King Monsters One

Β Dungeon Plungin Lich King Monsters Two

Dungeon Plungin Lich King Monsters Three

There are 5 Quests currently for DP V4 (V3.8). Some of the quests reuse the miniatures from V3, some are a mix and others are all new. For the moment you can grab all the V4 (3.8) play test stuff from the Oversoul Games forum. One of the major changes between V3 and V4 is the toughness of the monsters so the mix and levels are a little different. I did not make any mods to any of the miniatures as they are currently subject to change as the version evolves.

The first quest is the Dogface Demon quest filled with Kobolds and a single Gremlin, which I’ll grab from the ones above:

Dungeon Plungin Dogface Demons Monsters

Next Quest for DP V4 is Rock Solid, it’s your fairly normal rat, snake, spider cave quest with an earth elemental for the Boss. The rats I’ll reuse from the Lich King Quest above.

Dungeon Plungin Rock Solid Monsters

Both The Where Wolf , Castle Gryphon and Trolls Lair quest, consist of Greenskins, Wolves and a few gargoyles, no new monsters so no extra pictures for those three quests. In the base monster pack for V4 there are other monsters included either for you to create your own quests or possibly as the Oversoul crew have something planned. Below in no particular order are the additional monsters included in the base monster pack for DP V4.

Dungeon Plungin Extra Monsters V4 One

Dungeon Plungin Extra Monsters V4 Three

Dungeon Plungin Extra Monsters V4 TwoΒ  Dungeon Plungin Extra Monsters V4 Four

Dungeon Plungin Extra Monsters V4 Five

With the DP miniatures I assembled them as standard tab bases, this allows me to store the monsters in a smaller space and perfectly flat plus make use of some new bases I’ve ordered which I’ll post about once they arrive. As for my DP set I just need to finish creating some room decorations, primarily chests and maybe a few tables. Then it’s onto the hero’s and my Dungeon Plungin set will be finished and ready for the next Friday/Saturday afternoon of board gaming with friends.

Papercraft Build – Inked Adventures Dungeon Cut-Up Basic

Inked Adventures Dungeon 4 (S01)I have a real soft spot for nostalgic themed games, papercraft or artwork, this little build fills two of those. Ever since Inked Adventures released their basic Dungeon cup setup I’ve been wanting to build enough for a dungeon layout. So I put some time aside over the past few weeksΒ  and have now built enough tiles to populate a fairly decent sized dungeon, I can see I need to create a few more tiles but for the most part I’m done. As you can tell by the release date it’s taken me a fair bit of time to get around to building these, some of this relates to me trying to find a good material to mount tiles to but I’ll mention more below on that.

All Inked adventure tiles are hand drawn which I find a very nice look. There are 41 pages of dungeon goodness contained in this pack; rooms, corridors, stairs, trap tiles, 2d doors and 3d standup doors multiple versions of both. The beauty of the Dungeon Cut-Up set is even if your not into altering dungeon segments using GIMP/Photoshop, Billiam from Inked AdventuresΒ  has created this set so you can use a pair of scissors and glue to create your own custom tiles. There are 4 pages of “extra” bits which you can use to either decorate your tiles permanently by sticking them down directly to the tiles or by turning them into loose tiles you can add mid game.

Inked Adventures Dungeon 3 (S01)Layout Example – From an angle

For my set I stuck with components that are multiples of 2inches, 3inches or 6 inches. This will make it simpler to use for Dungeon plungin and Basic fantasy, although I might make a few special rooms that don’t conform to these sizes later on. For the moment I’ve created 8 – 6×6 rooms, 8- 6×2 corridors, 2 – 6×1 corridors, 4 L and T junctions, 2 X junctions, 4 dead ends, 14 small doors, 2 double doors, 2 double joiners, 4 double rockfalls and 2 large pit traps.

Inked Adventures Dungeon 1 (S01)Bits created so far laid out

The rooms I created from the parts supplied by Billiam although I did a fair chunk of altering in Gimp to make them fit a 6×6 square. Other than the room with blue squares you could replicate most of the room designs with a pair of scissors, glue andΒ  a little ingenuity or simply use the ones that come with the bundle (12 rooms included).

Inked Adventures Dungeon 2 (S01)Example Layout – Top Down

I mentioned at the top I’d been putting of creating these as I’ve never really found a suitable substrate for mounting tiles to. I’ve tested quiet a number of crazy ideas in my time from rubber carpet tiles to magnetic sheet. Not sure if it’s just the extreme weather down under but I’ve found all glues that are easy to use for tile creation (read spray glue even the good 3m stuff) do eventually fail, 3m takes the longest at around the 1-2 year mark.

Inked Adventures Dungeon 6 (S01)Kitchen mat backing, simply double sided taped on

After years I’ve finally narrowed it down to two methods, the first I mentioned in my city build thread 8mm PVC foamboard. A little heavy duty for this application plus chews up extra storage space so I’ve simply used grey boxboard 1400gsm (basically what commercial game boards are made from) and printed directly to sticker sheet, stuck the tiles down then cut around the whole lot giving a nice neat tile. To prevent slipping on smooth tables I used double sided tape to a fix non-slip kitchen mat to the backs. Nothing to out of the ordinary and it’s been done before but I’ve found this one of the better solutions for DIY tiles; No spray glue mess, No warping from glue, No lifting , Reasonably slip proof on a table and lastly they don’t take up to much room to store. My current dungeon tiles fill about 1/3 of anΒ  A4 document box. To give the doors some weight I stuck them down to some thick (2mm) magnetic sheet, this will also let me stick them to the inside of the lid of the storage box later on to protect them during storage.

Inked Adventures Dungeon 5 (S01)I’ll add some dividers etc later on but just to give an idea on storage

If your not sure you like the style of the tiles or simply want to give them a try there is a free sampler pack which should give you an idea of what to expect. I did this myself while experimenting with tile mounting techniques, once I had a solution I grabbed the full set and haven’t been disappointed. I even grabbed the square tile version although I haven’t used them. I should probably mention that Inked Adventures has released some freebies for this set so grab those as well as they’ll give you more options.

Inked Adventures Dungeon 4 (S01)The whole example layout – yep missed a door on the right

As always have fun building and gaming and I hope to get some more posts up shortly, I have 6 projects 90% complete….I should probably focus on one project at a time rather than starting six at once :).

Papercraft Build – Steam Ram

Mayhem in Paper Steam Ram Variant F(1)Back in April Squirmydad from Mayhem in Paper released the Steam Ram. At the time I picked up the model with the plan to build a Steampunk army around a couple of them. I’ve finally got around to building two and thought I’d do a review/build post about the Steam Ram.

Once you have purchased the Steam Ram for the very reasonable price of $3.95, you’ll receive a zip which contains:

  • A single layered version of each colour (brown, dark grey, light grey and green) at 28/30mm scale
  • A layered version of the above so you can turn guides and other bits off which is great for customizing
  • A single layered version of each colour (brown, dark grey, light grey and green) at 15mm scale
  • A single layered version of each colour (brown, dark grey, light grey and green) at 15mm scale with all guides off
  • Assembly Instructions and a Card modelling basics file.

On top of this if you own a craftrobo/silhouete/cameo you can slip over to the Mayhem in Paper website and pickup the GSD files for the cutter. All round this is an absolute pile of stuff for the purchase price but as you look through the Instructions and files you’ll notice that Squirmydad has also included parts not just for one model but for at least four different versions. Although with the parts this actually equates to a lot more options, here are the four basic ones easily constructed from the instructions:

  • Wheeled with Main Gun
  • Tracked with Main Gun
  • Wheeled with Top Machine Guns
  • Tracked with Top machine Guns.

Steam Ram Mayhem In Paper Variant A_C

I’ve borrowed the above images from the Instructions (copyright Mayhem in Paper)

The model itself is well laid out and all the parts are easy to identify. If you are hand cutting the model do be aware that not all the parts are used when assembling a Steam Ram so make sure you check the instructions and see what parts are needed for the version your planning to build before just cutting everything out. The 30mm sized Steam Ram is spread across 4 pages but for a single tank build you’ll only need to use about 3 pages of parts.Β  I found the colouring of the ram to be perfect not to dark and not to light scaling wise the ram should be perfect to use with 28mm miniatures. It did take me around 4-5 hours to finish each Ram, they mainly took this long as I was building very carefully and ensuring every join and part was edged, I even sanded a couple of parts to ensure they were perfectly perpendicular. So if your used to assembling card models you should be able to pull a Ram together much more quickly.

I did make some slight modifications to the two tanks I constructed. Firstly I centralized the gun box on the front but then cut out the driver window and glued this to the left of the gun box. I then added both machine guns to the top but set these towards the rear and facing left and right to provide some flanking protection to the tank. Naturally I had to build the tracked version and later on I might add some unit markings when I have more of a feel/theme for the army.

Mayhem in Paper Steam Ram Variant F(1)

Mayhem in Paper Steam Ram Variant F(3)You can see in the above pictureΒ  how I made use of some of the extra hatches that were included with the Steam Ram to add hatches to the top of the machine gun turrets. I am really happy with how the Steam Ram looks on the table and a pair of them really do look intimidating when I was in no way pretending to push them across a table in formation πŸ™‚ .

Mayhem in Paper Steam Ram Variant F(2)

I actual had the urge to create some fan art for the Steam Ram, this ended up beingΒ  some desktop wallpapers and a Kindle screensaver image. First up the wallpapers I did two versions a widescreen 1920×1080 and a 4:3 aspect ratio 1600×1200 version.Β  I am happy with how the wallpapers came out although I’m not sure anyone would actual use them as wallpaper. However they were fun to make and have a Steampunk/Victorian era feel. For want of a better name I’ve called my Steam Ram “Variant F”, Lord Hamilton Squirmydad had already written into the short back story for the model.

Mayhem in Paper Steam Ram 1600x1200 (small2)

1600×1200 version – Link to Full Size

Mayhem in Paper Steam Ram 1920x1080(small2)

1920×1080 version – Link to Full Size

Lastly I pulled together a quick version for a Kindle Screensaver. The image below will appear slightly washed out but it has been colour balanced to look okay on an e-ink Kindle not a computer monitor :). I’ve uploaded the below on my kindle and it now cycles through in my screensavers and if anything still appears a little dark (note you do need to jailbreak your kindle to use custom screensavers).

00006_Card_Steam_Ram

Click the above and then right click save as

As you can probably tell I really enjoyed building the Steam Rams and the customization options available in the PDF’s is huge with a large variaty of models achievable from just the base included parts. As I mentioned above I plan on building an entire Steam punk army around these two models and then using either Defiance VG or No Limits to spec the army out so watch out for more models/miniatures and eventually army lists in the coming months. If you haven’t already done so this model is well worth the money so head over to RPGNOW and grab a copy you wont be disappointed.

Hope you enjoy your Steam Ram, I’m going to go back to not pushing mine around a table in formation πŸ™‚ .

Cardboard Warriors Forum – Paper Miniature Hoard 104

Cardboard Warriors forum Hoard 104 is finished and released, this hoard contains some good stuff to pack out your Christmas Wars armies with. There is the Reinhold by Squirmydad a couple of mini-gun wielding Santa’s by Ryan and the Snow Tundra Tiles and Toy Soldiers from myself.

hoard104
You can pick up other Xmas Wars goodness from Hoards 38, 39, 40 and 88 . Between the old hoards and the new one this year you can put together a couple of very nice themed warbands or a whole Xmas wars themed army.

The December Hoard (105) with a theme of Chaos Unleashed/Modern & Ancient is open and will remain so until mid Jan so why not head over and create a miniature, a piece of terrain or a vehicle for the hoard.

Hoard 104 – November 2012

Enjoy battling with Xmas wars miniatures over the holidays :)

Cardboard Warriors Forum – Paper Miniature Hoard 103

I’ve just finished assembling the Cardboard Warriors forum hoard 103. This was a fairly small hoard although the little Zerstorung was pretty challenging to build due to the size. I’ve included two different PDF’s, one with SD registration marks and the other with Cameo registration marks both are contained in the zip below.

Reminder that the November hoard is still open which is Xmas wars and Super Heroic, so get those submissions in, only a week left.

Feel free to check over the old Hoards for other miniatures.

Hoard 103 – May/June 2012

Enjoy πŸ™‚


Project Status


WWII Project First Release

80%


B-tech Buildings Five

20%


Design Victorian era City

15%


Something Different

5%


Enter your email address to follow this blog and receive notifications of new posts by email.

Join 110 other subscribers

Content Released Under

Creative Commons License
This work is licensed under a Creative Commons Attribution-NonCommercial 3.0 Unported License.
Please Attribute to Sirrob01 with a link back to my blog