I’m going to cover one way of importing multi-layered PDF’s into GIMP so that each layer in the PDF becomes a layer in GIMP. This method is not quick but is fairly easy requiring you to carry out the same activity multiple times. It does require the use of Inkscape to carry the conversion process. It does however retain the images in as close to original colour/quality state as possible without using commercial software. You may still experience problems fully replicating a 100% direct match as some layered PDF’s make use of the blending options available inside Adobe Indesign or other proprietary applications for each layer. This means at best we are guessing the blending options for some of these layers. The below instructions are specific to Windows machines if you’re running a Linux flavour the below should still work or should provide you with enough of a guide to get you on the right path.
I will mention that this is a very long blog post and I’ve spent the past 2 weeks trimming it down and can’t get it any smaller so for those who read the whole thing sorry for the long read. To help out I’ve created a bit of jump index:
Modding and Bashing etiquette (Licensing/Copyright)
If your creating something for your own personal use that you’ll never share, no worries bash mod and print away no-one is going to mind. However if you want to share an item with the world (okay internet) remeber to check in with the artist before posting the file. Whenever you’re dealing with someone else’s artwork always respect either there standing rules around mods and bashes or check personally with the company/artist in question.
For Example:
Fat Dragon Games policy on mods/bashes
WWG policy on mods/bashes
All my art (if you can call it that) is released under creative commons license meaning your free to mod and share whatever you make so long as it’s not a commercial venture, you credit myself in someway and you share the resulting work under a similar license. Some items I do release into the public domain which means anyone can use what they like and credit me or not.
If you do start to create your own papercraft items from scratch using your own hand built textures, your own photographed textures or public domain textures. I would encourage you to make it very clear on each PDF what license you grant any future modders and bashes. I know myself I find it quiet frustrating when no license is apparent and I wish to make minor tweaks but don’t know if I can share the outcome and the artist is now unreachable. Sorry I’ll get off my soapbox now :).
Background and Comparison
For those curious as to why I’ve detailed this method first over some others I have 3 reasons I prefer this method:
- We end up with an almost exact colour match of the component parts meaning mods will match existing terrain pieces more closely.
- We end up with a highest quality image we can without adding image artifacts
- You end up with your own copy of the “layered” PDF (okay now an XCF file) in GIMP so adding a new layer in the right order results in easier modding. Eg On a Lost Reich Mech I could add a new bullet hole layer above or below the dirt and grim layer to show old and new bullet holes.
I’ve put together a quick side by side comparison image of 2 different methods and the resulting output vs the original so you can see what I mean, example used is a segment from a Fat Dragon Games Capital City File (zoomed in about 800%) :

Left is original, Middle is this Method and Right is using a PDF printer. You will need to click and load the above separately to see the red halo around the PDF printer image
The difference above may seem minimal however my printer, prints the pdf version and original at different shades and then my eye can easily spot the different shading across a terrain piece. This is less important if the whole piece is affected (eg whole building) as opposed to say a new Custom tile or balcony addition to an existing building. Saying that even this method is not perfect and if the piece is especially complex\layer heavy you may struggle to get a perfect match.
Software Needed
You’ll need to download and install the latest version of Inkscape (0.48.2 when I wrote this), or as always you can just make use of the portable version and run it off a thumb drive. You’ll also need a copy of GIMP downloaded and installed, covered in a little more detail in my previous post.
Inkscape Extraction
To start off with pick the layered PDF you want to mod/bash, try not to pick a layered PDF with too many layers a good practice piece would be one of Fat Dragon Games layered PDFs from there newer sets.
I will say if you are planning on using the below on any of Dave Graffams buildings check he hasn’t released a PSD version before you go through the conversion process as this saves a significant amount of time and effort.
Launch Inkscape so it is open and ready to go, then go to File>>Open and select the PDF your interested in converting. You will be presented with this screen:

For me this screen is sometimes very slow to load and refresh so be patient with it and assume every click is registering. If you used a multiple Page PDF set the Page number to the page your interested in, in my case it’s only a single page so it is locked to page 1, move the “Precision of approximating gradient meshes” to very fine 246.0 and leave all other settings as they are and select “OK” – this can take some time and your computer may seem to lockup but give it chance to work and it should eventually return a result:

Yours wont have example file from lost Reich printed across it :). Available from Fat Dragon Games
Your PDF will now be opened in Inkscape with every layer from the PDF imported as an object in Inkscape. The layers will be imported without any Indesign blending options and all the layers will be visible so the image will look different to how it appears in the layered PDF:

I have noticed some differences with the way different artists layered PDF’s import into Inkscape, I think this is caused by the different adobe software being used and that layered PDF’s can be generated as either a tree or hierarchy structure. Below are some notes on what I’ve uncovered to date:
Fat Dragon Games (Tom Tullis) – Imports fairly normally with each layer as an object these tend to be grouped in one group. However each object has it’s own custom size requiring you to set a custom size on export to facilitate easy importing to GIMP and retain the relative X,Y location of the layers.
Dave Graffam – Imports in long nested groups of objects cutting or moving the objects out of these nested groups causes the image links to no longer function (or it does for me). All objects are the same size so making exporting easier, however often you are clicking into nested groups for some time to find the base level.
Okumarts Games – Nested like Daves but sized like Fat Dragon Games. It is possible to ungroup the layers and export them the same as Fat Dragon Games (follow Fat Dragon Guide and you should be okay)
Mine (UFO etc) – Is some sort of odd cross between the two. The objects are a fixed page size like Dave’s but they are not nested in nested groups and all sit at the top level like Tom’s under one group (follow Fat Dragon Guide and you should be okay).
If I uncover any further different types I’ll add them to the above in the future and expand the below section.
Fat Dragon Games et al Process:
Select the Imported group (click on it once), then go to menu item “Object” and select “Ungroup” (Shift-Ctrl-G). You should now have this:

In the red circled area above make note of the “X” coordinates, Y coordinates, W size and H size. In my case this is -7.5, 25, 765 and 990. Next we can start exporting the different layers first up deselect all layers either by clicking somewhere to left of the selected group or by going to Edit>>Deselect (right near the bottom).Next click on your images and the topmost image in the stack will be selected:

Now to start Exporting either go to File>>Export Bitmap or use Shift-Ctrl-E and the export dialogue will open. Select Custom along the top, then change x0, y0, width and height values to those you noted above. Select the browse button and select a location to save the image file to and the name. The name isn’t critical and if you don’t know what is on the layer selected simply call it “one” and the next “two” etc or some other logical naming pattern you prefer. Lastly tick on “Hide all except selected” and press “Export”:

You have just exported your first layer. Now onto the remaining 5 to 5000 this is fairly quick although repetitive. You can leave the export window sitting open. Open the object properties window Object>>Object Properties or Shift-Ctrl-O on the little window that opens tick Hide. Again leave this open. Next click on the middle of your images and the next object down will be selected. Simply Click on your export Window and name the png to something else and then hit export:

Repeat the above hide>>Click>>Name>>Export process until you are left with a blank white page:

You have now captured all the individual layers that make up that PDF. There is no need to save the inkscape file as you have the original PDF and really we didn’t add much value in inkscape but you can save it if you like. To unhide all the objects before saving it’s Object>>Unhide All. Now skip down to GIMP Reassembly.
Dave Graffam Process:
This is essentially the same as the above process but you don’t need to worry about setting a custom size before exporting you can basically export each layer at the stock size. The trick is making sure you click down deep enough into the groups such that your at the bottom of the group pile. I’ve tried ungrouping but this for me breaks the image link(s) and I end up in a mess with red image cant be found error links all over the place, so try de-grouping at your own risk.
Okay first up open your Export Dialogue (File>>Export Bitmap or use Shift-Ctrl-E) and Object Windows (Object>>Object Properties or Shift-Ctrl-O). Put these out of the way so you can see the image in the middle.

The key point to watch is the group dropdown (circled red above) basically keep clicking on the image in the same spot until the numbers stop changing, just click as quick as you can and watch that little window eventually you’ll see the name stop changing:

You can see above I started at #g2997 and ended a #g4113 (there were about 7 layers).
Now just export that Layer using Export bitmap Window. Select the browse button and select a location to save the image file to and the name. The name isn’t critical and if you don’t know what is on the layer selected simply call it “one” and the next “two” etc or some other logical naming pattern you prefer. Lastly tick on “Hide all except selected” and press “Export”. Once it is Exported use the Object properties Window to simply hide the layer:

Crates Exported and Hidden
Now to export the next images simply start clicking on a piece of the image until again the numbers stop changing in the group dropdown. Sometimes you can get away with a single click and export if you click on the same or just about the same spot you clicked on for the last object, I would however be very cautious doing this as it is easy to end up hiding and missing an option layer. I expanded the list in the below so you can see how deep I am:

Simply Repeat the Multi Click>>Export>>Hide process until the Page is empty. Dave usually has a ton of options so expect to being do this for some time.

You have now captured all the individual layers that make up the PDF. There is no need to save the inkscape file as you have the original PDF and really we didn’t add much value in inkscape but you can save it if you like. To unhide all the objects before saving it’s Object>>Unhide All. Now read on to GIMP Reassembly
GIMP Reassembly
So you now hopefully have a folder full of images for the particular PDF:

This next step is slightly easier if you are using dual monitors. Next open the original PDF in Adobe Reader and then open all your extracted layers in GIMP using File>>Open as Layers and make your way to your extracted image folder and then select all the extracted images and select open. You should now have something vaguely resembling this:

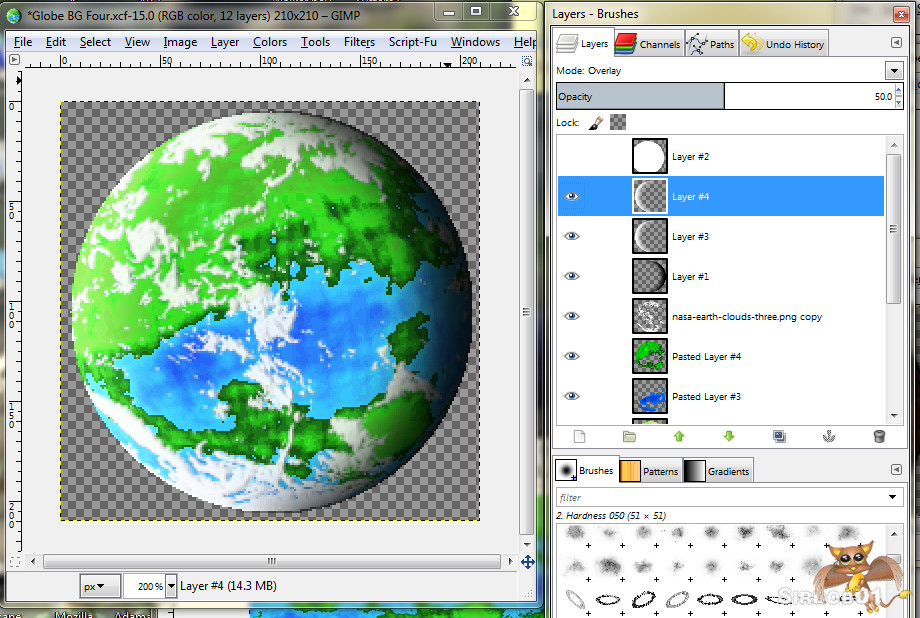
As you can see in the above the GIMP layer order does not currently match the layer order that appears in the PDF we basically need to make the GIMP layer order the same as the PDF layer order. You should be able to see all the layers in the Layers – Brushes Dock but if not this can be opened by going to Windows>>Dockable Dialogs>>Layers or Pressing Ctrl + L. Now its a simple matter of clicking on each of your imported Layers in the layer dialogue inside GIMP and moving it up and down to the correct location using the mouse. A quick tip I tend to work from the bottom up so I’ll hide all the layers except the very bottom one in Adobe reader and then hide all the layers in GIMP and show each one there until I find the matching layer and move it to the correct location:

In the above I’m finding the Stencils Layer
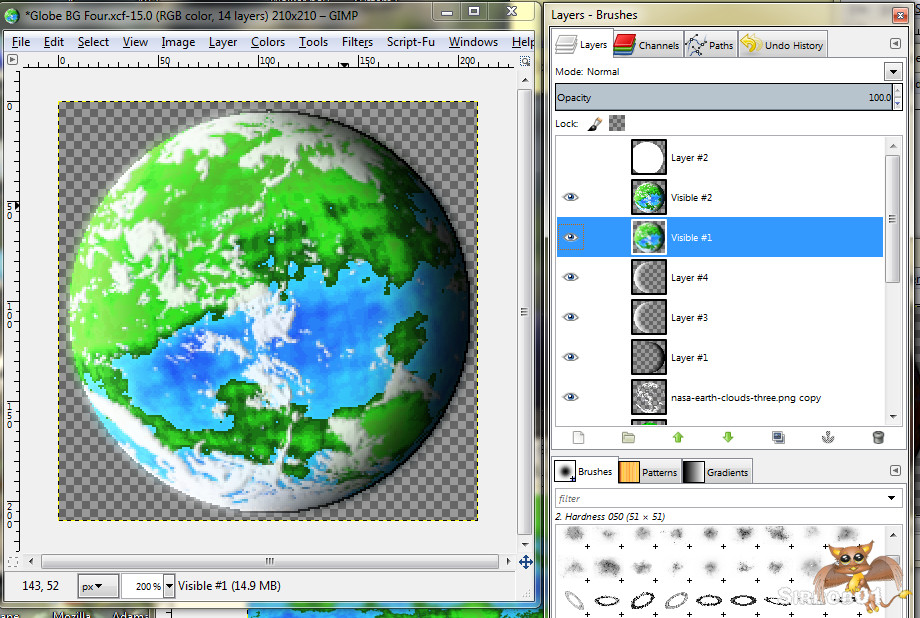
Now repeat the above moving layers up and down until the layer orders in Adobe and GIMP match. Now don’t forget to save the file in GIMP at this point, it is also a good idea to shrink the canvas size down a little (see my previous post) to avoid the margin printing issue in GIMP.

All done, when you get used to the whole process you can do a whole 10 layered PDF in about 15mins
Now if you have a layer in GIMP which isn’t looking right when compared with the original you will need to change the blending mode for that layer in GIMP. Click on the layer (select it in GIMP) at the top of the layer panel you can see “Mode” click to the right of the word “Mode” on top of “normal” works well and you will presented with a bunch of blending options:

Unfortunately I can’t guide you to which one exactly to use but some good ones to try are “Overlay”, “Darken Only”, “Burn”, “Screen”, “Hard light” and “Soft Light”. You’ll need to try different layer modes until you either get lucky and get an exact match or close enough that your happy with the result. I have found with some of Dave’s models my best results have been achieved by turning a layer off completely, my best guess is this is due to slight incompatibilities between the software Dave uses (Photoshop) to generate the files and GIMP.
Hopefully you now have an exact duplicate of the original PDF or very close this means any additions or bashes you make using this file should be an almost exact colour and quality match to anything you have already printed. So why not have some fun and add something interesting to the file :

Hello Skorpion? – Big apology to Tom at Fat Dragon Games
Hopefully the above info is helpful to those who wish to create some changes to layered PDF’s while retaining the quality. As this post is already very long I’ll cover doing some simple additions and changes to a file in my next post.
Have Fun 🙂
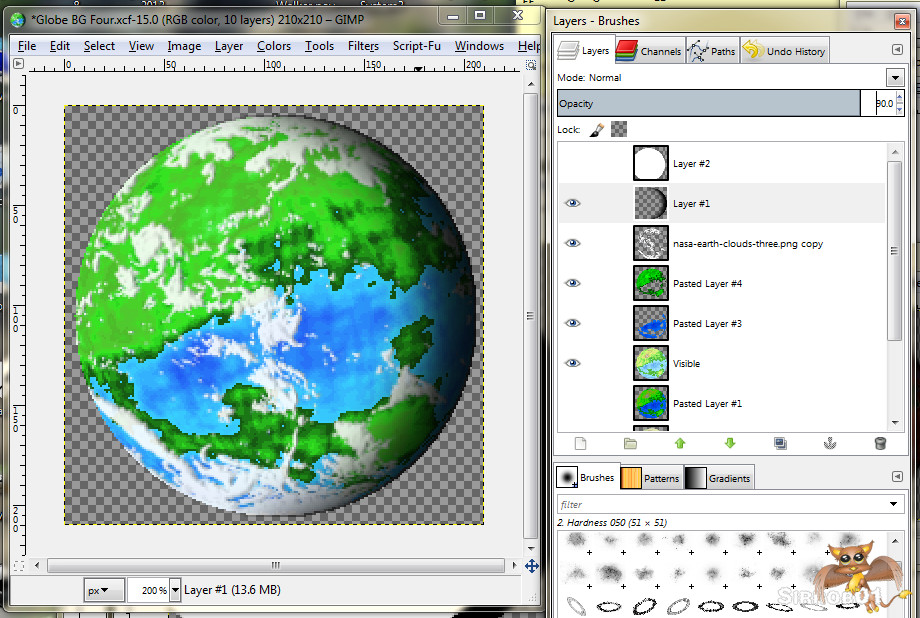
 I’ve been helping a friend out making some planets, now he needs lots so I had to develop a technique for making planets quickly in Gimp. In my previous solar system post I covered some basics around making a Solar system so hopefully this post will help flesh out the solar system a little more.
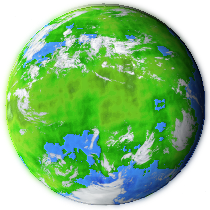
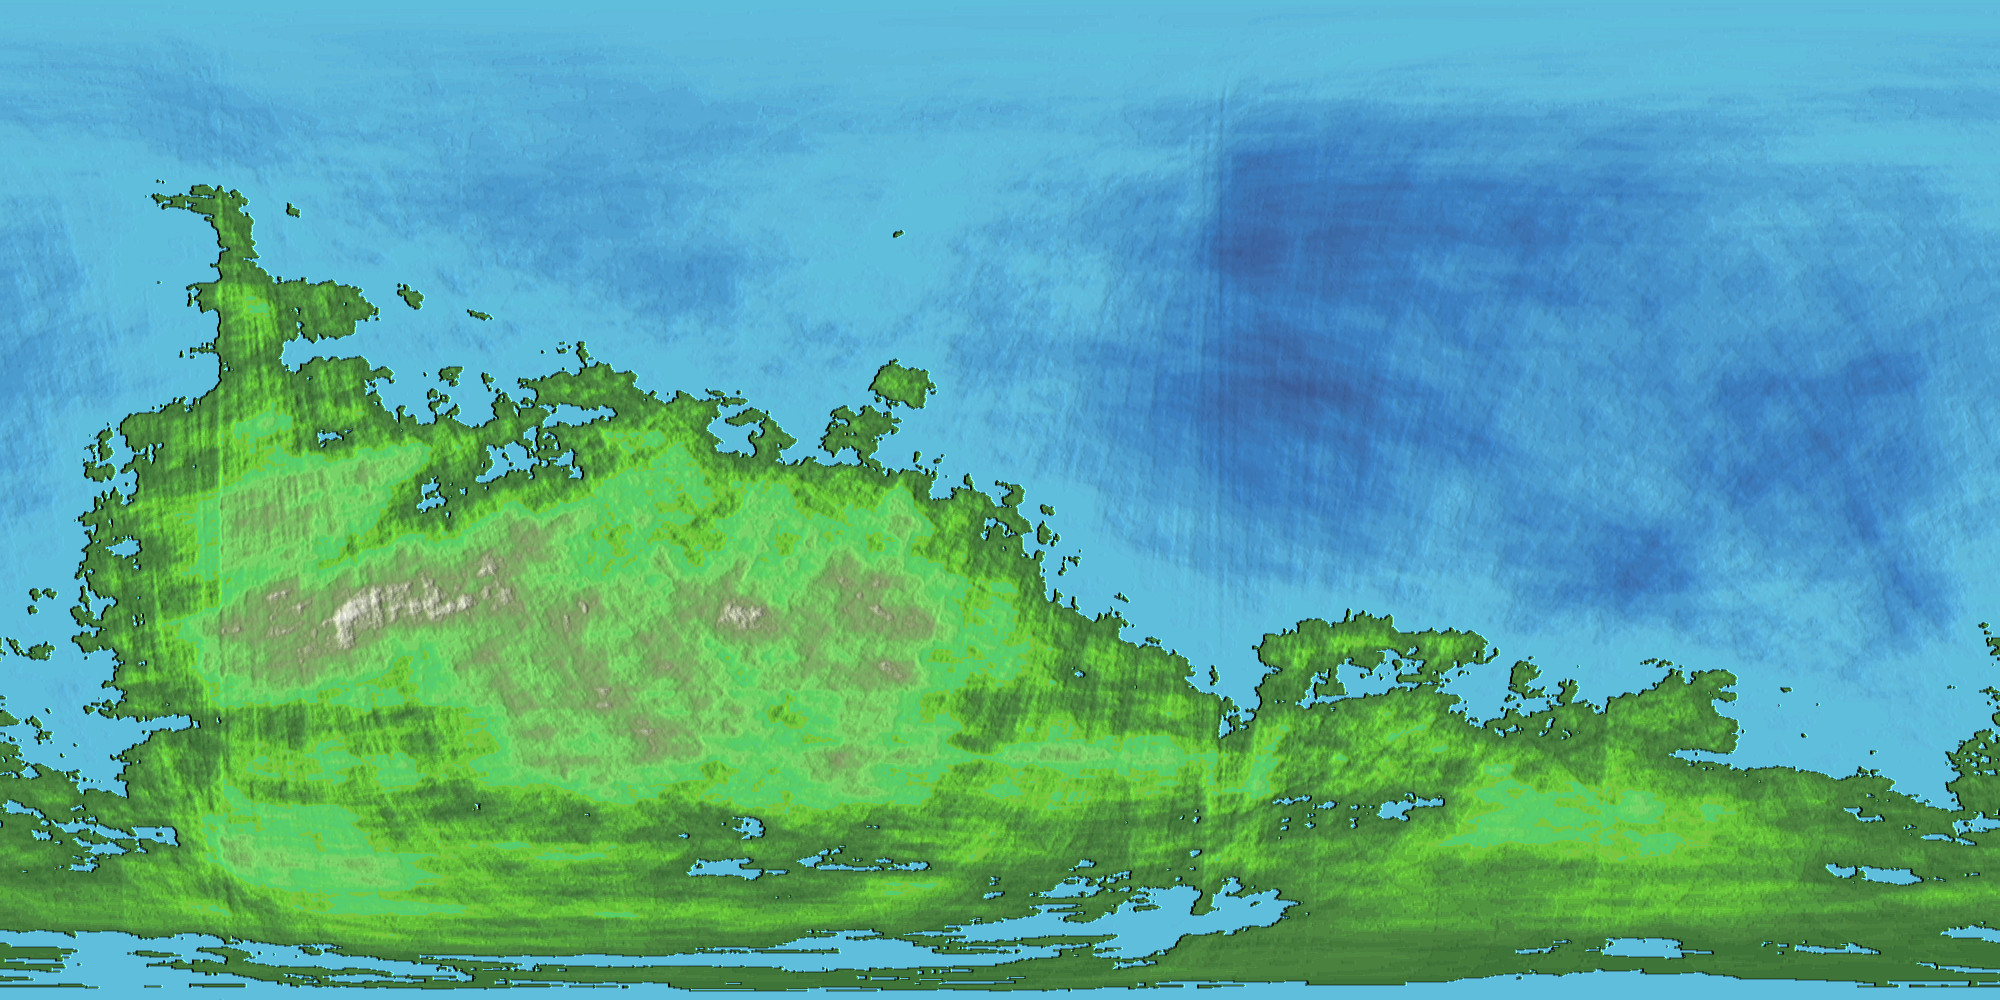
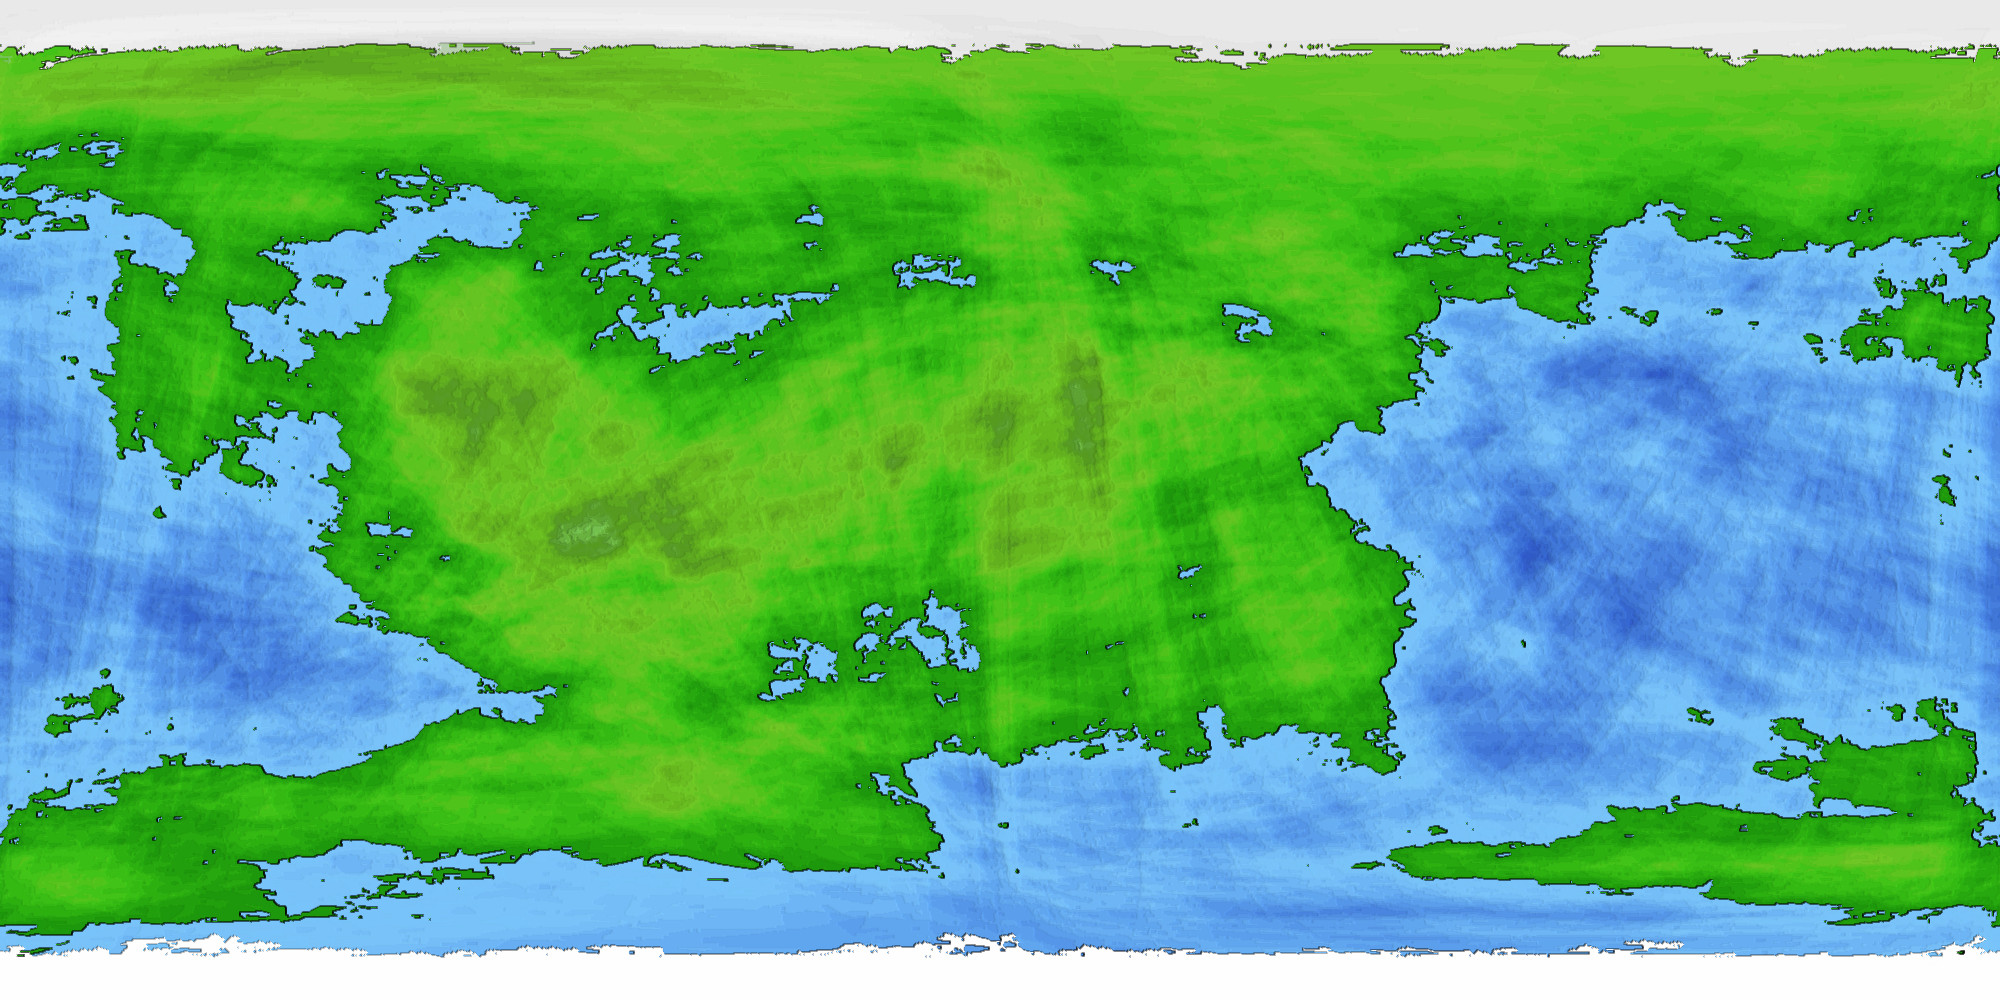

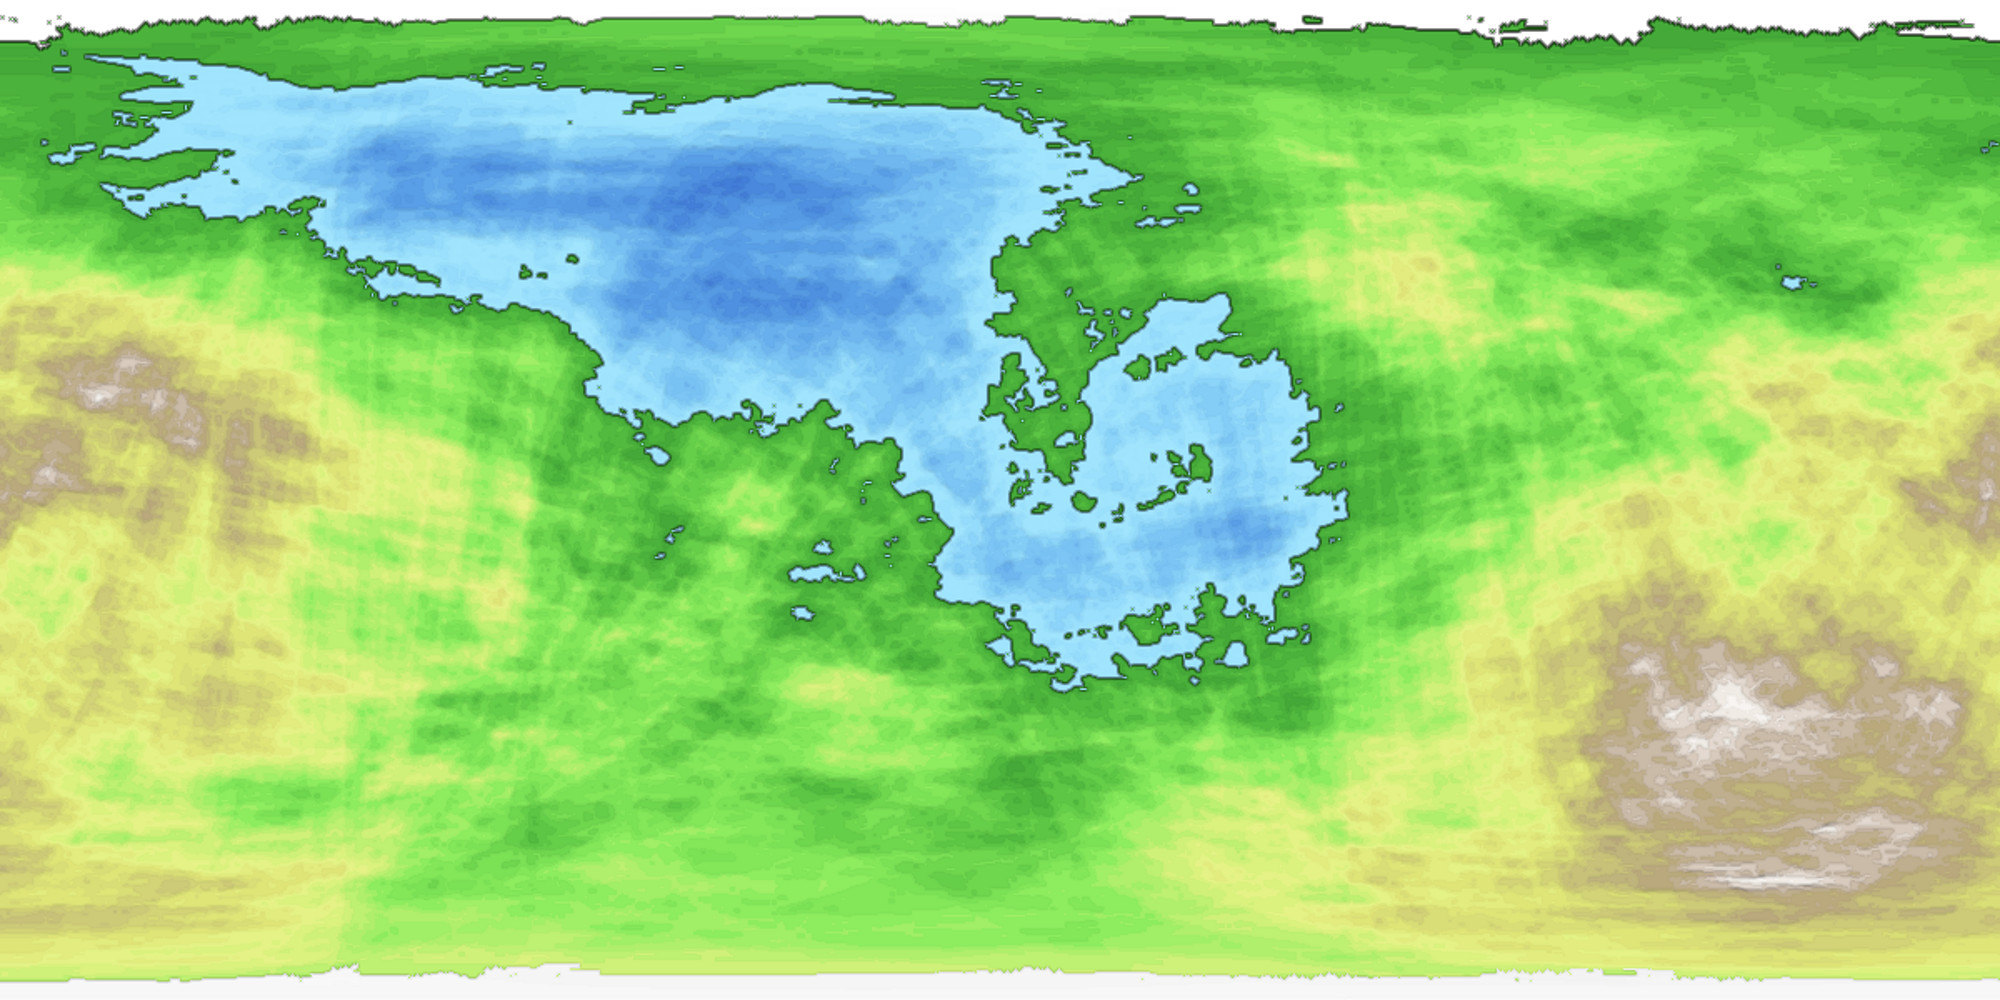
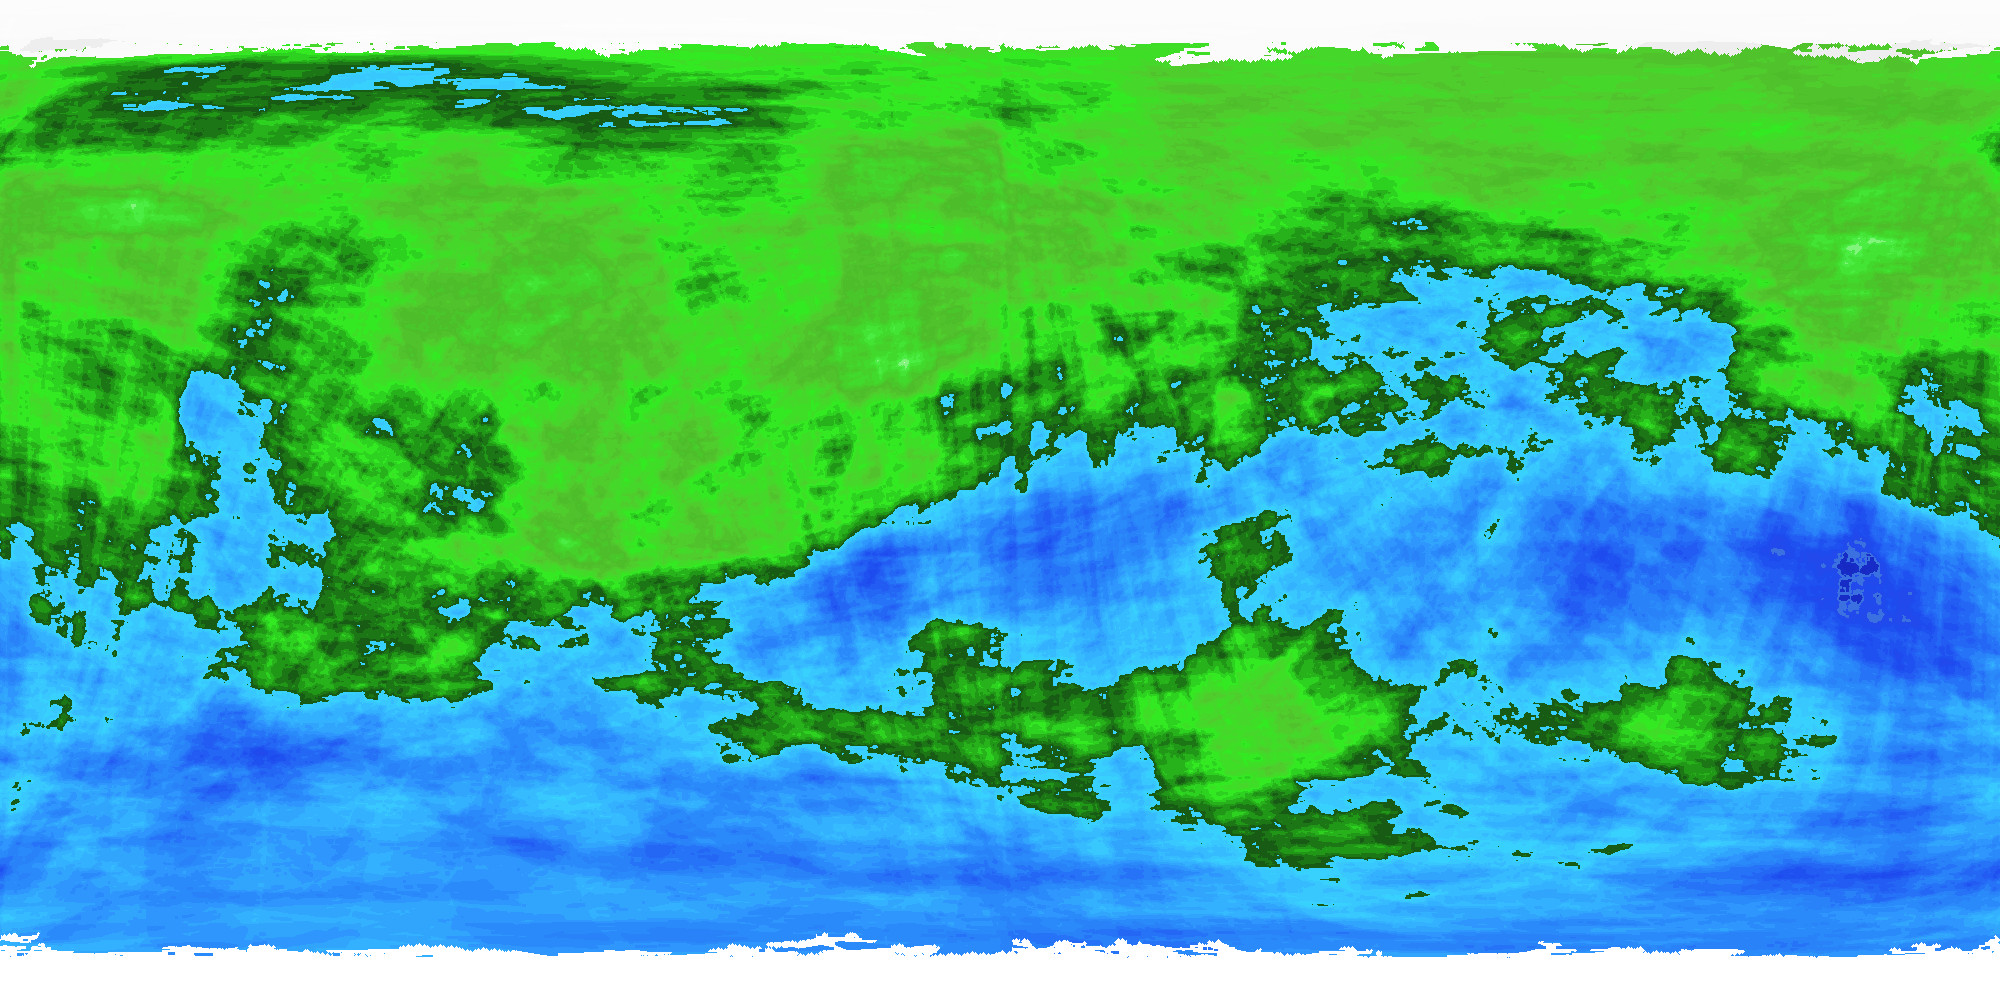
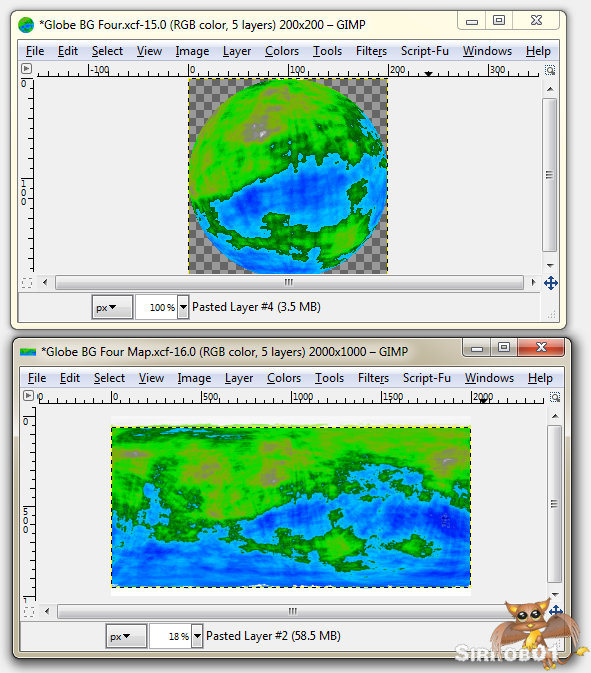
 I’ve found a flat map image height of 1000px works well
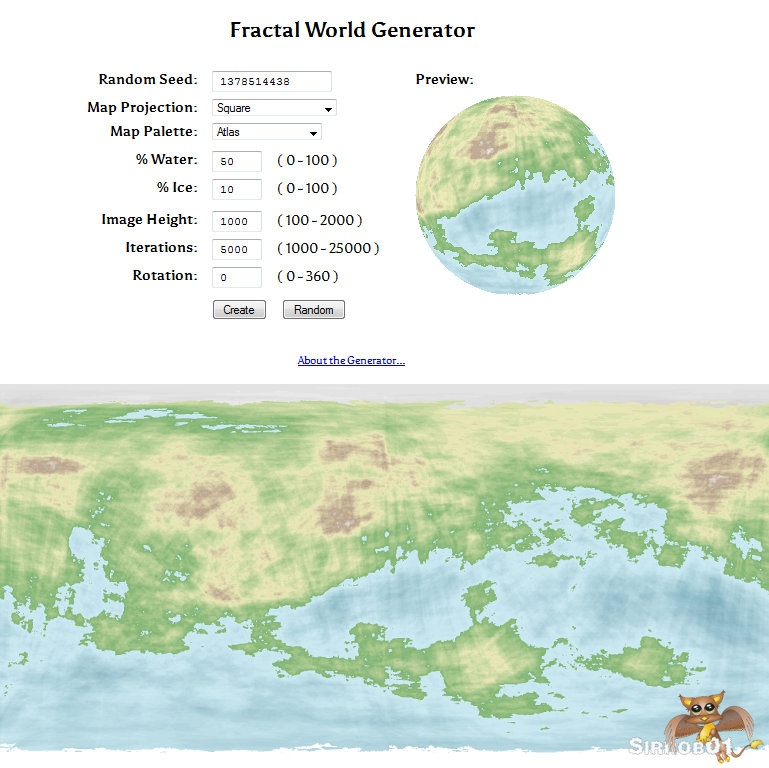
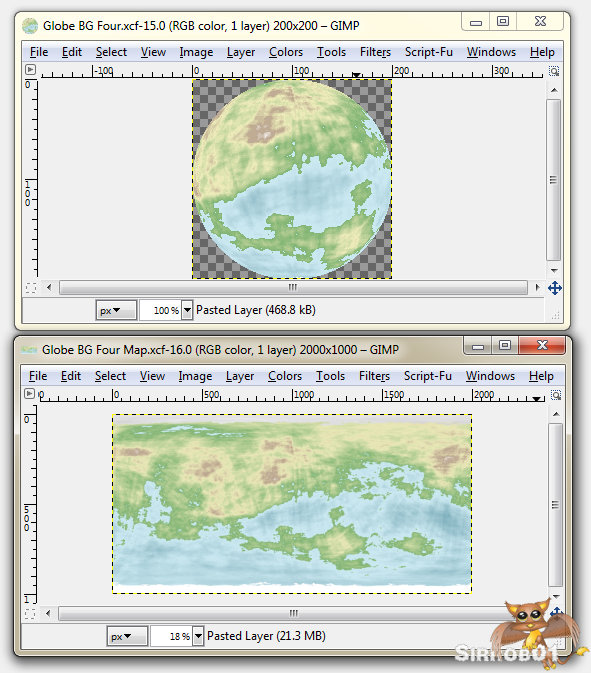

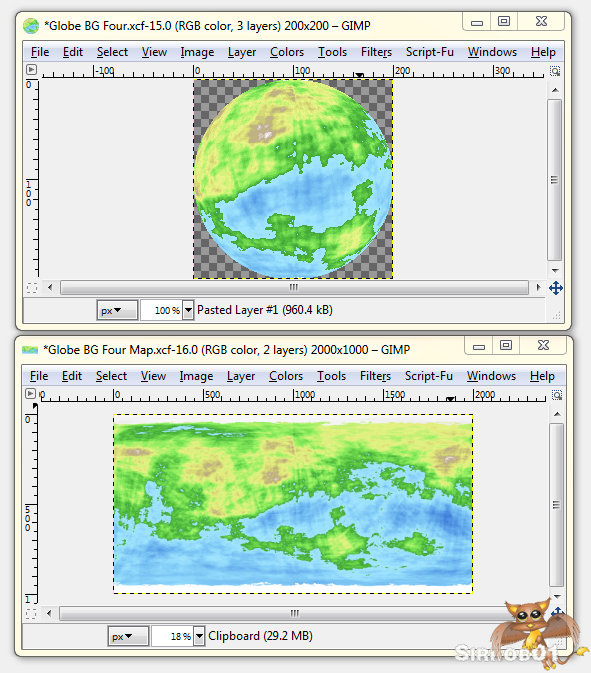
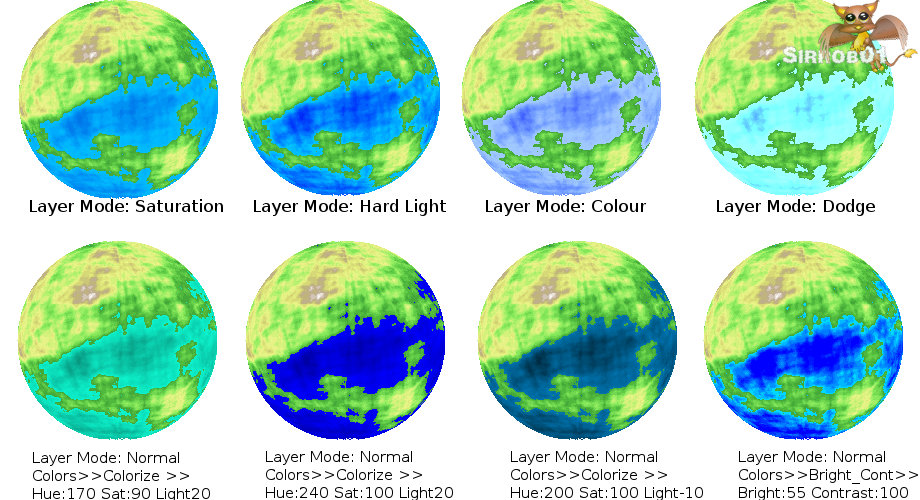
 Instant Deep Blue Oceans