Posts Tagged 'tutorial'

Gimp Planet Making – Blue Green Globes (Earth Like)

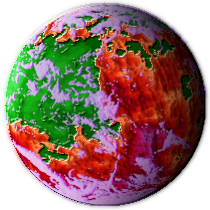
Blobe Blue Green FourI’ve been helping a friend out making some planets, now he needs lots so I had to develop a technique for making planets quickly in Gimp. In my previous solar system post I covered some basics around making a Solar system so hopefully this post will help flesh out the solar system a little more.

The below process makes heavy use of donjohn’s fractal world generator, I’m unsure what copyright the images it generates are under but for personal use you should be fairly right. The reason I use the fractal world generator is it generates a nice globe and a flat map projection in several variates and gives a nice working base to whip some planets up in Gimp. This doesn’t make beautifully photo realistic planets but it makes passable globes for use on a solar system overview images/maps and provides you with a matching world map you can take and work on later. Naturally to follow the below your going to need a copy of GIMP installed and probably this Script pack which I use heavily. I am by no means a GIMP expert so I’m sure there are other (better) ways of producing the below effects but hopefully it’ll get you started.

I’ll only cover one planetary type today – a Blue/Green earth type globe. If you really just want something to use in a hurry feel free to grab one of these. Usual rules apply CC BY-NC-SA 3.0 and credit myself and donjohn in someway :).

Making a Blue Green Earth type planet – XCF Demo File Here

Go to donjohn’s fractal world generator and generate a random world, make sure you check the resulting flat map (press create) before settling on a final globe and play around with rotation angle to get a nice view. Most importantly once you settle on a globe record all the settings this will let you recreate the same globe at a later date.

Gimp Planet Tutorial OneI’ve found a flat map image height of 1000px works well

Set the Map palette to “Atlas” and right click and copy the globe image and the flat map Images into Gimp as separate “New Images”. (Note: if you right click save as and then open these in GIMP ensure you change the image mode to RGB)Gimp Planet Tutorial Two

Then set the Map palette to “Mogensen” and copy/paste the new globe onto your globe Image in Gimp as a new layer and likewise with your map image:Gimp Planet Tutorial Three

Set the Mongesen layers on both images  in Gimp to Layer Mode “Overlay”. Then right click on your Mongesen layer and select “New from Visible“: Gimp Planet Tutorial Four

You can leave it there and jump down to adding clouds below. However you probably don’t want all your blue/green planets the same exact colour. So lets add some variety. First the ocean. Use the select by colour tool in addition mode (2 red squares) to select all the shades of blue (I set my threshold to 20 but the default of 15 works fine). Copy the Ocean from the Mongesen layer and then paste. Then do Layer to “New Layer”(this keeps the ocean aligned – do this on both images):

Gimp Planet Tutorial FiveInstant Deep Blue Oceans

Play around with different Gimp settings to get different ocean colours, I kept mine in a Blue/green pallette. But red and purple are achievable:Gimp Planet Tutorial Six

Play around with a mix of colouize and layer modes for even stranger effects.

Next Lets get some variety into our land masses,Firstly on the ocean layer on both images trigger layer>>Image size. Then use the select by colour tool on your ocean only layer but select in the empty space. Basically you want to select the empty pixels as by default these are all land mass (well most of them). Then select your Mongesen layer and copy then paste. Then do Layer to “New Layer”(this keeps the land aligned – do this on both images):Gimp Planet Tutorial Seven

Once again play around with different Gimp settings to get different land colours, You’ll find Layer modes less useful this time but Colors>>Colorize , Colors>>Hue-Saturation and Colors>>Color Balance far more useful (Whatever you do, do the same on both Images – Map & Globe):Gimp Planet Tutorial Eight

Hopefully now you have a base globe and a base map colored the way you want and looking pretty good:Gimp Planet Tutorial Nine

The base planetary map is finished at this point. However the globe needs some clouds and shadowing to make it look more ball like. Firstly some clouds on the globe image. Now the easiest thing I found to do was to search up some Earth images from NASA. Copy and Paste these into Gimp use the colour select tool to select and copy the clouds and paste those as a new layer onto your globe and scale them down. Now you can go do that yourself or simply save the png you like below and then follow the next step.

Firstly adjust the canvas size of the globe image.  Image>>Canvas Size and adjust this to 210x210px and center the image. Now File open as Layers and pick the cloud image you saved above. Set this layer  mode as Normal and Opacity at about 90%:Gimp Planet Tutorial Ten

Last few steps to go are to add some simple shadowing/highlighting. First add a new transparent layer to your globe image. Next select one of your original globe layers and first do layer to image size. Now grab the select by color tool and click in the empty space this will select all the empty pixels again. Next select>>Invert and select>>grow 1px. Click back onto your new layer and bucket fill this with solid black (#000000). The layer itself should be at the very top:Gimp Planet Tutorial eleven

Now duplicate the black circle layer and color>>invert. Then layer>>scale layer to 220px X 220px. Lastly move the layer to the left until a small segment of the black circle underneath is visible:Gimp Planet Tutorial twelve

Use the magic wand tool to select the white circle, Select>>Feather 40px. Finally select your black circle layer and press the delete key on your keyboard. Select>>None and hide the white circle layer. Set the Opacity of your black segment to 85-90% (see what looks nice): Gimp Planet Tutorial Thirteen

Almost done we just need to add a small highlight on the Sun-ward side, duplicate your black shadow crescent layer, Colors>>Invert ,  Layer>>Transform>>Flip Horizontally. Set opacity to 100% and Layer Mode to Overlay. Duplicate the layer and set Opacity to 50%:Gimp Planet Tutorial Fourteen

Last  Step; Layer>>new from visible, then duplicate that new layer. Select the lower of the two new layers and Filters>>Blur>>Gaussian Blur 8px. This gives the planet that sort of hazy aura you see around planet pictures sometimes. Save your xcf fie as next time you make a planet you can re-use the shadows and highlights from this file – saving yourself time:Gimp Planet Tutorial Fifteen

Export you planet as a gif/png and your map as a jpg and your done.
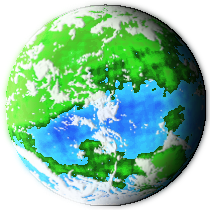
Blobe Blue Green FourBlobe Blue Green Four MapNow you are free to create as many earth like planets as you need for your fantasy Solar system(s). The above might seem like a complex process but once you get into a rhythm you can turn a planet out about every 10-15mins.  I’ll cover some slightly different techniques next time such as giving the planetary surface a rough/textured look and alien colours for example:

Daemon Two

Enjoy your Solar System building 🙂

GIMP – Getting Started with Papercraft Modding/Bashing – One

First up normally when I start talking to people about GIMP they get all nervous looking and edge towards a door, I think they assume I mean these, so to clarify my post is about GIMP (GNU Image Manipulation Program). I wrote this blog post for a few reasons. First I wanted some basic info to go with the Lost Reich posts I’ll be putting up later and as I seem to have posted/sent information like this out a few times to different people I thought others might find it useful.

First up the online Gimp help files are actually helpful and very well written so I would encourage people to have a flick through those. I will admit that for a new user they could seem a little over whelming with the amount of info presented. The full help files can be found here, I suspect most people will want to jump straight to Chapter 3 in that document as that’s were the real meaty help and how to use starts. My post below  is a bit of a shortcut primer to just get you up and running quickly and start hacking some basic mods into an existing paper models  but is no substitute for the full help files and hard won experience.

If your switching across to GIMP from your totally legal and fully purchased copy of photoshop. I would encourage you to stick with GIMP it took me about 3 months to become fully comfortable with GIMP when I switched over from my old copy of photoshop 5/6.  Now I couldn’t live without some features in GIMP such as “Paste as New Image” (suspect photoshop has that now) and the ability to push docks onto my 2nd monitor as separate Windows. I will admit though that sometimes it takes a little longer in GIMP or it takes me time to locate a plugin to do the same job but unless your a high paid commercial graphic designer, GIMP should meet your needs :). Just give it a chance and give your mind a chance to learn (re-learn) where everything is.

* I have assumed with the below that the user has some understanding of terms like “docks”, can install the software and has some basic level of software knowledge. If not drop me a comment and I’ll try and clarify or help further.

Getting GIMP and First Startup

First up download GIMP and install, the version available when I wrote this is 2.8.2, so your success with the below instructions might vary if we are now up to version 4 and/or its the year 2022.  Personally I prefer to use the portable version to the full install version as I tend to run GIMP off my external HDD I carry with me everywhere.

Next up launch Gimp either via the menu item/desktop icon or via the GIMPportable.exe if using the portable version. Now hopefully you’ll end up with something that looks like this on the first launch:

No I’m not a Starwars and Lego Fan..not at all

The first issue most people have is that we have 3 separate windows, if your running dual or more monitors I’d encourage you to leave GIMP in the above configuration. This will let you push the main image window onto one whole screen and manage the docks on your second screen so maximizing space when image editing (be nice if GIMP just treated both screens as 1 big screen..maybe next version).

However if you prefer a single window or have only one monitor, simply place GIMP into Single Window mode by going to the menu item “Windows” and select the bottom Option “Single-Window Mode” (depending on how your OS operates you may need to close and restart GIMP to have single window mode appear). Below are two more Screenshots, one in single window mode and the other how I have Gimp setup on two monitors (I normally have more docks opened out and untabbed):

Personally with dual monitors I find the above restrictive, but everyone has there own preference so use what your most comfortable with.
I wish it looked that clean IRL with no monitor bezels 🙂

On the odd chance someone is missing some of the default docks to get those back simply go to the “Windows” menu item and first check that “Hide Docks” isn’t ticked on if it is untick it or simply hit the tab key. If you still have no luck go to “Windows” menu item again and select the recently closed docks option if there any options under that select them and it should return your docks. Still no good, Okay one more easy solution to try, go to menu item “edit” and select “preferences” then select “Window Management” (2nd last item) on the small screen on the right then select the “reset saved window positions to default values” select ok on the question that pops up and then hit ok and close GIMP and relaunch. Hopefully the default dialogs have reappeared.

Still no luck? You have my sympathies and I have no idea whats happened to your install, maybe best to try a re-install or try the portable version I mention above, but if you want you can rebuild your docks by hand but it is painful. First up hold ctrl and hit b this will return your toolbox you’ll need to re-size it a little as it will probably be long and thin. Next Select the “Windows” menu item again then the  Dockable Dialogs and select the ones you want one by one and drag the docks back together. At a minimum you want Layers, Brushes and Tool Options. However many others are useful such as Channels, Paths and Undo history but you’ll figure out what you use/need over time.

Basic Paper Model Mods

Okay number one rule with anything in GIMP, most stuff can be subject to an undo, as with most programs undo is under the edit menu item or triggered through a ctrl-z, so don’t be afraid to use it :).

Getting the PDF into GIMP

This is actually much easier than you would think, the worst thing is that Gimp can’t handle layered PDF’s so it only imports the default view you get when you first open the PDF. I’ll cover a work around for this in a later post:

First Launch GIMP

Then Go to “File” then “Open” and browse to the PDF you wish to open and select it (I opened One Monks Old Devils-Imps.pdf ), you’ll be presented with the below:

The most important point on this screen is to make sure the resolution is set to 300 (pixels/in – default setting) and then click Import

In the above this was a simple 1 page PDF if I had imported a multi-page (not layered)PDF I would have seen multiple pages (see below) on the selection screen and each page I selected would be given it’s own layer in GIMP – Think of layers like different bits of papers with a different picture/drawing on it.

We now have our Imps inside GIMP seemingly ready to go, however if you simply print the page now from GIMP you’ll notice it comes out a little smaller than out of the PDF. I don’t fully understand why but there appears to be some internal margin in GIMP which forces the document to be shrunk on print out. To get around this we simply shrink the paper (canvas) size a little.
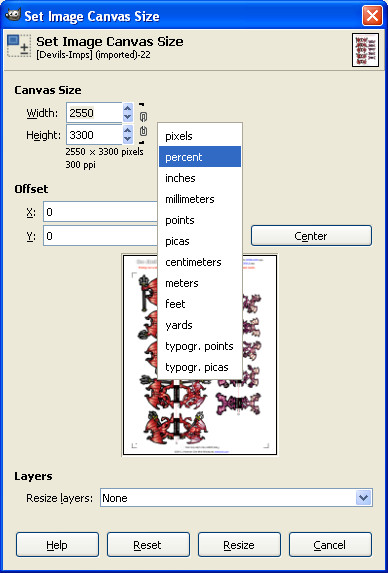
Go to “Image” then select “Canvas Size” (Do not use Scale Image), your canvas will probably be 2550×3300 px, Click on the “px” value (see below) and change it to %, change both values to 92% (optional turn on the little chain-link icon and change just the top value and both will match or very close). Press the “Center” button and then press “Resize” (you may have to play around with the X and Y values to get the robo marks to stay in view)

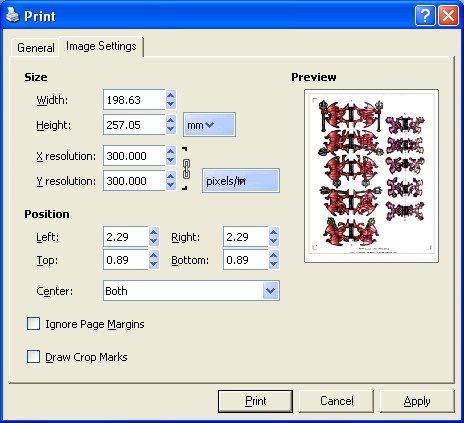
Okay why did we just do that last step? If you now go to “File” and “Print”, select your normal printer, now see right at the top you have a tab next to “General” called “Image setting” click that (see below). See the Resolution is  set to 300, If you don’t shrink your canvas a little Gimps internal margins kick in and the resolution on this screen will be above 300, normally around 320-325  and hence your print outs are small. Now on the below screen you can select the “ignore margins” button and manually set your resolution back to 300 but I tend to forget and end up wasting ink and paper… feel free to check out the below screen before you shrink the canvas.

One Way of re-colouring

As with most software there are 3-4 different ways of doing something. GIMP is no different and the below is one way you can re-colour in GIMP, the below will however only let you re-colour it wont for example let you apply a different camo texture, but I’ll cover that in a later post. This way is very quick but not without its limitations it will change all instances of that colour/hue to a different colour/hue. So it works best on large single colour critters, Demons, Dragons, Trolls etc.

You have your Image all ready to go:

Next up go to “Colors” and select “Hue and Saturation”, this will launch this screen

I want some Blue Devils, so I select “R” for red as mostly their skin is Red and now I simply adjust the Hue slider until I get a nice Blue shade. If I want a lighter Blue I simply adjust the Lightness and Saturation Sliders (make sure the little Preview box above “help” is ticked on) until I’m happy with the colour. Below are some example re-colours and the settings used to achieve them. In both cases I adjusted both the Red and Magenta channels but have included screen grabs of both.

Blue Frost Demons

How about some Bright Green Forest Demons?

Once your happy with the colour, select ok and the minis will be re-coloured then save your version as an xcf  file and print your document, cut out (or run through your Cameo/Robo) and enjoy your newly coloured minis.

I’ll leave it  there for now as this post is very long, hopefully there is enough above to get you started. I’ll cover a bit more in other posts later this and next week, I have 3 posts part drafted. If you want me to cover something specific feel free to leave a comment asking/requesting it and I’ll try and add it to my next post.

As always have fun

How to Base Paper Miniatures

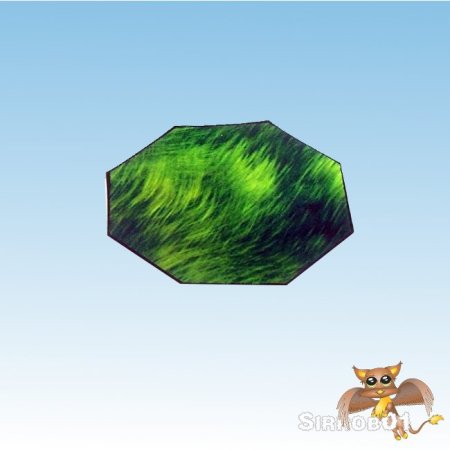
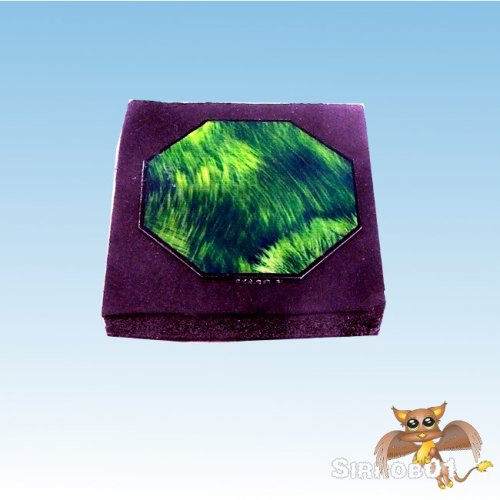
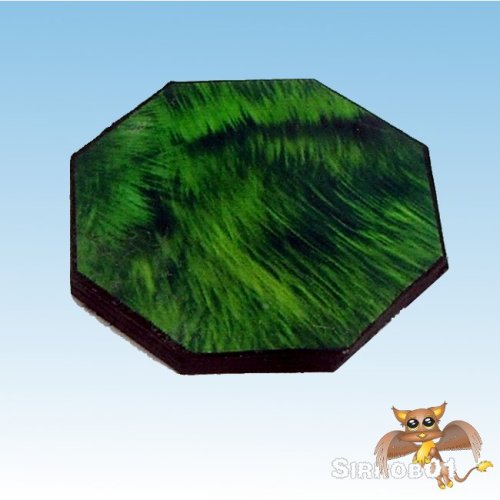
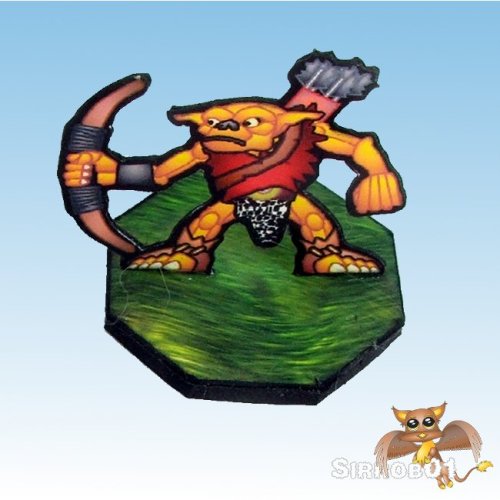
I’ve been meaning to do a post on how to base paper miniatures, which includes some of the various types of paper miniature basing you can do. There are advantages and disadvantages to each type of basing so there is no right or wrong way to base. Most of the various base idea’s below come from the cardboard warrior forums, so feel free to head over and browse through the gallery to see what others have done. Depending on the type of basing you decide on you’ll need to grab some of Onemonks standard bases or I’ve made up a plain base template as a layered PDF (30mb) which includes Onemonks basic textures. Additionally I’ve  included the raw shape png’s at the end of this post so you can overlay them on any texture you like from anyone, sorry no cut files yet.

First you’ll need to choose a base shape. This initially would seem easy to do and if you only game using one set of rules just use whatever they recommend. If however you jump around between rulesets/RPG’s/Wargamming it gets slightly more difficult to pick a shape. If your using one of the removable base types below you can just make different base sets for each rule sets you use although if you have 2-3 armies making all those bases can get tiring. For myself after much deliberation I settled on Octagons, there are several reasons why I choose Octagons:

  1. Most RPG’s don’t care what base’s you use but by some sort of weird default convention most stuff to be used for RPG’s ends up on round bases. Round bases do have their advantages in that you don’t snag base corners on things and they aren’t as easily damaged. Octagons provide a similar level of protection not quiet as good as a circle but very close.
  2. Most War games (fantasy) like you to rank your troops up into units and use movement trays, normally specifying a square base so troops and units fit tightly into a movement tray. Octagon bases can also be ranked up quiet effectively in movement trays.
  3. Some war gaming rules have the concept of facing and it can be quiet important which way your unit is facing. The facing rules can be based on a Hexagon or Octagon. By using the trusty Octagon you can cover facing very easily and disregard two sides if you need to very easily.
  4. There easy to cut out compared to circles 🙂 .

In the end pick the shape that works for you, for me that’s Octagons but if you want heart shaped bases go for your life :). With some of the below base types if you use black foam core you can save yourself a significant amount edging.

My Current Bases

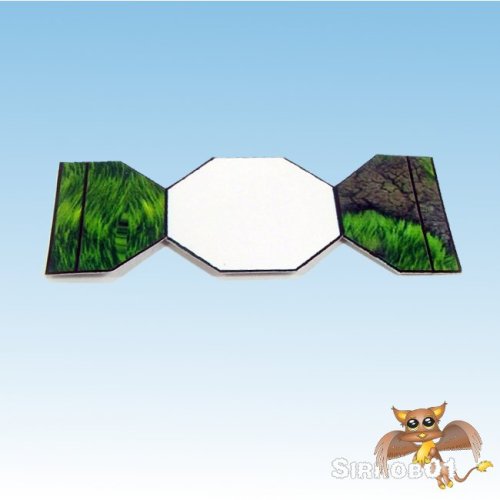
I’ll cover my current basing method first. I use a modification of the slotted Foam board base (see below) and something Afet posted about here. I bought a sheet of 2/3mm Depron, Depron is used in RC plane construction and is pretty much available everywhere (okay I know the US/UK and AUS can get hold of it very easily).

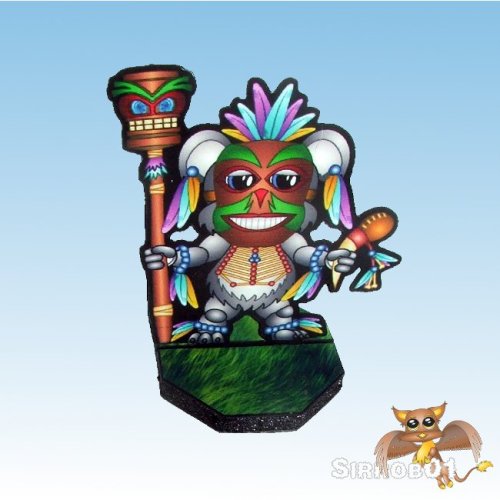
I find these bases are slightly thinner than a 5mm foam core base below and don’t look quiet so odd on the table next to regularly based metal mini’s but provide plenty of stability for the paper mini’s. The mini’s don’t slip out easily during game play and I can remove the mini’s to store them flat at the end of a game so they take up less space. It also gives the illusion of flat basing which I prefer with my miniatures. There are a couple of draw backs: It takes slightly longer to make each base than the stock foam block method. I have to shorten the black base tabs a little bit on each miniature which again uses up time. Eventually the bases take on a permanent bend and wont grip the miniature as well (this takes a lot of use). Below I’ve documented the process for making these bases:

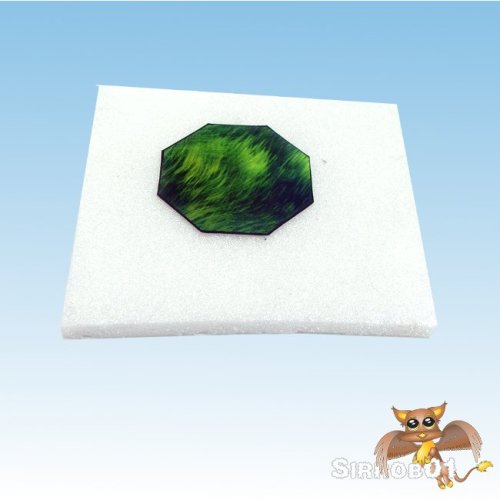
First up Print and Cutout a base of the required size.

Glue the above base to a piece of 2/3mm Depron/Foamboard

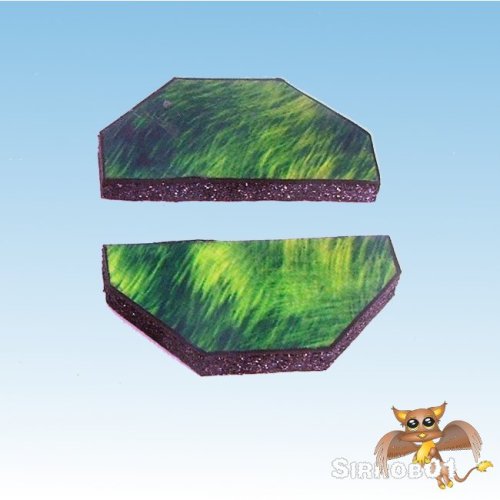
Cut around the hexagon and cut the base in half (or just off center if your going to rank troops) and colour all white edges to black using a thick black marker

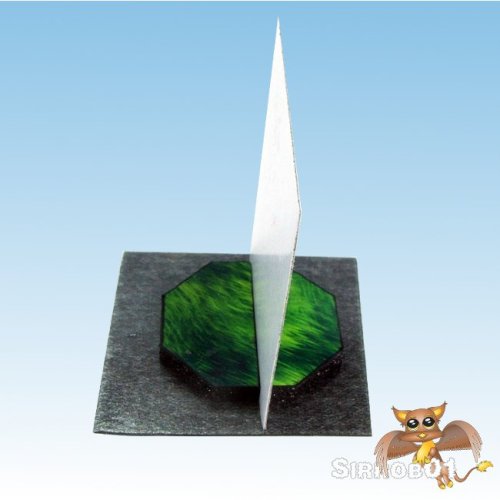
Stick the two halves back down onto some thin magnetic sheet ( I use the cheap fridge magnet stuff on ebay), Insert a single piece of card between the two halves as you stick them down to make a slight gap.

Trim the magnet to size and the base is ready to use.

When I make bases for larger paper miniatures I do tend to mount them on thicker bases as they look less out of scale.

Flat Slide Bases (Reivaj bases)

Full credit goes to Reivaj for coming up with this basing method. I’m torn at the moment between using my basing method above or slowly moving my miniatures across to this basing method.

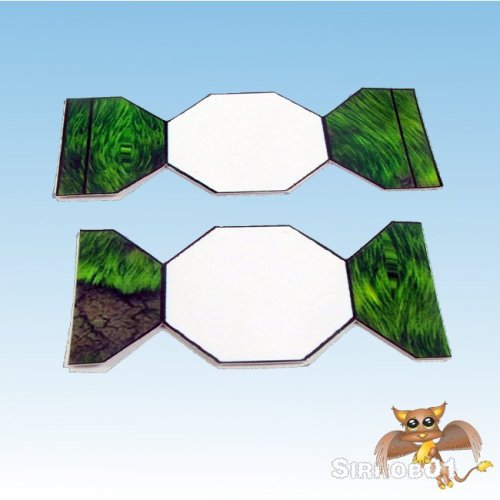
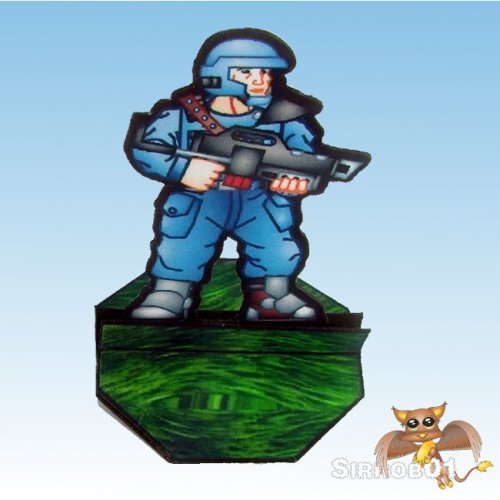
This basing method  provides you with a removable bases, the bases are not to thick so your mini’s don’t have a mounted to a plinth look, they are only slightly more difficult to make than my modified foam block bases above and the miniatures once mounted are near impossible to pull out of the base. They do however have a couple of draw backs: When you make your paper miniatures you have to be careful not to glue the black base tabs together so you can bend them outwards later on, sliding the miniatures into the bases can be a little fiddly and if your not careful you can damage the the base (bend it to much) or the miniature (burr over the tabs).

First up print and cut out a standard One Monk base of the required size.

Trim off the square end tabs as they are not required.

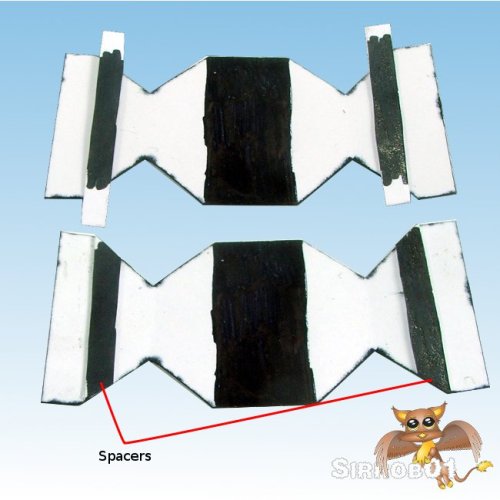
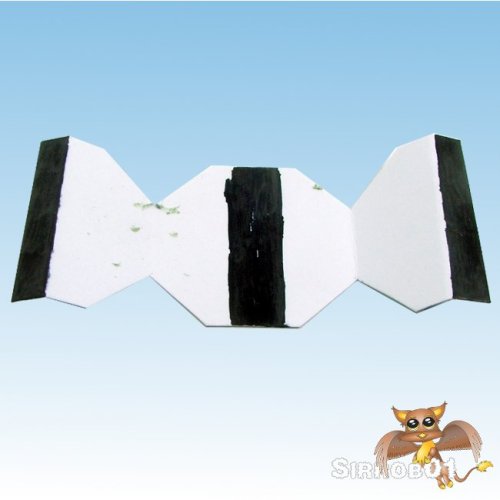
Flip over the base and glue some strips/pieces of cardboard inside the base (black spacers in the below image, I’ve been using doubled up 190GSM card to create the spacers), trim to size and edge.

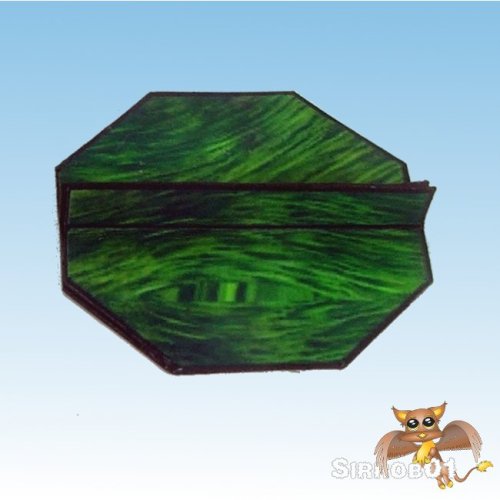
Fold over and glue the top to the bottom

When Gluing your miniatures up make sure you Don’t glue the black tabs as you need to bend those out left and right.

(You can strength the black tabs with a little sticky tape)

Base all finished. When sliding miniatures in and out bend the base upwards slightly.

As an addition I’ve been  sticking  a thin piece of magnetic sheet to the bottom of these bases to add a little extra weight/strength.


Slotted Foam Block Bases

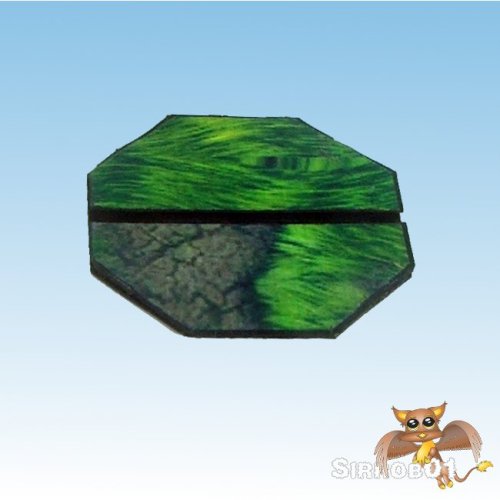
I’m not sure who came up with this basing method but I’ve seen several users on the cardboard warrior forums using this technique . The advantage of these bases is that they are very quick and easy to make. However they are not without their drawbacks. I have had some problems pushing miniatures into the base slots and removing them which can damage the miniatures base tab, if you use standard 5mm foam core for the bases they are also very chunky. I tend to only use these bases in a pinch eg I’ve run out and need to mount some more mini’s for a game I’ll quickly cut some squares  from black foam board and wont worry about adding a ground texture.

First up Print and Cutout a base of the required size. I tend to find with these bases I need one size bigger than I would normally use for the miniature.

Glue the above base to a piece of foam board

Trim the foam board back to the base shape and cut a groove. I use a small steel ruler to help work the groove slightly bigger.

The base is all finished and ready for use

Onemonk Standard Bases

These are the standard Onemonk bases you can download. There are over 50 pre-made bases and textures available in multiple manufacturers textures. These are easy and fairly quick to make. I have found overtime with use that the tab on the base that holds the miniatures slowly loses it’s grippyness, this tends to occur more quickly than with the other base types. You can fix this issue by simply using a short bobby pin or if you prefer permanently gluing your miniature into the base. This of course then removes some of the advantages of paper miniatures as you will no longer be able to store them flat. I’ve included how I assemble them below as it’s slightly different to the PDF guide located here.

First up print and cut out a standard One Monk base of the required size and score along the indicated score lines.

Flip the base over and using a black  marker blacken the end tabs and a strip down the middle of the base

Simply glue the top to the bottom and edge with a black marker

The base is now ready to use

Permanent Flat Bases

With all the options above I no longer use flat basing as a basing method. Although it looks good it removes one of the key benefits of paper miniatures for me and that’s the ability to store a lot of miniatures in a small space. Saying that it is impossible to remove a miniature from a base short of ripping it off so during gaming they are very durable.

First up Print and Cutout a base of the required size.

Glue the base to your preferred basing material and edge. I’ve used magnetic sheet, Matt board and plain cardboard in the past.

Simply cut the black tab off your miniature and glue it to the base using PVA or super glue

Going All Out

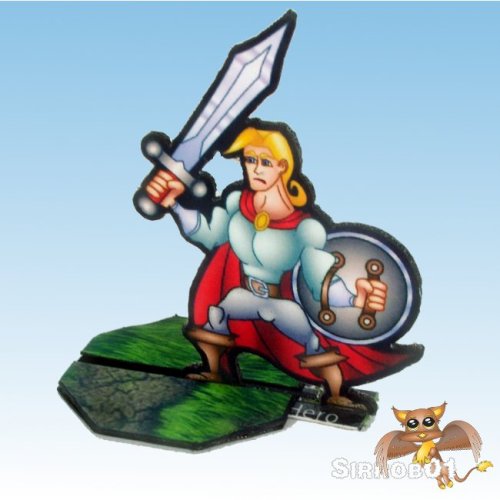
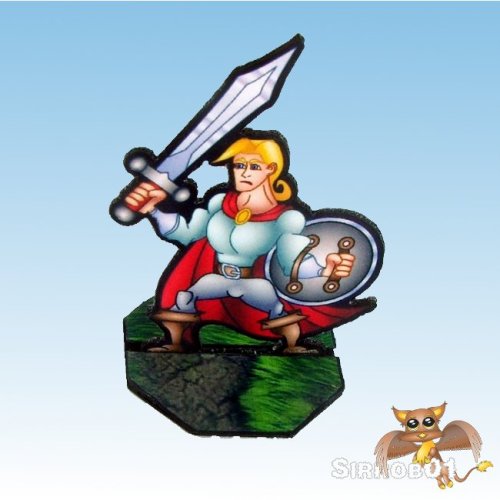
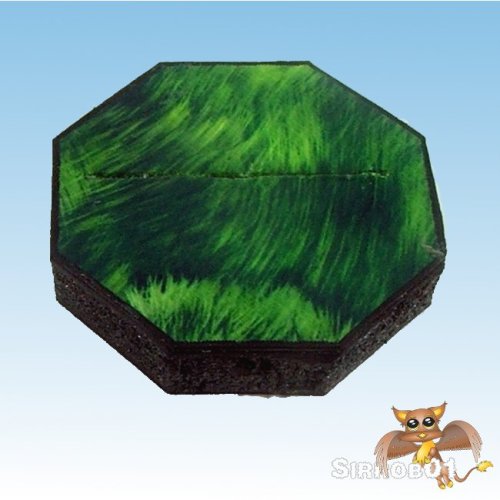
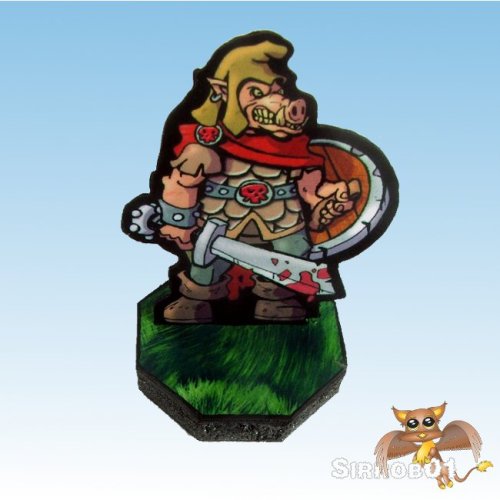
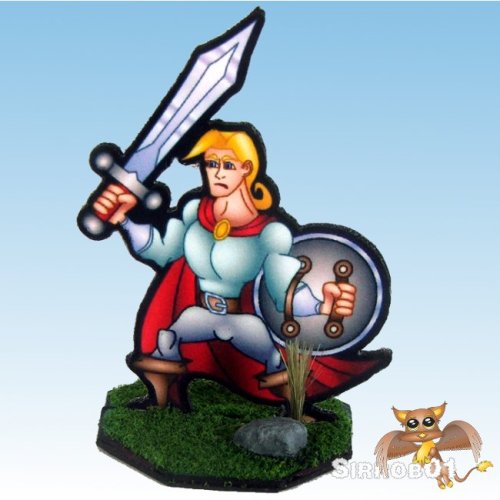
There are some really nice based paper skeleton miniatures across on the cardboard warrior forums, although not removable from the bases they look out standing. Using the above bases as a start there is no reason you can’t use more traditional basing materials to really make your miniatures and bases pop. Although fairly labour intensive to make for a whole army, for special miniatures like Hero’s or PC’s these bases really help to make special characters stand out on the table top. Below is one example I’ve assembled but you could use any of the hundreds of regular basing tutorials on the web to create unique looking bases (here, here, here and here).

Fancy Reivaj style base (sorry about the dark base in the photo)

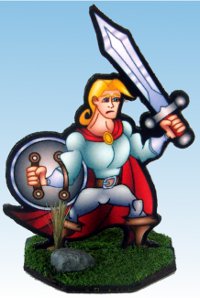
Here’s a picture of the five different base types side by side at the end of the day they will all look good on the table so pick the base that works best for yourself 🙂

Have fun gaming

Plain Base Shapes Layered PDF (30mb recommend right click save as)

Save the below and load in GIMP/Photoshop, they should be 2550×3300 pixels @ 300 pixels an inch

Circle Square Octagon Hexagon
15mm 15mm 15mm 15mm
20mm 20mm 20mm 20mm
25mm 25mm 25mm 25mm
30mm 30mm 30mm 30mm
40mm 40mm 40mm 40mm
50mm 50mm 50mm 50mm
Pill Rectangle Oct-Rectangle
15x30mm 15x30mm 15x30mm
20x40mm 20x40mm 20x40mm
25x50mm 25x50mm 25x50mm
25x75mm 25x75mm

Lego – Basing Minifigs for Wargaming

This is a bit of a tutorial/instructional post and I’m hoping informative and useful to others who may wish to use Lego minifigs for wargaming (Part2 here). One of the fundamental problems with using Lego minifgs for wargaming is they don’t have a base and if you try to just field them as is they end up falling over and getting knocked over a lot. Now you could try sticking them to radar dishes or flat square bases,  however you’ll then be adding height to your already slightly over-sized troopers or worse for most fantasy games they wont rank up well in movement trays and the bases are still very light. Now you could buy these from Minifig For Life:

However I had 3 issues with these, firstly at 0.65 euro’s (0.80 – 0.90 AUD) each it gets expensive fast. I estimated I needed 40-60 of them to start with so  I was  looking at close to $50AUD just for bases (not counting shipping).  Secondly they appear quiet small my estimate is 3/4 inch – 20mm round slightly under the 25mm standard round base and made of plastic so they might be to light and small to keep minifigs upright. Thirdly I had to order them from OS which of course means more $$$ for postage. I like to spend my money on paper or lego not postage, however if I lived in europe I probably would have jumped on them to save time and energy :).

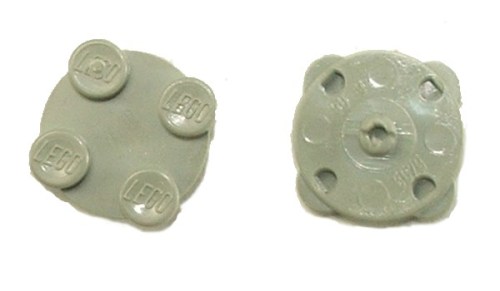
So I started to look around what could I use to make nice bases. Washes come in a nice 25mm size (25mm/1inch diameter) with a hole in the middle, are cheap (10-15c)  and heavy,  I thought I could simply bond a flat plate of lego over the hole (Yes, glue a piece of lego permanently to something hence destroying it forever, my lego protective gene had issues with this to, however my need was to great).  It was partial success the flat plate caused to much of an increase in height and looked very glued on. Hunting around  Bricklink I found the below part which is the top part of 2×2 turntable part no 3679, even better you can get them for around 1-3 cents each and they are very thin vertically:

Now the process of actually creating the bases is fairly simple. Grab 1 of your 25mm washers (1 inch), next grab 1 x 3679 (the above part), take a small dob of 2 part epoxy glue and place it around the outside of the inner washer hole (Araldite or some other brand, I find the 5min stuff best and use a cheap no-name brand from the $2 shop not like anyone’s ever going to see it):

Next place part number 3679 over the washer hole (center it relative to the outside edge of the washer) and push it into the glue, make sure the glue doesn’t bulge up higher or across the flat part of 3679 or your minifig’s will have problems being placed on the base:

Next I spray painted the whole lot black using a cheap enamel spray for durability (keep the coat thin). If you want for example desert bases change the enamel spray to a light brown or desert orange basically a colour that matches your planned finishing look (I prefer black with green :), personal choice):

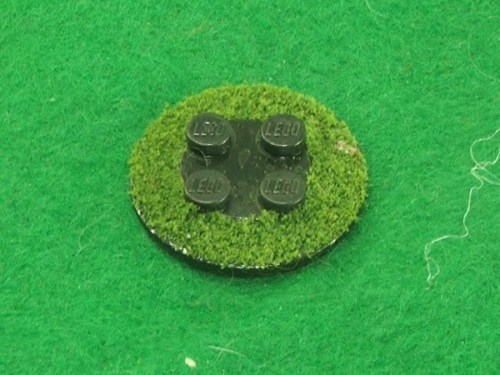
I quiet literally have heaps of flock laying around and just grabbed some green flock to use, but you could use sand or any other standard wargaming basing technique just make sure your Lego interface piece (3679) stays free of flock/sand and other bits of decoration:

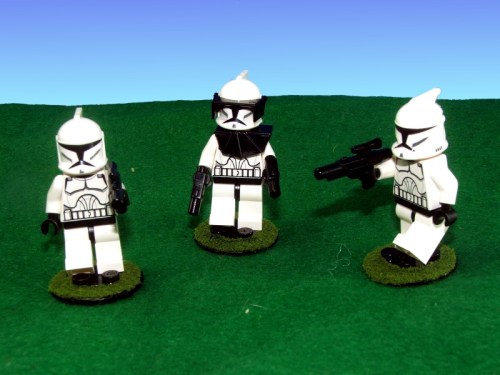
Now your lego armies soldiers can traverse the most difficult of Felt terrain without any problems:

Hopefully this information was slightly useful to someone 🙂


Project Status


WWII Project First Release

80%


B-tech Buildings Five

20%


Design Victorian era City

15%


Something Different

5%


Enter your email address to follow this blog and receive notifications of new posts by email.

Join 110 other subscribers

Content Released Under

Creative Commons License
This work is licensed under a Creative Commons Attribution-NonCommercial 3.0 Unported License.
Please Attribute to Sirrob01 with a link back to my blog

%d bloggers like this: