Kaleidoscope Kite – Built at Peter Travis Kite Workshop around 1990 – Part 1

Peter Travis
Used without permission

contact and I will remove

(Note: I wrote this post over about a month I have left in corrections new info as I found it.)

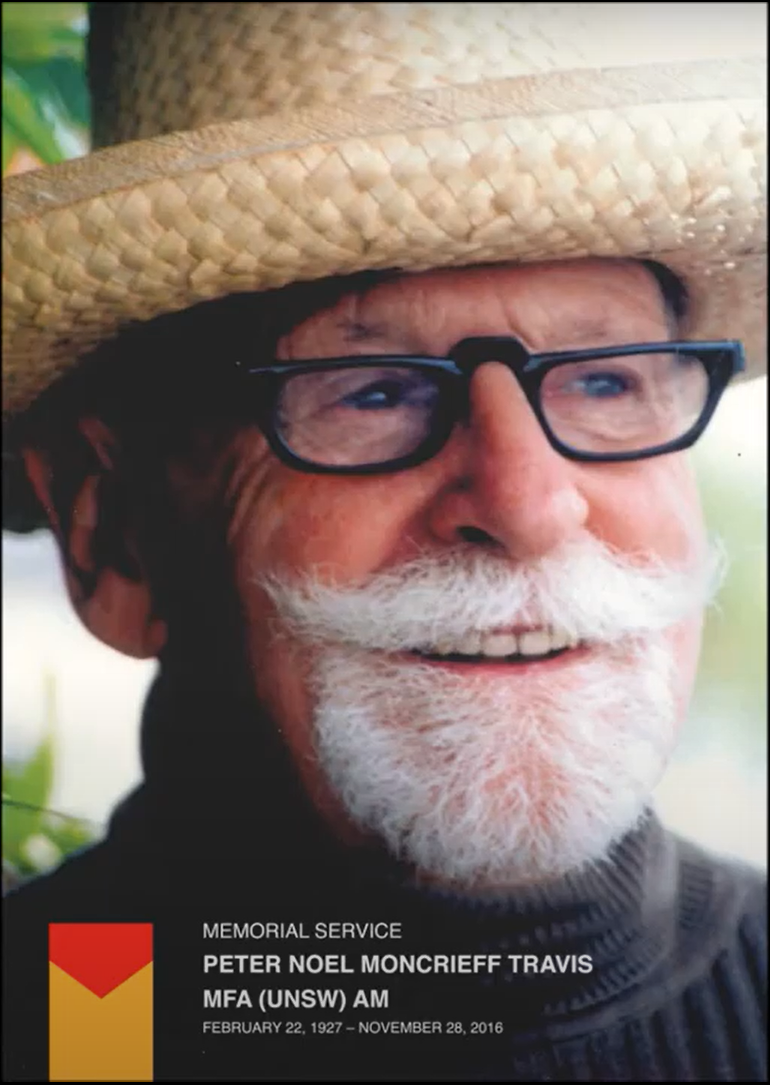
I recently discovered that Peter Travis AM passed away at the end of 2016. This reminded me of the Kite Workshop I did with him way back in about 1990 that he ran. I can’t be exactly sure on the date but I was in around Yr6 or Yr7 so 12 or 13. I was never sure how our art teacher Sue Graham managed to convince Peter to come all the way out to Coonabarabran in Rural NSW (about 600kms from Sydney were he lived) to run a Kite workshop for 4 students, but after watching Peter’s memorial linked above that appears to be part of who he was. I did the workshop with my Mum and we made one of Peter’s Family Kaleidoscope Kites over the two days and then flew it on the Sunday afternoon on the High School Oval. I suspect part of my desire to make this blog post is because all three have now passed away, Peter, Sue and my Mum and even 30+ years later I can still vividly recall parts of that workshop and the fun making that kite with my Mum.

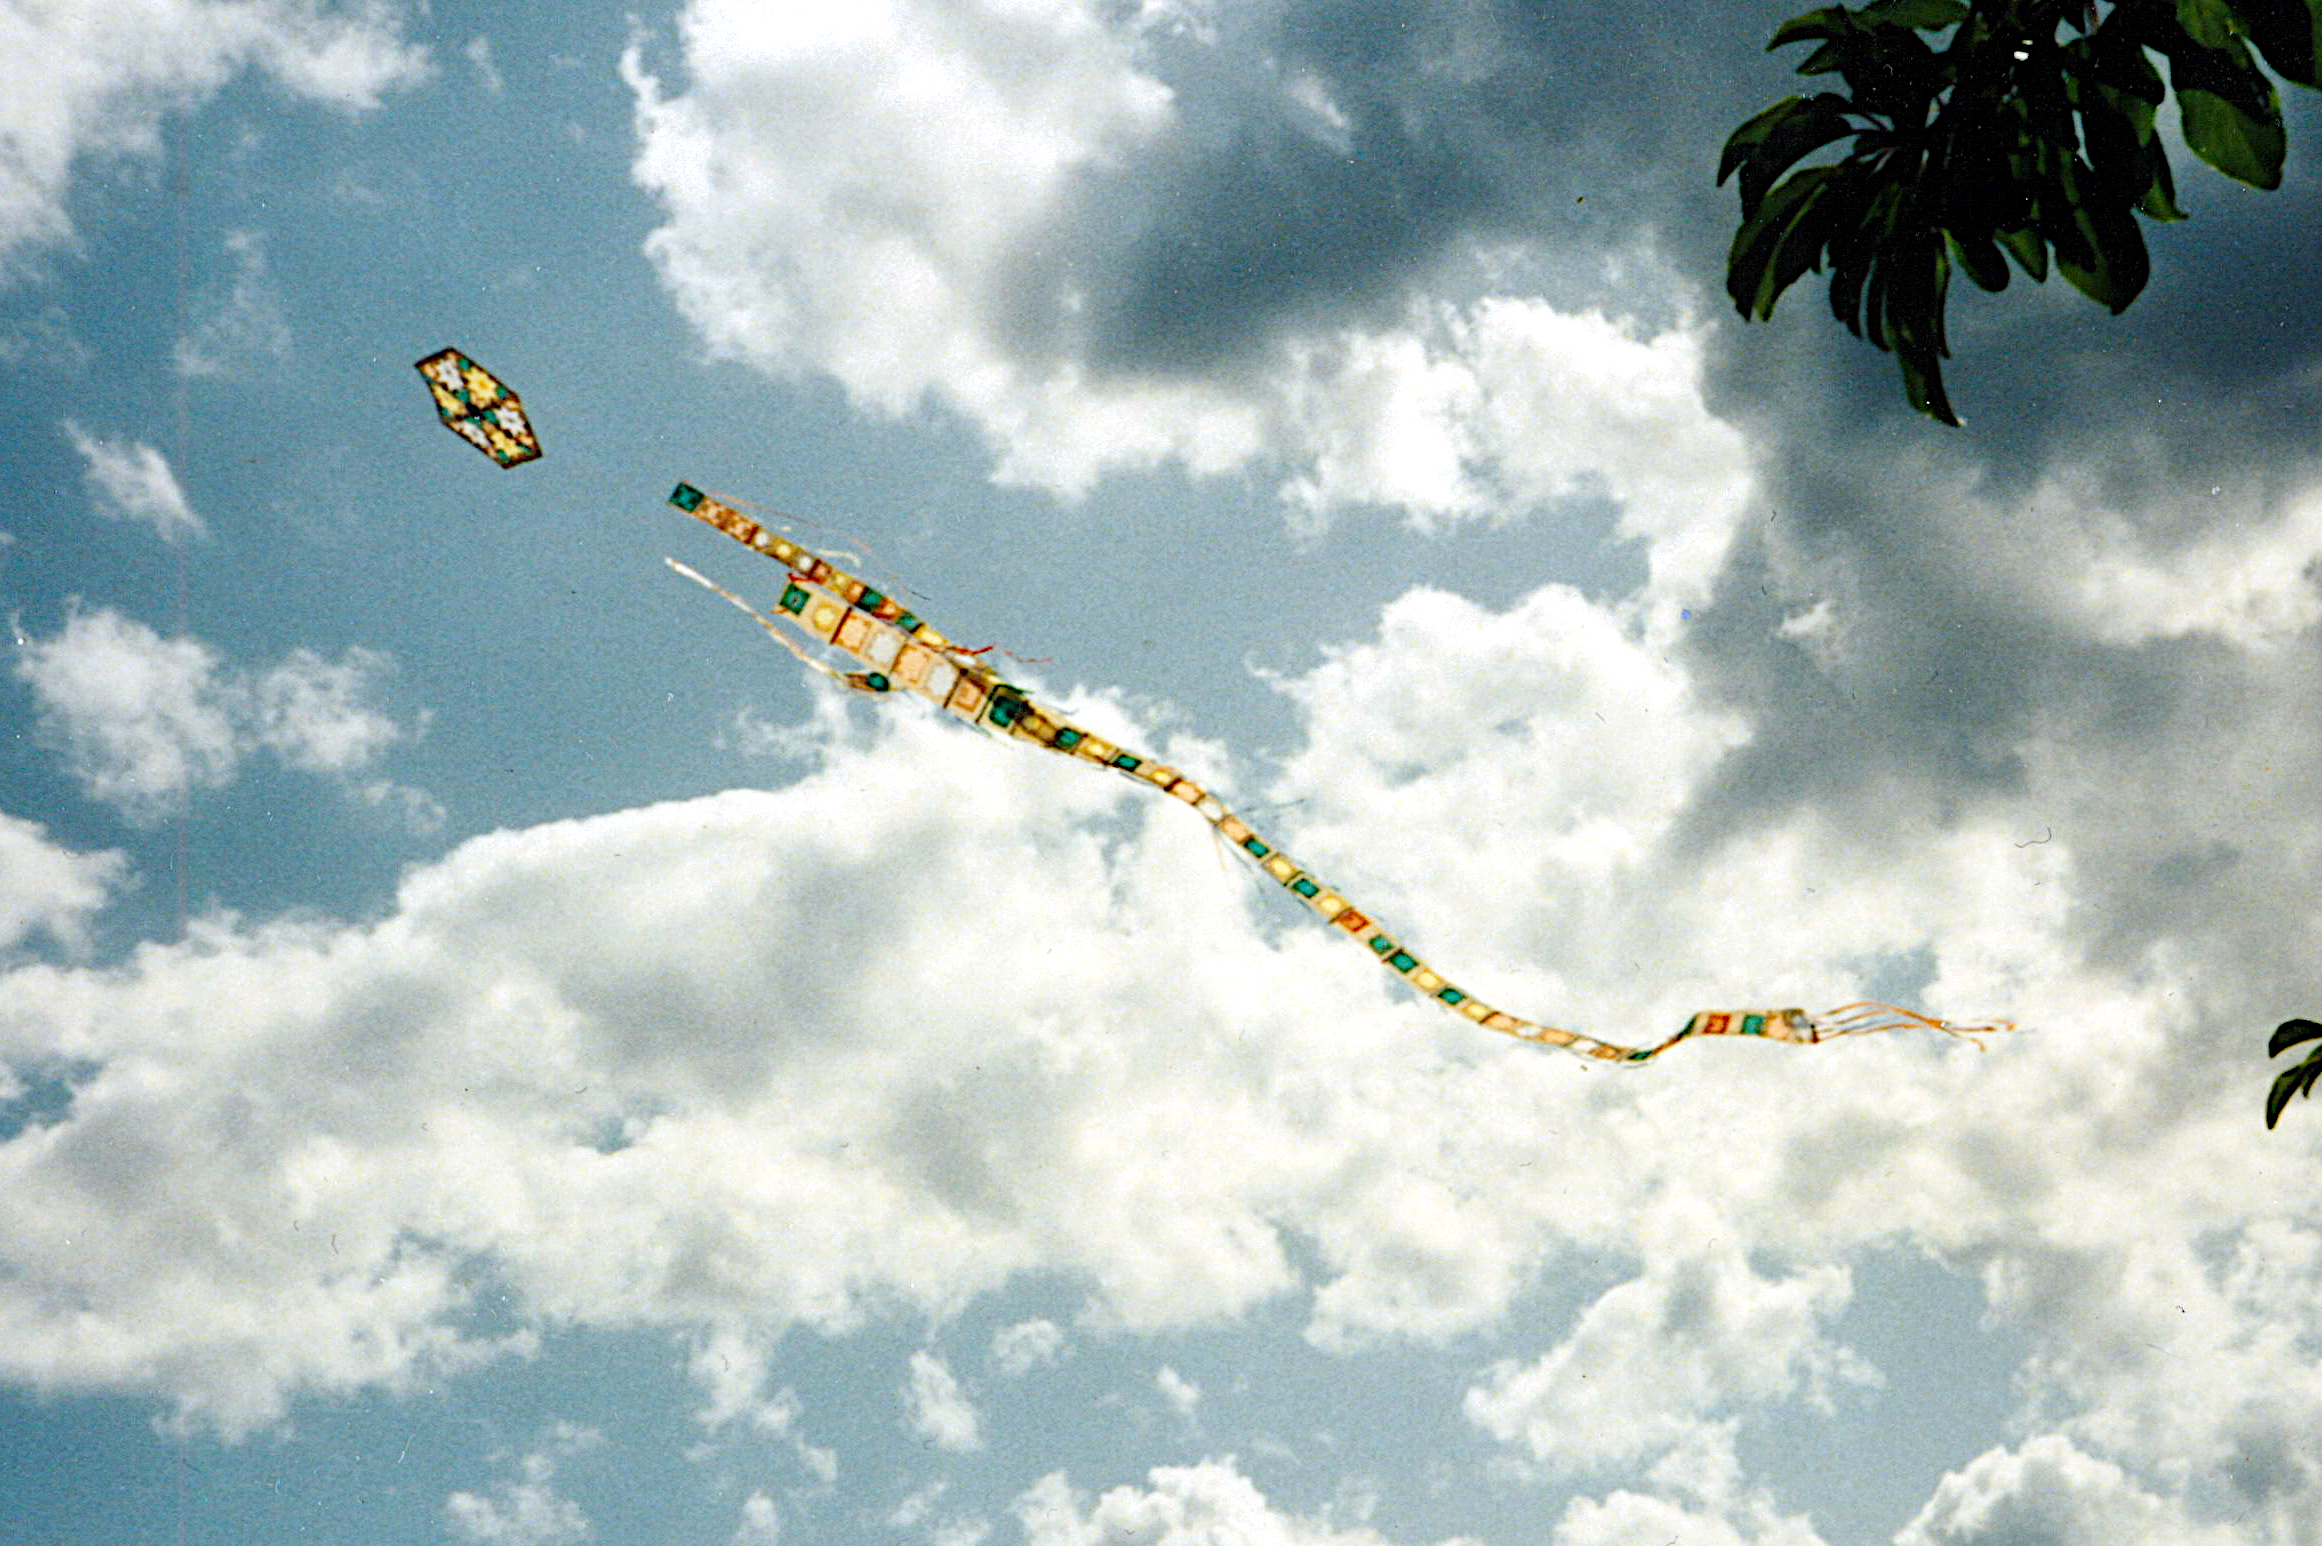
The above photograph appears to be the only photo I have left of my orginal kite (unfortunatly it was destroyed by a mouse plague in about 2005/6). The above photo is from around 1994/5 so about 4 years after I built the kite and I was flying it on my parents property. I did fly the kite a number of times normally with my brother, best friend and either one or both of my parents present. I didn’t fly it after about 2000 as I was concerned the tissue paper was becoming to fragile (Oddly I can remeber Peter mentioning that would happen and the idea was you would just replace it). I did try to google if anyone had ever posted pictures of one of Peters Kaleidoscope Kites but I was unable to locate any photographs and even information about the kites appears to be missing from the internet (see new info below * and **). It is mentioned in Peters memorial by Michael Richards which you can watch the relevant part yourself using this link. I can totally relate to the way Michael tells the story and its very much worth watching and listening too the above. The main point is that Peter considered the Kaleidoscope Kite a family kite, something you build togther and fly togther as a family or group. I can certainly say you need at least 2-3 people to help launch/land the Kite and 4th is definitly very handy. I can’t be 100% sure but I think the workshop Michael mentions was run in 2012 in Belconnen at the Arts Center (confirmed below see **). I believe this may actually be the last Kalidoscope Kite course Peter ran before passing away in 2016. Even those “young” kites would be 10 years old this year.

* More Internet digging I stumbled on this old magazine article which on page-15 image top right shows one of Peters Kalidescope Kites being prep’d for flight. I found this after building my 1/6 scale kite below. I’ve uploaded a copy of the picture belowIntrestingly is that a young Peter in the Picture? Thats one very neat build, the tails almost look fabric like and were are all those streamers attached? and no side streamers on the tails or not many an evolution in design between 1976 and 1990? I’d love to see a picture of 2012 build did Peter evolve the design further?

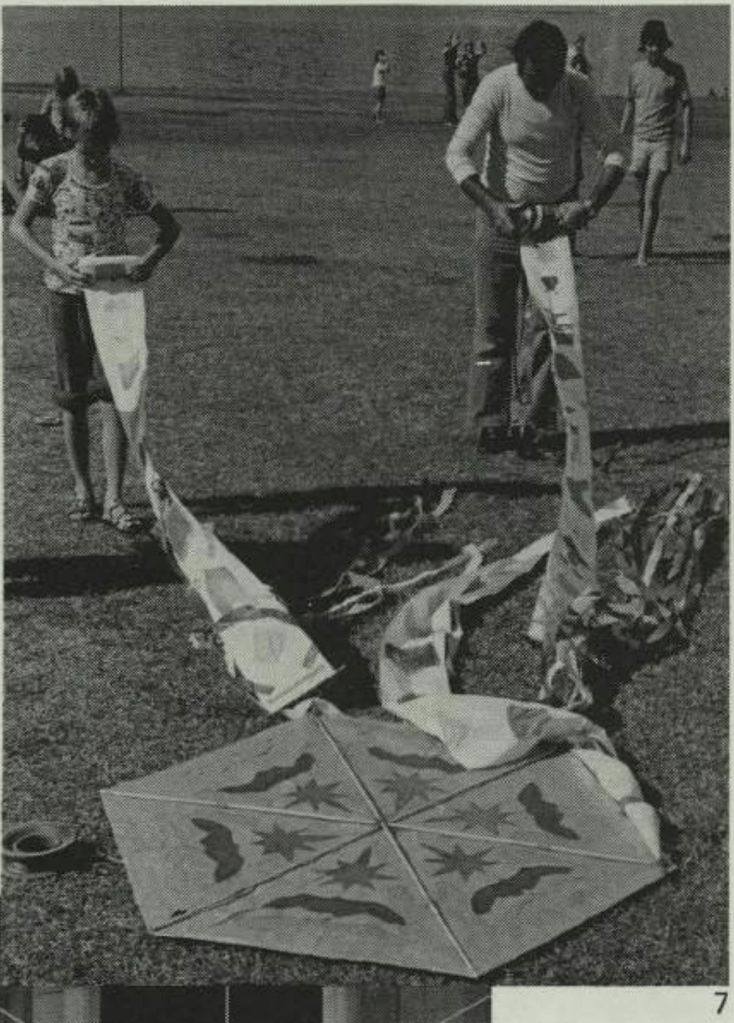
https://www.thetrust.org.au/pdf/trust-news/TN_1976_06_032.pdfPage 15 – Image 7
Kite flying preparation on the South bank of the Brisbane River
Image and Copyright trust-news

** I trawelled the Belconnen arts facebook photo page and located another few pictures of Kaleidoscope Kites:

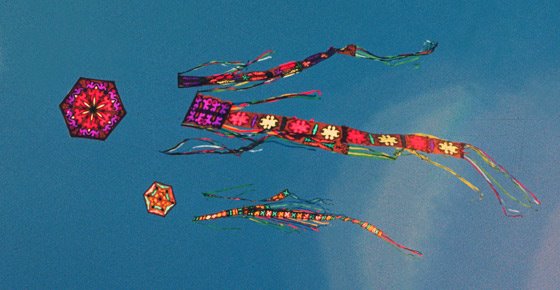
https://www.facebook.com/BelconnenArtsCentre/photos/397616020280444/
Something Intresting going on with the front ones tails, looks very nice.

Image and Copyright Belconnen Arts Center

https://www.facebook.com/BelconnenArtsCentre/photos/387903014585078/
Image and Copyright Belconnen Arts Center

Getting more than a little nostalgic I thought I might try rebuilding my Kite, something I planned to do in 2006 after the mice turned my original into nesting material. I remeber some parts of the workshop very vividly and even with the single photo above (four photos now) thought I could probably get close to replicating the kite. However I thought (hoped) maybe others have posted photos or info I can use to help me reconstruct my kite. As I mentioned above I googled and hunted through numerous kite forums and websites I can find very little info on Peters Kaleidoscope Kite design. If your reading this blog post and think I have one of those kites and you have pictures of your kite I’d encourage you to upload them somewhere – From the Eulogy Michael gave above, Peter did seem to value the Kaleidoscope Kite so I think it would be nice if a few more pictures of his kite could appear on the internet for others to view and learn about. It does make me more than a little sad that something that I have such fond memories about, that was created by such a vibrant, talented designer and looks stunning when flying is essentially missing from the great global knowledge pool ie the internet. I did manage to source a few very old pictures of Peters Kites that look like they could be what the Kaleidoscope Kite is based on:

I stumbled over some other intresting articles/links:

Adding approximate dimensions to my photo

Next I needed to write down what I could remeber and what I could work out from the above photo and believe it or not what Michael mentioned in his Eulogy piece about the Kite.

  • Head of the kite is 120cms/4 feet across at widest hexagon point – My memory the head lived behind my bedroom door for a decade and Michael in Eulogy.
  • Main Tail 10meters long x 30cm wide with dowels at top and bottom with coloured panels approximatly every 25cms. This I remebered as it was a whole roll of brown paper, the width I checked as closly as I could from the photo and it appears 30cm/1foot wide
  • 2 Smaller tails 15cms wide (half roll width) and about 5meters long again dowels at top and bottom – estimated from photo and I remeber cutting rolls of brown paper in half, well I actually remeber Peter cutting rolls of brown paper in half.
  • Constructed of plain brown paper, tissue paper, streamers, string, glue, 1 large piece of plastic, 4(maybe 5)x 120cm pine dowels at around 7-8mm and bunch of fishing swivel clips.
  • An extra note on string for kite construction we used the white cooking string (not brown jute, although I believe jute maybe stronger?) that you can buy fairly easily everywhere – so easy access for everyone even in fairly remote rural towns. However it’s breaking strain is only about 25lbs and I learnt the hardway it does degrade over time.
  • Long bridel(were you attach the string…sigh bridel not bridal) this is worth noting as I remeber Peter tieing all our bridels (he may have been standing on a chair to do it) and they were way out in front of the Kite when he had it laying flat on the ground. You can just see it on the above photo – I’ve marked it in blue
  • There was also some strange string setup on the back of the frame which I don’t remeber why just that the string went down to main tail and back up to middle. My guess is this went down from the middle, went around the outside then transitioned back up to the middle – I dont think this adds extra strength but maybe it does? It’s my best guess and after studying numerous Hexagon Kite designs I can find no other kites with this type of setup but I’m not even close to being an amature kite builder so please leave a comment if you know why or what this may do?

Next up I made a model at 1/6th scale of the kite (easier and cheaper to work things out, note my tails are closer to 1/7th scale long and 1/5th wide so a bit short and wide). I tried really hard to remeber how Peter got us to fold up the brown paper to make the big hexagon as I was fairly sure we did that in one step. Unfortunatly best I could work out is a two step process. It also helped to give me an idea on how much overlap to leave on the edges (I had vague recollections of 2-3cms). How to cut the pattern on the main surface and importantly which way around to mount the spars and tie them. I decided on middle vertical spar closest to brown paper as this gives the whole kite very slight dihedral towards the edges which should help with stability (apparently that happens in kites as well as RC aircraft something I’m more familiar with)….I thought from memory it was the other way up but that appears to make no aerodynamic sense. The old pic I uncovered above clearly shows vertical spar up against the brown paper so score one for aerodynamic logic, minus one for dodgy human memory.

Approximate 1/6th Scale Kalidescope Kite – Small scale so no curves in cutouts
Right and Left tails are out of alignment lucky no flying for this Kite
I’m placing the above photo in the Public Domain – CC0

Some quick thoughts from the scale build, more so I don’t forget later as well.

  • Leave lots of string when finished tieing middle knot and get it in the correct place ie centered
  • Dont forget to re-inforce center of brown paper before glueing to the frame
  • Unsure about the dowels at the bottom of the tails these may have only been the width of the kite tail not protrude – I did main tail protruding and it just looks wrong when my brain compares it to my memory, I did the two small tails as dowel at width and I’m not convinced now there was a dowel at the bottom at all. New old photo is not helping resolve this either.
  • Easier at least at 1/6 scale to attach bridel and tail strings before glueing on brown paper. Need to research bridel positioning a little more my small bridel seems out of place/wrong angle.
  • Cover with plastic before tieing bridel.
  • Main tail is attached further back from the head than side tails – est around the 2meter mark
  • On 1/6th scale I forgot the strings that were there to tie the tails up securely for storage.
  • 60/40 (PVA/Water) – watered down PVA glue worked best for gluing tissue paper panels.
  • I remebered Peter saying this as I was gluing tissue paper – don’t worry to much about small wrinkles or untidy overhangs around cutouts no-one will see it when your kite is 30-50 meters up.
  • Did we really glue the tissue paper on the front of the head of the kite or is my memory faulty?…More research on other kites – I think we did do it after glueing paper hexagon to frame and my best guess is less risk of damaging tissue paper panels during gluing it to the frame. Plus if the fold over was to wide and protruded into cutout much easier to trim with no tissue paper in the way. Also we were 11-13 yr olds after all :). New old photo clearly shows tissue paper front side – plus one for dodgy memory.
  • Those tails are a lot of cutouts, I’ll be honest I don’t remeber cutting out that many panels I have the impression my Mum may have done the body of the work on those – Thanks Mum.
  • Building a 1/6th scale of the Kite is in someways as hard if not harder in some spots than building a full size one.

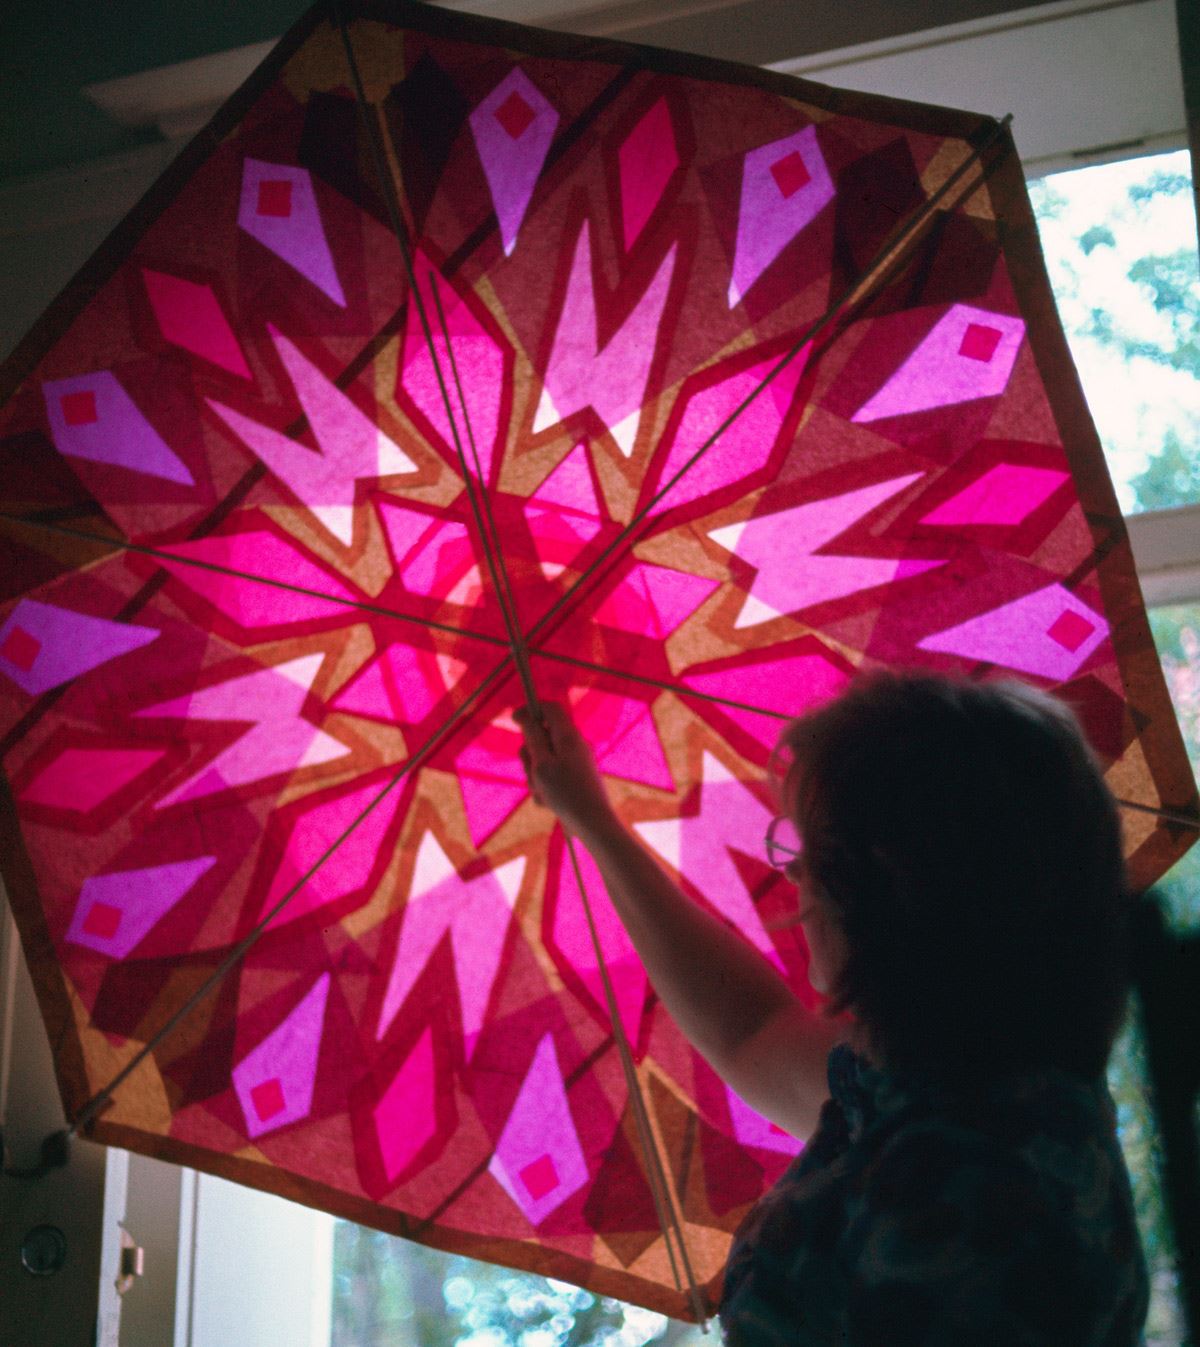
I did have a play around in Inkscape with some color ideas etc for designs mostly just for fun, again drawn to approximate scale – I have adjusted middle tail location to about were I think it should be.

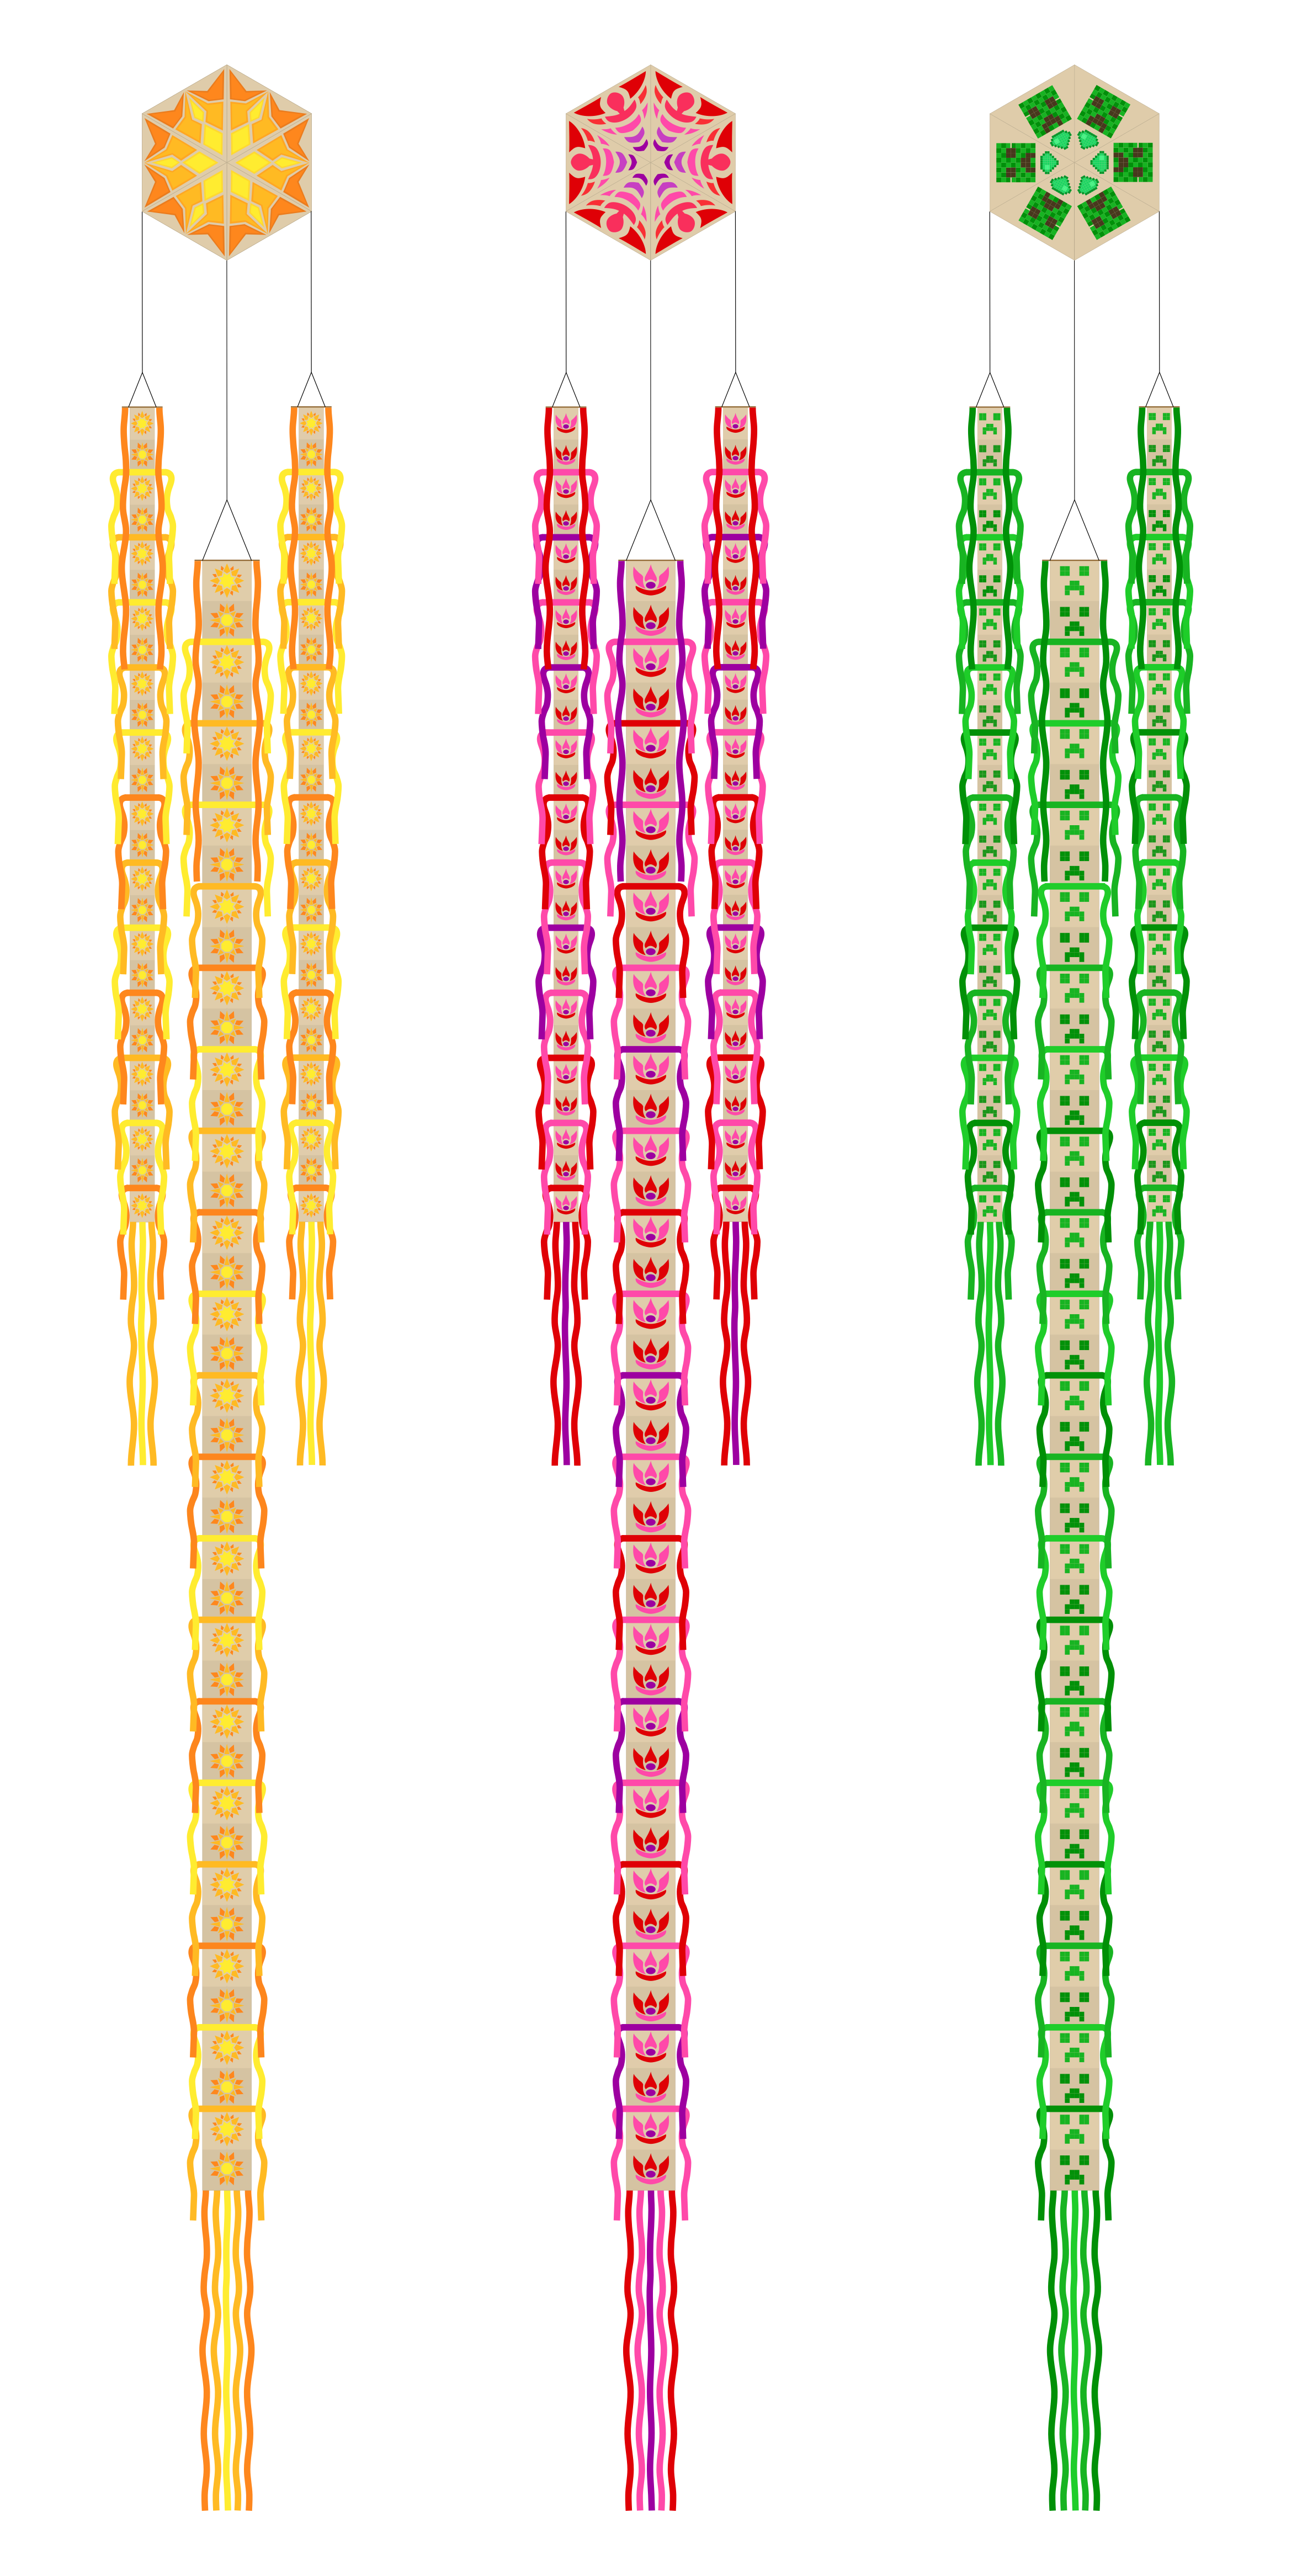
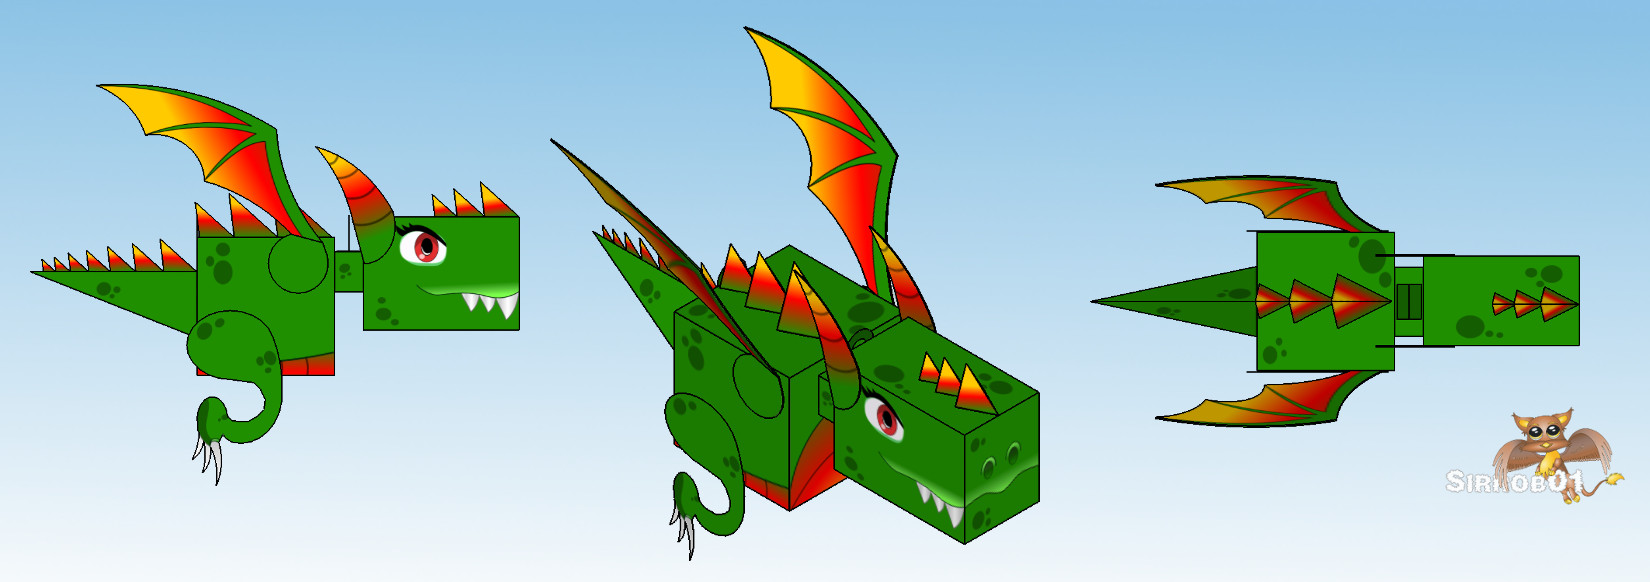
Left Star/Sun Design, Middle Flower/Web Design, Right Minecraft Creeper
Above Image – Public Domain – CC0

I like the pattern on the yellow/orange design but I’m not sure on color choice I seem to recall yellow is not the best color to use with tissue paper although on the image above it looks great. I did the yellow design in memory of my Mum I know she would have liked the Star theme. The middle red/purple/pink one has great colors but I’m not so much liking the patterns, I’ll play around with that further. Lastly the Creeper kite I just did for fun to show a more contemporary item that kids tend to love on Peters design. The layered green/pixel pattern on the head can be achieved by layering on multiple pieces of tissue paper, yes it would be fiddly. The eye’s and mouth of the creeper on the head I intended to be left as brown paper but then coloured in black. I more did it as a way to potentially show any kids/children who maybe intrested that any design is possible just need to use your imagination :).

I’ll leave this blog post here as it’s getting very long. I’ll do a Part 2 which will detail full size build process and hopefully a few photos and maybe a video of my new kite flying (This will take some time). I also plan on putting together some detailed pdf instructions which anyone can then use to recreate their own Kaleidoscope Kite hopefully with there family/children or maybe as a class/school/art project/topic. We’ll see how I go, still lots to figure out even after building a scale model. I may try reaching out to Michael and see if he can help or provide any information.

Someone mentioned your name today, took me down memory lane, to a time very much younger, a time more pure, more sane.

– Adiela Akoo

Miniature Painting – 3d Printed Heroquest Zombie

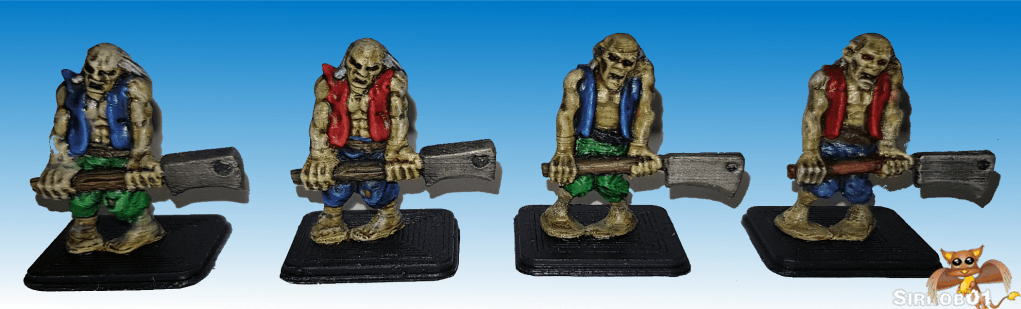
So to finish up the undead group I needed to add some Zombies. I did something a little different this time as I couldn’t find an alternate Zombie pose I liked (well rather I found it after I’d already decided to do a comparison). So I found a Zombie resculpt that had been done by fabbio84 that is in the same pose. So what I did was printed two of the scanned Zombies and then printed two of Fabbio84’s Zombies to show a contrast between the quality you get when printing a digital sculpt vs a very high res scan. For those after an alternate sculpt for Zombies try this one from DungeonWorks. I’ve included all the stl files at the end of this post just in case they vanish from Thingiverse.

Thingiverse 3d Render – Left Rescultp, Right Orginal Scanned

From the render above hopefully it is easy to see how much cleaner and crisp the resculpt looks, as I found this does have flow on’s to printing. I did scale both these a little, so the fixed scanned Zombie I scaled down to 90% this makes it a little bigger than the normal zombies but better sized against the rest of the HQ minifigs. The resculpt I scaled down to 91% which made him about the same height as the scaled down normal zombie. In both cases I turned off “preferences>>configure cura>>Automatically drop models to the build plate”. This was so that I could sink the bases below the buildplate and print them baseless. For those intrested that means once scaled for the scanned zombie a position of Z = -2.61 and for the resculpt a Z = -3.15.

Left Resculpt, Right Scan

These were printed on the same printer using the same pla and the same cura profile. So the quality difference is purely in the sculpt vs scan. In the picture above which shows the painted resculpt vs the scanned zombie. It’s pretty clear that:

  • Overall the detail on the resculpt is much crisper and not as soft.
  • On the resculpt my printer even managed small details like the belt, although teeth are still lost as is the belt buckle.
  • The feet on both are pretty much mush, however on the resulpt I can just about make out toes. Don’t know why my printer seems to hate zombie feet…they must smell bad

On the painting front I found painting the resculpt much easier as I wasn’t guessing about detail in a few places and trying to bring it back using different paint colors.

Left – Good Pla, Right Not so Good Pla

I was going to do a comparison as well between cheap pla vs more expensive pla. Unfortunatly once cleaned and painted it’s really hard to tell the difference and even undercoated its tough to spot. I can say even if the photo dosen’t show the quality differences; Straight off the printer the better pla requires less cleaning and is also less temperamental/more reliable when printing. Additionally I also find the better pla seems to show fine detail just a hair better.

4 boys shambling off to a party

So short summary would be use the best quality 3d sculpt you can with the best quality pla for your printer. Even on a FDM printer you can see surprising improvements in quality with a more crisp/detailed sculpt. Next up will be 4 female versions of the HQ hero’s.

Skin (Less green)
1. Necrotic Flesh (Army P)
2. Green Tone (Army P)
3. Seraphim Sepia (Citadel)
4. Tanned Highlight (Reaper) (Dry Brush)
Hair
1. Ulthuan Grey (Citadel)
2. Nulan Oil
3. Ulthuan Grey (Citadel) Dry Brush


Red Shirt
1. Pure Red (Army P)
2. Carroburg Crimson (Citadel)
3. Mars Red (Army P) (Blend Highlight)
4. Wild Rider Red (Citadel) (Blend Highlight
Blue Trousers
1. Altdorf Gaurd Blue (Citadel)
2. Nulan Oil (Citadel)
3. Altdorf Gaurd Blue (Citadel)(Highlight/Dry Brush)


Blue Shirt
1. Altdorf Gaurd Blue (Citadel)
2. Nulan Oil (Citadel)
3. Altdorf Gaurd Blue (Citadel) (Blend Highlight)
4. Lothern Blue (Citadel) (Blend Highlight)
Green Trousers
1. Mouldy Clothes (Army P)
2. Nulan oil 1 drop,
Angel Green 2 drops –
water down to wash
3. Mouldy Clothes (Army P) (Highlight/Dry Brush)
Wood
1. Earth brown (Reaper)
2. Nulan Oil
3. Oiled Leather (Reaper)

Metal
1.Leadbelcher (Citadel)
2. Nulan Oil (Citadel)
3. Ironbreaker (Citadel) (Dry brush)
4. Honed Steel sword edge (Citadel) (Dry brush)
Paint Colours Used

All the below are under the Liscences specified by their creators, check inside the Zip files.

Alternate Zombie pose by DungeonWorks  Note: I havent printed this

A painting requires a little mystery, some vagueness, and some fantasy. When you always make your meaning perfectly plain you end up boring people.”

– Edgar Degas

Miniature Painting – 3d printed Heroquest Alternate Mummy

HQ_mummy_paint_one
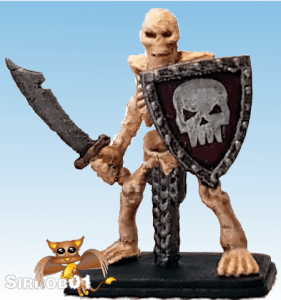
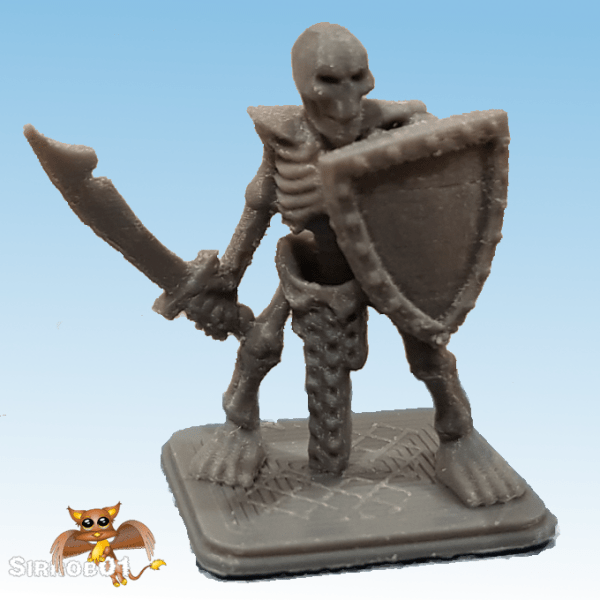
To join my little band of alternate HQ skeletons I dug up some alternate mummies to go along with them on Thingiverse.  I really like this alternate mummy by Mangforge it has a much more shambling moving look to it than the orginal HQ mummy. I guess you would say a much more classic mummy pose. As this is also under a standard cc by 4.0 licence I’ve attached a copy of the mummy stl at the bottom of this post just in case the thingiverse version becomes unavailable.


Picture of Heroquest Mummy Render from thingiverse

Thingiverse 3d Render

I printed 4 copies of the above mummy sculpt. I think because of the bandaged nature of mummies in general the layer lines are even less noticable than on the skeletons or the zombies to come. However I did encounter some strange artifacts along the tops of the mummies arms. I’m not sure why but it could still be an overextrusion issue, I’m still contiuing to tweak my cura profile.

HQ_mummy_print

3d print PLA+, 0.04mm nozzle, 0.08 layers with tree supports, nil cleanup and undercoated

I decided to upload a picy of the worst print, pre-cleanup and after I’d undercoated it. I love seeing the awesome prints people get from FDM machines but it’s really hard to find questionable prints or prints pre-cleanup and after undercoat. The undercoat really helps show the defects:

  • Shoulder layer lines – cause unknown the other 3 didnt recieve that defect and printed from the exact same cura file (it happens) – minor cleanup with a file fixes those in few seconds.
  • Little plastic tags hanging off – cause stringing – rub over with super fine sandpaper or scrub with old toothbrush and tooth paste (toothpaste is a very mild abrasive).
  • Micro blobs or pieces of plastic – cause suspect stringing – as with above for cleanup.

I did print him seperate from the base and glued him on afterwards. Unfortunatly when I was painting I lost track of which one of the four he was, however Im fairly sure the little picture of the painted mummy at the top of the article is him. So you can see they cleanup and paint to tabletop quality fine even with what appear to be terrible defects.

HQ_mummy_paint

The awesome shamblesome

Painting I chose a fairly standard and quick scheme, I needed these 4 finished fast as the skeletons took longer than I expected. The Zombies are likewise taking a bit to long as I’m having trouble getting the skin tone correct. I’m resonably happy with how they came out although there skin is a little too green for my liking and they certainly look a bit rougher than the skeletons. Although given I spent less than half the time painting these as the skeletons the roughness is to be expected.

The Bandages

  • Bleached Bone (Citadel) base
  • Wash Seraphim Sepia (Citadel)
  • Dry brush Bleached Bone
  • Dry brush 50% Bleached Bone and 50% White

The Skin

  • Necrotic Flesh (Army Painter)
  • Green Tone (Army Painter)

I’ve also included the simple heroquest base by enfenix which is in this thingiverse file pack, the bases is under CC BY-NC-SA 4.0 liscence

STL files: Walking+mummy

STL files base: Simple+HeroQuest+Base

Miniature Painting – 3d printed Heroquest Alternate Skeletons

Skeleton_toprightI caved and bought a 3d printer when it was on sale about 6 months ago. It’s one of the ones that makes the best budget lists fairly regularly the ender3 pro (check that link for info). I’ve spent a bit of time trying tune it and improve print qualities and have fairly consistent results using a 0.4mm brass nozzle with a 0.08mm layer height now. Checking over on thingiverse I stumbled on this cool alternate model for the skeleton for Heroquest created by Tezca . As this is under a standard cc by 4.0 licence I’ve attached a copy of the stl at the bottom of this post just in case the thingiverse version becomes unavailable.

Skeleton_render

Thingiverse 3d Render

As carefully as I could I printed out 4 copies of this model, however as my printer is an FDM 3d printer the quality does suffer. A resin printer would produce a far superior print. However having resin, isopropyl alcohol and UV lamps laying around my living room is not really an option so I do the best I can at the moment with my FDM printer. The quality I’ve managed to get from my printer in 6 months as I’ve been learning how to use it has improved significantly and I know it’s capable of much better quality with further tweaks and improvements.

Skeleton_print

3d print PLA+, 0.04mm nozzle and 0.08 layers with tree supports increased 8% in size (I recommend going 6% bigger)

The above picture of one of the skeletons is after I have done cleanup on the print. I spent about 5-10mins doing cleanup of stringy bits and odd lumps with sand paper, small file and clippers. Hopefully the above picture is clear enough so anyone intrested can clearly see the quality issues. ie a bit munged up at the bottom of the shield, the sword has a bit of a zigzag pattern and theres quality loss across the face (teeth and nose) to point out a few of the defects. I printed these four attached to there bases when I should have seperated them as the tree supports left a bit of a grid pattern on the base, live and learn.

skeleton_painted

The four standing skeletons of the…um…..hmmm

Before painting I added the little skull motif to there shields. I did this old school by printing a design I made up to paper, cutting it out and then glueing it on the shields and painting. If your intrested in the skull it is attached at the end (Released into Public Domain). I went with a fairly standard Skeleton painting scheme:

The Boney Bits

  • Bleached Bone (Citadel) base (yes I have an antique hex pot thats still good)
  • Wash Earth Brown (Reaper)
  • Dry brush Bleached Bone
  • Dry brush 50% Bleached Bone and 50% White

The Armoury Bits

  • Leadbelcher (Citadel)
  • Nulan Oil Wash (Citadel)
  • Dry brush Leadbelcher (Citadel)
  • Dry brush Ironbreaker (Citadel)
  • Dry brush Honed Steel sword edge (Citadel)

The Shields

  • Vampire Red (Army Painter)
  • Skull Ulthuan Grey (Citadel)
  • Nulan Oil Wash (Citadel)
  • Dry brush skull with Ulthuan Grey

The bases

  • Basic black

After all that quick spray with citadel matt clear to protect them and done. I’m pretty happy with how they have come out. They are far from perfect but they dont look out of place next to regular Heroquest Scythe Skeletons when placed side by side.

“If you are losing your leisure, look out! — It may be you are losing your soul.”
 Virginia Woolf

ZIP STL Files:- Heroquest+Skeleton

ZIP SVG Skull:- Skeleton_Skull_Shield

IKEA – IVAR Shelf

dscn0565
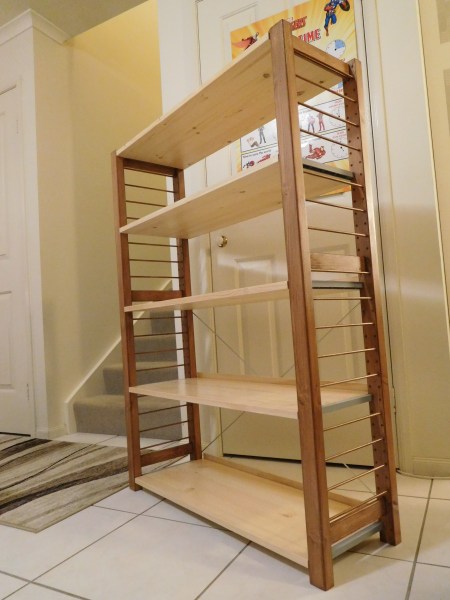
Been awhile since my last post, to say my personal life has been very up and down over the past 2 years would be an understatement. However I’ve learnt a lot about myself  over the time as well as facing and overcome many challenges. I hope to be posting more projects back to my blog over the coming months. First up an IVAR shelf I assembled and customized. Full credit to Ikea Hackers for the side bar dowel idea.

I’m very happy with how the shelves have turned out and it was certainly worth the extra effort to stain and varnish the unit and make a few modifications.

First up I settled on an approximate shelf spacing of 30cm (12inchs). On the 124cm tall sides this equated to needing five shelves and one cross brace. When I selected my shelves I carefully picked out shelves that had no joins or filled knots so they would look as nice as possible when finished. I sanded the entire frame down using 180 followed by 280 grit sand paper. Unfortunately I should have hit the side bars harder as there are still some electric plane marks from the original manufacturing process visible.

mine-and-stock

My finished IVAR compared to the stock version

I screwed and glued some thin pine timber to the back edge of four of the shelves (not the top shelf) to create a lip at the back of each shelf. This should prevent items from being pushed off the back of the shelf and sliding down behind the unit. Very annoying when it comes time to fish the items that have fallen down behind the shelf back out.

dscn0566

I followed the example on the Ikea Hackers page and inserted dowels down each side. This really helped finish off the shelf unit and will prevent items from toppling or being pushed off the shelves sideways.

I finished the whole unit using Cabots waterbased cabothane, the sides used the stain and varnish in one product tinted to Suburbia. I chose Suburbia as I wanted a lighter brown rather than a red brown. The Stain and Varnish product took a little getting used to, best tip I can say is apply it in very thin coats with not much product on your brush.

Assembly was very easy with the shelves popping into place and then screw the back metal brace in place which firms the whole unit up. I’m very happy with how the shelves look and plan to make a second taller set in the near future. They now go to there permanent home for now in a cupboard for food and other item storage. The additional stain, varnish and timber came to about an extra $60 AUD on top of the shelf costs.

dscn0564

Woodworking gives me something useful to do when I’m feeling puny and it takes my mind off my troubles. ~ Gary McCarthy

Aircraft 2.5d – Spitfire, Hurricane, Bf109 and Bf110

supermarine spitfire thumbFinished my first batch of 2.5d WWII paper aircraft for wargaming. I’ve started with the four main aircraft used in the Battle of Britian, well the fighter aircraft. For the Allies there’s the Hawker Hurricane and Supermarine Spitfire, for the Axis we have the Messerschmitt Bf109 and Messerschmitt Bf110. I’ve been working on these off and on since December 2013 but only recently finalized a design which was sturdy enough for gaming and allowed me to remove the aircraft models from the bases and stands for easy storage.

Unassembled


I designed these as I wanted something a little simplier to build than 1:200 scaled fiddlersgreen aircraft. I made a few of their models shrunk down but they took me on average 2-3hours to assemble a single plane, so I started work on my 2.5d simple designs. I based most of my models on freely available 3 drawings which I turned into vectors using Inkscape. In the case of Bf110 Péter Kaboldy  had already done this and released the 3-views under CC license so I used that as a starting point for the Bf110. About the only fiddly part to assemble on each aircraft is the horizontal stabs, I recommend using superglue to fix them in place. Full credit goes to Reivaj for the basing technique, which I’ve also reused on the underside of the aircraft so they can slipped on and off the stands.

Hawker Hurricane 2_5d paper aircraft

Hawker Hurricane

Supermarine Spitfire 2_5d paper aircraft

Supermarine Spitfire

Messerschmitt Bf 110 2_5d paper aircraft

Messerschmitt Bf 110

Messerschmitt Bf 109 2_5d paper aircraft

Messerschmitt Bf 109

There’s only one colour scheme for each aircraft and I tried to pick the colour scheme which was most likely to have been used during the Battle of Britian. I have included a high contrast version which I think looks better on the table and a more accurate historic version. I’ve included four different types of 25mm hex bases; Ocean, Coast, Farmland and City. The stands/posts I have completed three different types; plain blue, numbered 1-4 and numbered 1-6. The numbered stands are designed to fit in with Wings of War/Glory and the easiest way to track the current flight level is to simply use a paperclip.

wings of war_glory bases and aircraft scaled

I plan to use my models for Wings of War/Glory so I also created some slide bases based on the wings of war aircraft cards. Basically I copied each aircraft card twice. I then cut the central segment out of one copy of the card added a spacer between the top and bottom piece and ended up with a base almost identical to the original card which I can also add the 2.5d aircraft model to. For extra weight I added a thin piece of flex magnetic sheet to the bottom. The description above might be a little vague so I’ve assembled a quick diagram to assist anyone who might wish to make some.

Wings of War_Glory Base


in addition to Wings of War there are two free rulesets that I want to try out using my models. These are Thunderbolt and Lightning and Pz8 Aerial Combat. Both are hex based games and the rulesets are free so feel free to try them also.

I do plan on completing more aircraft from ww2 and I’ll also do some re-colours of the above aircraft over time. The aircraft files, hex bases and stands are below. I hand cut all my test builds (12 aircraft in total) to ensure they were fairly quick to build and it is possible to assemble 3 aircraft in about an hour including cutting out, edging and gluing together. Unfortunately this means at the moment there are no cut files for the above aircraft, however I will make some at a later date when I do some of the alternate colour schemes (read that as these four were way more work than expected and I need them finished). The below should be more than enough models to replicate some of the air battles from the  Battle of Britain, enjoy :).

Supermarine Spitfire

Hawker Hurricane

Bf109

Bf 110

Bases Hex

Bases Stands

 When it is obvious that the goals cannot be reached, don’t adjust the goals, adjust the action steps.- Confucius

Battletech – Buildings Sci-Fi Light Commercial

Here are my next lot of battletech buildings, three light commercial buildings to expand the city. The powers on, the roads are down, people are getting comfy in there homes and now they can walk down the road to the corner shop for a quick coffee, a haircut or some dancing at the local night club. As with the houses three designs have been created by the three companies offering building designs to the newly formed city.

Battletech 6mm City Commercial Buildings 1_1
B.O.R.I.N.G Construction Company are back and have truly excelled to bring you an even more lack luster design than before. They have developed a lower level shop unit that can simply be placed down before the existing house design to give you a small shop with an upstairs apartment or a large venue featuring up and downstairs area’s. Fortunately the designers did see clear to add more expansive glass paneling at the store front – bullet resistant glass is available on request for those buildings located in less reputable surroundings.

Battletech 6mm City Commercial Buildings 1_4


The next offering is from Cubico Construction Pty Ltd, they have continued with the modular theme for there buildings. They have added a new shop front base with a slightly altered upper floor window configuration module, more suited to use as a small office space or open plan restaurant, they do however offer this new upper floor in an open plan house configuration.

Battletech 6mm City Commercial Buildings 1_5

STAR Industries realizing they needed to keep pace with the other two companies, looked over the back inventory of star ship components and uncovered that they had several thousand units of standard cargo transport pods (HEX-11-21) on hand. Sealing up the entry and exit hatches on the ends and then tipping them on there ends provided a near instant light commercial building. They then simply added some windows, a new door and some internal fit out. For STAR Industries these are cheap to make as they are currently using up there stockpile of transport pods, so if you need a building fast no-ones going to be able to get one on site faster than STAR.

Battletech 6mm City Commercial Buildings 1_6

I’ve included about 23 different shop signs with the buildings so you can make the buildings multiple times and place different signs on each one. I’ve done two different sign types a flat glue on the front sign and a vertical sign. For the vertical sign you’ll need to run a thin film of glue down the edge and bottom to glue it in place, at this scale including glue tabs is near impossible. The second design (Cubico Construction)you should be able to mix and match with the existing pieces to get some interesting looks. Once again I’ve uploaded a copy of the sketchup file to the warehouse(Here).

I’ve created a 32/33mm PDF version and a 38mm (1.5inch) PDF version, links are below enjoy:

Commercial Small One 32_33mm

Commercial Small One 38mm


Battletech 6mm City Build So Far

 I have been impressed with the urgency of doing. Knowing is not enough; we must apply. Being willing is not enough; we must do. – Leonardo da Vinci

Papercraft Kuboid Dragon – Something Fun

Will across at Inked Adventures  doodled a nifty little cuboid dragon, which was really awesome so I felt inspired to create this 3D papercraft version of Wills Dragon or Fan art….maybe fan paper model is a better term.

Dragon Papercraft Live Build Christmas Colors S01

I didn’t have any particular design goal in mind when I created the model it really was just made as a fun little dude (or dudette) to hang/sit around the place. For myself I plan to sit one on top of my monitor and I’ll make a few for the old Christmas tree this year to give it a bit of a fantasy theme.

Dragon Papercraft 3 View S01

I did design two slightly different sizes a 6.5 inch long model and a 4.5 inch long model. The larger model fills three pages and the smaller model fits on a single page. I have included four main colours as well as a version you can print and hand to a small assistant to colour in :).

Dragon Papercraft Christmas Colors S01

Not much else to say except here are the files, enjoy 🙂

Kuboid Dragon

Mini Kuboid Dragon

It does not do to leave a live dragon out of your calculations, if you live near him. – J. R. R. Tolkien

Battletech – Building Sci-Fi Houses

Houses ThumbnailNow that the Power Plant is built and we’ve established some Roads, People have started to move into the Town. Three styles of house have started to spring up designed and built by three different construction companies but with a sci-fi look and feel (hopefully) – Sorry to much Simcity again :).

Houses Scene

First up we have the Bunker by the B.O.R.I.N.G Construction Company. A fairly simple industrial looking concrete bunker building, used for both military and civilian purposes. Quick and cheap to build and extremely sturdy.  The company plans to extend the range for the military by offering rooftop mounted weapon modules in the future.

Sci-fi House 1


Cubico Construction Pty Ltd is providing a more modern look to their buildings in a two story layout. With the top floor of the building dedicated to the living areas/bedrooms and the lower floor for the garage/workshop/laundry space.  Appealing to the more affluent members of the city, these buildings are  more expensive to build due to the extensive use of large glass panels. Due to the square design the floors can be built offsite and then moved into location and bolted together, this also enables the floors to bolted together differently or added to at the client request very easily.

Sci-fi House 2


Lastly STAR Industries a former spaceship building company has entered the housing market to try and bolster there income streams.  There design more than a little resembles the spaceships they normally design and assemble. This does however mean the designs are strong and suitable for both civilian and military use.  Unfortunately the interiors also resemble spaceships, with bulkhead doors used in some of the cheaper fit outs. Great for military applications but not so much for your daily household when little Tommy continually trips over the door jam.

Sci-fi House 3

Messed up the texturing on this one, should only have a doorway on the right

Okay enough fluff stuff :). I used the same texture pack that I used for the power plant so the houses have a consistent look and feel with the power plant. I’ve also uplaoded a copy of the sketchup file to the warehouse, not sure if that will be useful to anyone in the future (Here). I’ve created a 32/33mm PDF version and a 38mm (1.5inch) PDF version, links are below enjoy:

Houses Group One 32_33mm

Houses Group One 38mm

Houses Only

An investment in knowledge pays the best interest – Benjamin Franklin


Battletech – Roads Asphalt

6mm Asphalt Road Tiles Decorative CircleNow that we have power on our Battletech map-board we need some roads so people can move around and start to build the city…maybe I’ve played a little to much Simcity in my time. Some simple asphalt road tiles to spread around your map board to give it more of a city feel. Later I may do some transition tiles for cross-country roads so they meld better with a green background.

The road tile image I created myself using base textures, there’s not to much to a simple road tile, concrete, asphalt and some drop shadows and your pretty much done. I did throw on some drains and rubbish but at this scale you’ll need a magnify glass to see them. As Battletech runs in two very different scales, 1:300 for the miniatures and 1:900 for the ground scale I struggled a little with what to do. In the end I scaled the road widths to about 1:300 so two 1:300 cars can be placed on each road half and not look strange. The car-park tile I split the difference and just made the parking spots about 1:500 no particular reason other than it looked okay.  Later I might do a proper drop in 1:300 scale car-park area in various hex sizes making the single tile redundant but it works for now.

Asphalt Road Tiles 1200x900

It would seem that hex size on the old Battletech maps and the new Battletech maps is different. Not by much 32mm vs 33mm. However that 1mm causes big problems when you string 10 road tiles together in a long straight suddenly your either half hex short or half hex to long. So the only solution I could see was to export a version at 32mm and a version at 33mm. If your using mostly new map-boards or the downloaded map sheets from RPGnow. It is safest to stick with the 33mm size, if you have a ton of old printed map sheets from the 80s/90s go with the 32mm sized tiles, If your not sure I’d run with the 33mm as that’s what the new stuff seems to be created in. I also created a 38mm/1.5inch version for those playing on a larger hex size. If someone has a need for some other odd size feel free to leave a comment and I’ll export a copy at that size (hex dimensions flat to flat in mm) – not promising it’ll have the layer options :). Due to this 32/33 discrepancy I’ll also need to upload a new base for the power plant in 33mm but I’ll do this when I get time to finish the page of plain concrete pieces.

Asphalt Road Tiles mockup  1200x900

I used the Megamek Road tiles to check I had included all the various turn shapes etc, hopefully I haven’t missed any. Later on I might try and pull together a high tech road set if I can find some inspiration but for the moment I’ve got more than enough basic models to work on. No cut files as they seemed a tad redundant as you’ll need to glue the tiles to some heavier weight card and cut around them so the tiles have more heft/durability. I’d recommend box board, matt board, cereal box card as good starters to back the tiles to, or you can do what I did and mount them on 0.8mm magnetic sheet. They are much easier and quicker to cut out with scissors than using a box cutter or scalpel blade.

To prevent them slipping around you can paint the backs with a thin layer of PVA glue or if you can get hold of it that paint on rubber stuff that should help a little with keeping them in place (trusty old blu-tak will also work). If you do use magnetic sheet simply place a big piece of flat tin/steel (1.5mm thick) under your paper map and then drop the tiles on and they wont shift and as a bonus the map sheet wont move either. Links to the pdf files are below- enjoy 🙂

Roads Asphalt 32mm hex 1.25 inches

Roads Asphalt 33mm hex 1.3 inches

Roads Asphalth 38mm hex 1.5 inches

Step with care and great tact ,and remember that Life’s a Great Balancing Act. – Dr. Seuss 


Project Status


WWII Project First Release

80%


B-tech Buildings Five

20%


Design Victorian era City

15%


Something Different

5%


Enter your email address to follow this blog and receive notifications of new posts by email.

Join 110 other subscribers

Content Released Under

Creative Commons License
This work is licensed under a Creative Commons Attribution-NonCommercial 3.0 Unported License.
Please Attribute to Sirrob01 with a link back to my blog