Archive for the 'Lego' Category

Lego – Basing Minifigs for Wargaming (Part 2)

In my never ending hunt for different basing options for Lego Minifigs. I stumbled onto these nice hex bases by catspaw customs, now I’m a bit slow to the party as the bases have been around for a while.

I couldn’t make the Catspaw website work or at least there shop (I think they might have closed) so I picked my bases up from Gi Brick, but you can also grab them from Brick Arsenal and Minifigforlife.

Lego bases Parts2 One
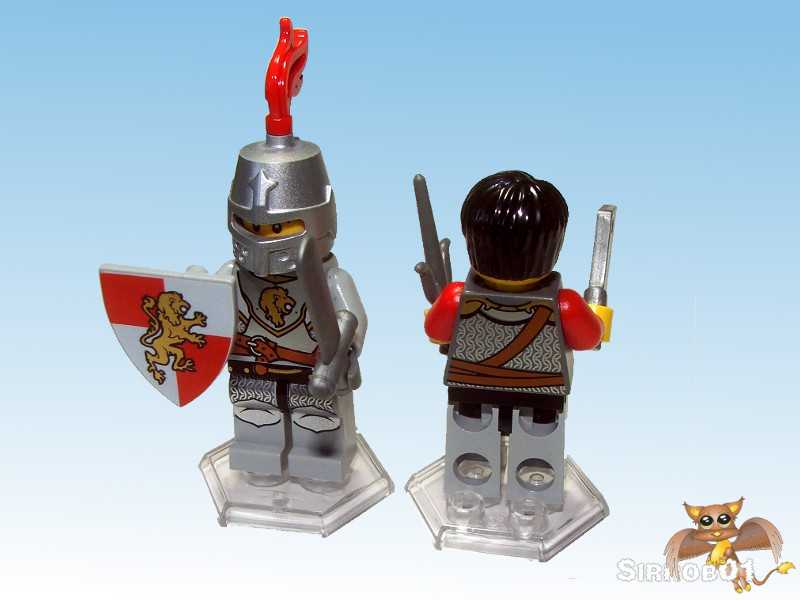
Front and Back Clear Trans 4 stud

These bases are still not what you call cheap at around the $1 USD each.  This makes these bases more expensive than my home made washer ones (this previous post). However they are superior to my home made bases in a few ways and only one minor negative apart from cost:

  • They come in clear, I know for wargaming armies quite often you have themed armies and bases. For myself I like my mini’s to appear to be mounted on the right terrain that they are currently marching over. Clear bases let you see the terrain the miniature is moving over creating the illusion froma distance they are based the same as the terrain.
  • They stack and clip together like normal Lego.  Storing my washer bases is quiet annoying and due to the weight I have to be careful to store them separate to the minifigs and vehicles.
  • They are hexagonal, I prefer Hex bases to Round ones. This mainly stems from a few rulesets I’ve tried using facing more heavily.
  • The bases are not as heavy as washers so minifigs are easier to knock over, but I don’t think this will cause any major problems as it still requires a fair knock to push a Minifig over.
Lego bases Parts2 Two
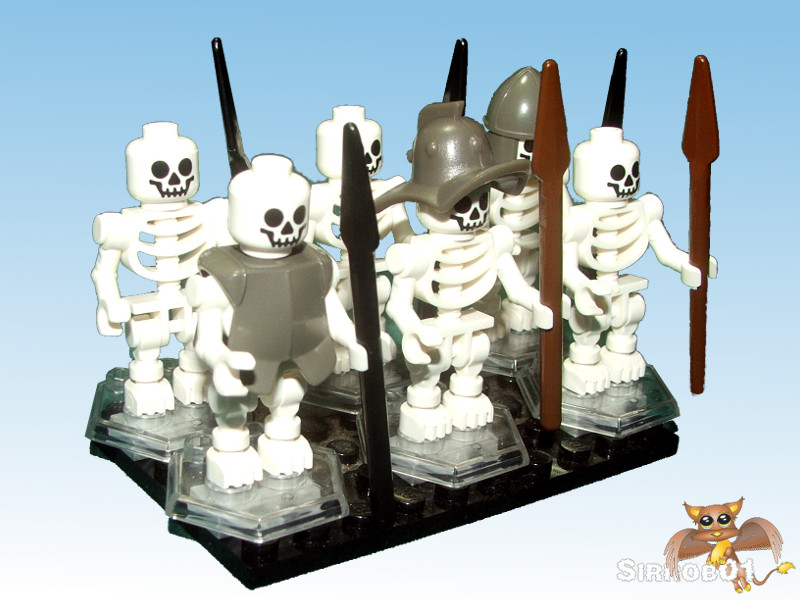
Hero’s vs the Undead

For me the above advantages more than out weigh the added cost. The bases themselves come in a broad range of colours and either a 2 stud or 4 stud design. For myself I’ll stick with the Clear bases with a 4 stud design so I can add markers if needed to the bases. I’m unsure if this was happy accident or not but inscribed on the bottom of each base between the 2 marker studs is a number between 1-9 on my clear bases it’s a little hard to read and I’d imagine on opaque ones you would need to flip the base over to read the number, I ordered 10 bases initially and received 1 of each 1-9 and a second 4. The bases are sized to be 1 inch square, however mine measure as just a hair over an inch on the long side (point to point) and just under an inch (flat to flat). I can’t see it causing myself any major problems and troops can still be ranked up if needed and it makes the bases fit in better with normal Lego plate stud sizing.

Lego bases Parts2 Three
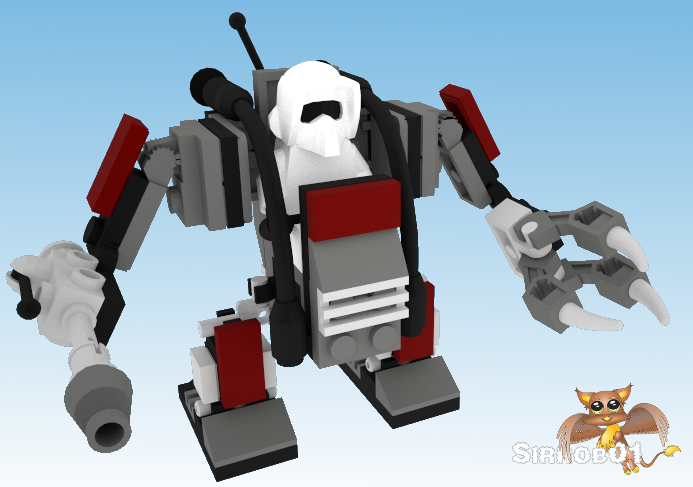
My base plate is a little short

I’m going to pickup a few more of these clear bases and eventually use them for all my Lego gaming.

As always have fun 🙂

“Always desire to learn something useful.” – Sophocles

Lego Clone Army – SR-01 Clone Loader

SR-01 Clone Loader RenderBeen a while since I pulled together a Lego MOC. I decided to build a small Clone walker, however it’s not in the traditional Star Wars walker theme but more of a battlesuit or small mecha.

I see it as having started as a simple power loader with a couple of large overpowered hands. Then in frustration a clone commander having been pinned down by Droidekas, quickly bolted a combination anti-vehicle heavy blaster and light blaster to the right arm and equipped the hand  on the left with a nasty set of claws. With this heavy armament it can punch through a Droideka’s shield easily while remaining small enough to provide support for a unit of Clone troopers in very close quarters. Due to the short legs they are relatively slow but this doesn’t cause major problems as they can easily move twice as fast as a running clone trooper.

SR-01 Clone Loader Built

Most of the bits I used to assemble the Clone Loader I grabbed from my bits box although I didn’t have any bendy tubes and had to buy a few from bricklink to finish the model up. I did borrow the middle of the leg design from other small lego mecha models (the 4 way light holder). Not much revolutionary in the rest, I did stick a little bit of blue tack behind  the small turntables just to make them a little stiffer so they don’t turn so easily. I had enough parts to build two Clone Loaders although not all the light greys match.

SR-01 Clone Loader MockupMockup Image Background:Miss_Ohara CC 2.0, Planets NASA

I used Mlcad and Ldview to create the instruction images and laid them out in a word document. I wanted to try producing a render of the model, unfortunately I find Mlcad a little annoying to perfectly align parts (gaps in renders look terrible). However I did find a handy sketchup plugin which let me import the Ldraw parts to Sketchup and I assembled the loader in sketchup and then used the free maxwell render plugin to generate a simple render.

SR-01 Clone Loader Render

I didn’t play around with the settings much in the render tool but I’m fairly happy with how the render turned out for a first try. I was contemplating generating a simple short walking render animation but that’s going to take a little more time, one for a later post (maybe 🙂 ).  I’ll be adding these as an alternate walker to the AT-PT for my clone army, I’ll probably have a few different load outs.

Instructions are below if your curious about any of the construction steps or methods. I used a 2×4 plate on the base of my feet for added stability but this was excessive nothing more annoying than a model that falls over on the table :).

SR-01 Clone Loader Instructions

Have fun gaming and building

Lego Separatist Army – Unit Attack Craft

I’ve been working slowly on my Lego Separatist Droid Army to use against the Clone Army. Here is the first unit an APC. The design is primarily based on Lego set 7929 although that set is the Platoon Attack Craft (PAC) which holds 112 battle droids. This is more battle droids than I could ever use in Defiance as it’s a skirmish based game. The Lego model of the PAC only holds 8 Battle droids, again of little use to me as I’ve created the Separatist army so that it is 12 B1 Battle droids to a unit.

I had a hunt around Wookepedia to see if there were any canon Star Wars unit level Separatist Droid transports and unfortunately there are none. Oddly you can either transport 112 battle droids slowly using the PAC /MTT or one at a time quickly on a STAP. Seeing this obvious hole in the Separatist troop transport line up, I’ve designed my own unit based repulsa lift APC/carrier named the Unit Attack Craft (UAC). I stuck with the wonderfully exotic naming regime that the MTT and PAC uses.

The UAC look is sort of cross between Lego set 7929 and Lego set 7126. I tried my best during the design phase to reuse as many elements from Lego set 7929 as I could, so as to limit the number of extra parts you need to have on hand. However due to the shortening of the chassis and droid carrier components and the addition of guns you do need some extra parts. The only drawback with the design is that I couldn’t quite fit 12 blaster rifles on the transport so only 8 are visible with 4 more carried in compartments along the side of the UAC, yes a cheat but a necessary one:

Just in case anyone else would like to use the UAC in wargaming or whatever here’s a little bit of unofficial fluff:

The UAC was designed by Baktoid Armor Workshop to fill the role as a rapid Battle droid carrier and delivery system. Unlike the lumbering MTT and PAC the UAC is fast moving with a top speed of 250kph enabling it to deliver troops quickly for re-enforcement or for the insertion/extraction of commando droids on a mission . The UAC carries twin linked light laser cannons and twin linked light blaster cannons which are primarily used to clean up any light troop resistance it might encounter on it’s way to it’s destination. The carrier is lightly armoured especially from the sides making it prone to anti vehicle weaponry and light arms fire. The crew consists of a pilot and a loader, both droids however can carry out the others function in case one is destroyed. The UAC can carry 12 B1 Battle Droids and there weaponry, with some re-configuration it can carry 12 B2 Battle Droids or 6 Destroyer Droids.

I put together a bit of an action picture/mockup as well, although it’s a little bland. It’s quite difficult to keep the focus on the subject and not clutter up the picture with unnecessary elements. The background of this image was taken by  Stuart Brabbs (Rolling Hills and is used under CC 2.0) and represents the rolling grasslands of Naboo with two UAC’s racing to re-enforce a pinned down Battle droid group.

I put some instructions together using MLCAD, they are the longest instructions (and largest 4mb download) I’ve ever assembled, however they are only A5 in size and hopefully easy to read. If you do build one don’t worry to much if you don’t have the exact colours needed any kind of black/gray parts should look okay. You can see in my prototype above I didn’t have enough light bluish gray clips for the Blaster racks and used black instead.

Instructions for Lego Unit Attack Craft (UAC)

Have fun and please leave a comment if you build a UAC .

Lego – Basing Minifigs for Wargaming

This is a bit of a tutorial/instructional post and I’m hoping informative and useful to others who may wish to use Lego minifigs for wargaming (Part2 here). One of the fundamental problems with using Lego minifgs for wargaming is they don’t have a base and if you try to just field them as is they end up falling over and getting knocked over a lot. Now you could try sticking them to radar dishes or flat square bases,  however you’ll then be adding height to your already slightly over-sized troopers or worse for most fantasy games they wont rank up well in movement trays and the bases are still very light. Now you could buy these from Minifig For Life:

However I had 3 issues with these, firstly at 0.65 euro’s (0.80 – 0.90 AUD) each it gets expensive fast. I estimated I needed 40-60 of them to start with so  I was  looking at close to $50AUD just for bases (not counting shipping).  Secondly they appear quiet small my estimate is 3/4 inch – 20mm round slightly under the 25mm standard round base and made of plastic so they might be to light and small to keep minifigs upright. Thirdly I had to order them from OS which of course means more $$$ for postage. I like to spend my money on paper or lego not postage, however if I lived in europe I probably would have jumped on them to save time and energy :).

So I started to look around what could I use to make nice bases. Washes come in a nice 25mm size (25mm/1inch diameter) with a hole in the middle, are cheap (10-15c)  and heavy,  I thought I could simply bond a flat plate of lego over the hole (Yes, glue a piece of lego permanently to something hence destroying it forever, my lego protective gene had issues with this to, however my need was to great).  It was partial success the flat plate caused to much of an increase in height and looked very glued on. Hunting around  Bricklink I found the below part which is the top part of 2×2 turntable part no 3679, even better you can get them for around 1-3 cents each and they are very thin vertically:

Now the process of actually creating the bases is fairly simple. Grab 1 of your 25mm washers (1 inch), next grab 1 x 3679 (the above part), take a small dob of 2 part epoxy glue and place it around the outside of the inner washer hole (Araldite or some other brand, I find the 5min stuff best and use a cheap no-name brand from the $2 shop not like anyone’s ever going to see it):

Next place part number 3679 over the washer hole (center it relative to the outside edge of the washer) and push it into the glue, make sure the glue doesn’t bulge up higher or across the flat part of 3679 or your minifig’s will have problems being placed on the base:

Next I spray painted the whole lot black using a cheap enamel spray for durability (keep the coat thin). If you want for example desert bases change the enamel spray to a light brown or desert orange basically a colour that matches your planned finishing look (I prefer black with green :), personal choice):

I quiet literally have heaps of flock laying around and just grabbed some green flock to use, but you could use sand or any other standard wargaming basing technique just make sure your Lego interface piece (3679) stays free of flock/sand and other bits of decoration:

Now your lego armies soldiers can traverse the most difficult of Felt terrain without any problems:

Hopefully this information was slightly useful to someone 🙂

Lego Clone Army – TX-130 Saber Class Fighter Tank

No Clone army is complete without some form of tank. Lego set 7679 is of the TX-130 Saber Tank, it’s not a bad set and from a wargamming viewpoint not to oversized compared to some of the other sets which if you fielded them would simply fill up the tabletop. However when I set the tank up on a tabletop is was a little on the big size just over 18cm square (7inchs). I decided to put my tank on a diet  but I didn’t want to destroy the overall look as I feel lego did a fairly good job replicating the TX-130.


Original left , Mine Right

First up was the chassis looking at it I could see there appeared to be a wasted row of studs around the outside of the cockpit area (blue arrow above) and some opportunity to shorten the length of the tank. As it turned out it was very easy to thin everything down by 2 rows of studs, as the central cockpit area fit easily in the new narrow space. Next  up was to shorten the length a little so the tank didn’t appear to long and thin. I removed the flip up engine area and simply streamlined the front slope, saving a few studs in length. The basic construction and appearance of my tanks central area appears the same as the stock tank unless you compare the two side by side then it’s noticeable narrow and shorter. I also added a hinge to the upper gun so the little shield is angled but the guns can articulate up and down independently, my antenna are in storage position. Next up are the sponsons.

Original Left, Mine Right

I’m not a big fan of the red bricks mixed with the dark red so one of the first things I decided to do was replace all the red components with dark red. I also prefer no sticker so I left it off on one of my tanks (the other came pre-stuck on, thats 2nd hand for you :)).  Looking at the sizing and how much I thinned the main chassis down I decided to take 1 stud of width out and drop the length by 3-4 studs. This meant I lost the little front compartment (no big lose), I did however retain the swivel under rocket pods at the rear. After a fair amount of messing around I ended up with a very nice sponson.  I happen to like it more than the original but that might be because I built it :). Not much else to add except you can see I added a few extra smooth tiles to the top.

Putting it all together I ended up with a rather nice TX-130 tank that fits nicely within a 17cm square and should serve me well for wargamming:

No mock up on this one as it’s very much just a mod of an existing set. I’ll continue working on this lego clone army and my other projects.

Lego Clone Army – AT-PT

Continuing on with my clone army next up is my version of an AT-PT . I basically needed a small light walker, all the existing Lego sets are quiet big, bulky and tall at least for wargamming. Due to line of sight rules in most games and the bulkiness of lego I try to keep my models thinned down so I suffer as smaller a disadvantage as possible when playing against a regular lead/pewter/paper army. After checking through Wookepedia under AT’s it seemed the AT-PT would fit the bill nicely. Not wanting to reinvent the wheel I had a look around at what other Lego AT-PT’s had been created. Saber-Scorpion had created  a rather nice AT-PT and after looking at the pictures of his design and comparing it to the wookepedia article I designed my own AT-PT, incorporating some elements from saber’s design and some of my own:

Saber uses a large lift able square lid part which seems to be ultra-rare not something you want when you need 3-4 of the unit for wargamming. Neither of my two designs allow the lego minifig to be removed either way it’s trapped in there:

The first design (detailed in the instructions below) makes use of only very standard and common parts and should be fairly cheap to build up from a stockpile of bricks and order anything missing from ebay/bricklink very cheaply . The second design (The ones in my photo) make use of a flip lid (part no 4857) although not expensive it can be difficult to track down and only comes in light grey  not the new light bluish grey (see photos for colour difference), you also need a few tiles so it doesn’t seal closed :). Other than that minor difference the two designs are identical. You can fit a clone trooper into both with a helmet on although the arms do need to be place down by his sides. However it looks good when you look through the windshield to see a minifig in there:

I had enough parts to build 3 and I’m a few bits short for a 4th. At this stage they all have different coloured windshields I wanted all red ones but that part in red seems to be another rarity so I have a blue trans and grey trans version. When gaming I just stick a different colored tile to the top to help id each one. As with the Speeder Bikes I did an action shot in GIMP:

I assembled the instructions using Ldraw/Mlcad and a set of PDF instructions are below, I didn’t quiet get the legs at the correct angle but they are very close:

Instructions Lego Star Wars AT-PT

Got to get back to cleaning up the house :).

Lego Clone Army – Combat Speederbikes

Since last year I have been working on a star wars lego clone army for use during wargamming.  I always planned for this to be a long term project due to the costs involved, basically you don’t save any money by assembling an army in lego but it does let me combine two of the hobbies I enjoy. The clone army is now getting close to completion so I’ll start some posts on this little side project, Starting of with the speeder bikes.

So I purchased two packs of set 7655 from bricklink they came with no lego minifigs which suited me and were hence very very cheap. I disliked the stock lego design:


However I had some ideas on how to combine all the parts from the set plus a few additions into something more interesting. I wanted a more heavy looking build to indicate the speeders are designed less for scouting and reconnaissance and more for a support/anti-infantry role during a frontal assault battle. The speeders would also be a single seater but appear to be highly maneuverable. After a few hours playing around with bricks and build combinations I settled on the below to fill the role as Combat speederbike.

As it turned out I didn’t have enough of the correct colors to completely outfit two in the correct colours but did have enough bricks to at least have two I could use during gaming. Next time I order up some bricks I’ll get some correct coloured bricks/tiles. The flags are used during gaming for tracking which unit is which:

from the pictures you can see the minifig has some protection along the side rear and front, although I’m not sure id want to ride one into battle it’s  a significant improvement over the stock lego version.  I played around in GIMP for 5mins a pulled the below together, racing across the deserts of Tatooine into battle or possibly some other desert world:

In case I lose the above or someone wants more detailed assembly instructions, I’ve put some quick instructions together on how to assemble:

Instructions Combat Speeder

I have been working on the last few troop types of my fox army as well so I’ll be posting an update to those hopefully in the next few weeks as well as some more lego stuff, well back to the projects for me 🙂


Project Status


WWII Project First Release

80%


B-tech Buildings Five

20%


Design Victorian era City

15%


Something Different

5%


Enter your email address to follow this blog and receive notifications of new posts by email.

Join 110 other subscribers

Content Released Under

Creative Commons License
This work is licensed under a Creative Commons Attribution-NonCommercial 3.0 Unported License.
Please Attribute to Sirrob01 with a link back to my blog