Archive for the 'Recipe' Category

Healthy Vegetarian Tacos

tacos2
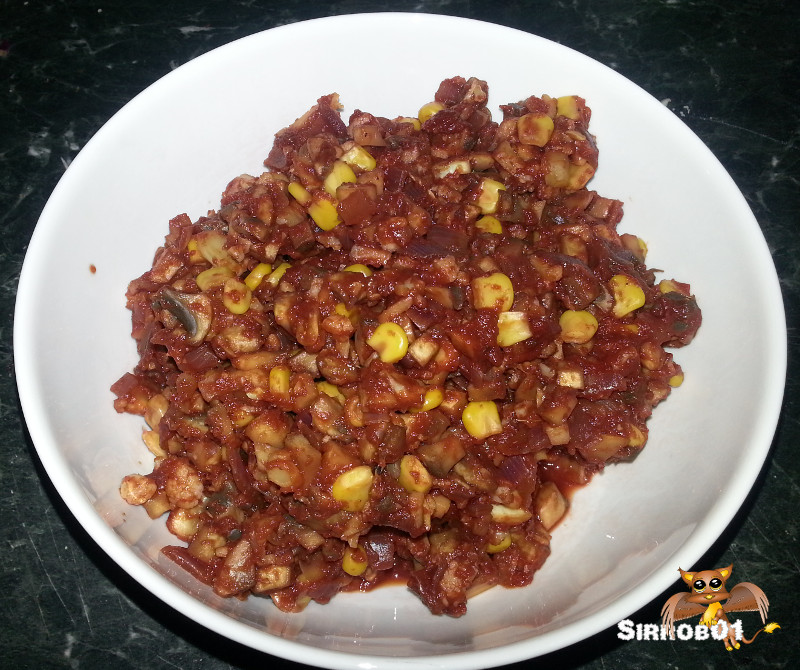
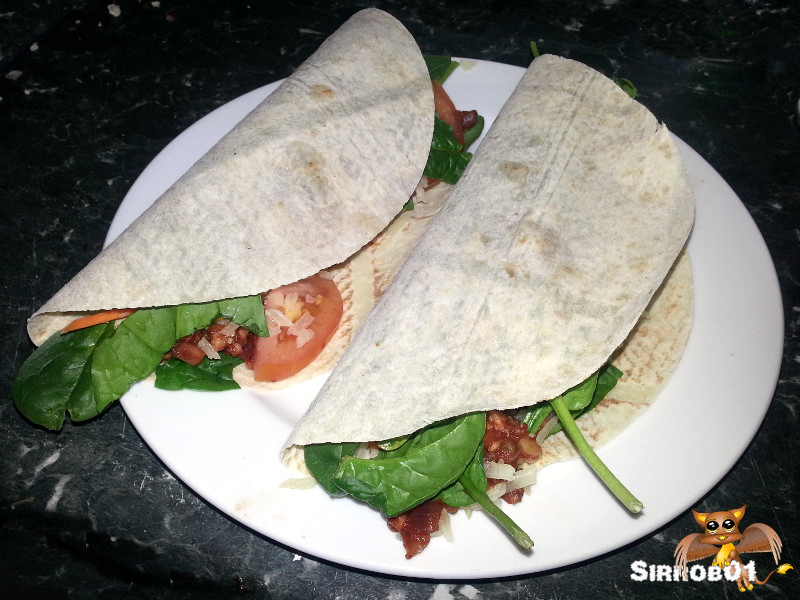
Just a quick post showing a recipe for healthy vegetarian tacos. I grabbed the original recipe from the clean eating magazine but made some changes to the original and my version is below. I’ve made these a few times now and both myself and my wife love them so enjoy, the below will make 8-10 tacos depending on how much mix you use in each one and are fairly easy to make, although dicing 400g of mushrooms takes some time

Ingredients for Taco Mix

400g plain white mushrooms cut  into small cubes (diced)

2 small onions diced (I use Spanish onions but brown/white use what you have)

1 cup about 1/4 head of cauliflower again diced/cut small

1/2 cup of veg stock

125g canned corn (one of those small cans)

140g of tomato paste (I use one whole small tin)

2-3 gloves of garlic (crushed/minced)

1-3tsp of chilli powder (mild is about 1tsp, 2tsp medium, 3tsp hot – depending on your chilli powder)

1 tsp Cumin (powder/ground)

1/2 teaspoon of salt and pepper

  1. Mix 1/4 cup water, tomato paste, cumin, chilli, salt and pepper in a small bowl and put to the side.
  2. Place the stock, onion and garlic into a non-stick pan (I use a wok), slow cook/simmer this for about 5mins.
  3. Add the mushrooms and cauliflower and stir in and cook slowly, the mix will seem dry to start but as it cooks and the mushrooms shrink the mix will become wetter. Cooking time should be around the 10min mark or approximately when the mushrooms have halved in size.
  4. Throw the mix from step one and the corn into the pan and mix in. Cook (simmer) for between 10-15mins, The mix will be dry but still moist, not wet.

tacos

Mix ready to eat

Serve with (depending on what you like)

Corn Mountain bread cut into circles for soft taco shells, warm them if you like (Corn tortillas prepacked downunder all seem stacked with fat)

Low fat shredded cheese

Low fat Sour Cream or Cottage Cheese (If I have cottage cheese I don’t use the above cheese)

Lettuce/Spinach leaves cut up (We prefer spinach leaves or a mixed lettuce leaf mix)

Tomatoes cut up 2-3

Shredded carrot/cabbage mix

Mushed/diced avocado

Make up the Taco’s the way you like. Depending on what you add and how much mix you use each taco should be around 600-800kj (150 -200 calories) and only a few grams of fat.

tacos2

Healthy Vegetable Moussaka

I’ve been making a few recipes out of the veganomicon, although not vegan myself I’ve been been modifying the recipes  and trying to make them a little lower in energy per serving. Below is my modification of the Moussaka recipe on page 165 of the veganomicon which I might say is very tasty in it’s own right but a little to high in energy. Mainly due to the inclusion of pine nuts and about 750g (1.5 pounds) of potato.

First up this is not a quick recipe to make, so far every time I’ve made it, it has taken me a good 2 hours of time. Although not 2 hours solid in the kitchen about an hour on prep and 45 mins to bake. It does however make about 10 servings, so its good for meals for a week or if you’ve got people coming for dinner. If I’m serving it for others we’ll add a simple salad to the side, if it’s just myself and my wife we’ll have just the Moussaka.

Ingredients

Vegetables For Layering

1/8 cup Olive Oil or Spray Olive Oil

1kg (2.2lb) Eggplant (about 2 large)

1kg (2.2lb) Zucchini (6-8 medium size)

1kg (2.2lb) Carrots (Grated/Shredded)

1kg (2.2lb) Butternut pumpkin

500g (1.1lb) Sweet potato

Tomato Sauce Base

3  Cans Crushed Tomato (1.2kg – 2.6lbs)

3 Med Onions (500g – 1.1lbs)

4 Cloves Garlic (minced/grated)

1/3 Cup Veg Stock

4 Teaspoon Oregano

1/2 Teaspoon Cinnamon

1 Teaspoon Dry veg stock

1 Teaspoon Guar Gum (or another thickener)

1/4 Cup Water

White Sauce

4 Tablespoons Lemon Juice

600g (1.3lbs) Silken Tofu

1 1/2 Teaspoon Arrowroot Powder

1 Clove Garlic  (minced/grated)

1 Teaspoon Ginger

2 Pinch Fresh Nutmeg

2 Pinch Black Pepper

200g Cottage Cheese

20g Grated Parmesan Cheese

Topping

20g Grated Parmesan Cheese

Getting the Vegetables Ready for Layering

Preheat the oven to 200 C (400F) then cut the tops and bottoms of the eggplant and zucchini and slice them into 1/2 to 3/4 cm (1/4inch) thick slices length ways. Next up peel the pumpkin and sweet potato and cut them into slices about the same thickness as the zucchini and eggplant. Place all the cut vegies on trays on greaseproof/baking paper (saves using oil) and either spray the tops with olive spray oil or brush very lightly with olive oil (1/8 cup). Place these trays in the oven and cook the zucchini and eggplant for 15-20mins and the potato and pumpkin for 20-25mins, try not to over roast them.

Roasted and Ready to go

Make the Tomato Sauce

While the vegetables are roasting you can make the tomato(red) sauce. In a frypan place the 1/4 cup of water, 4 cloves of crushed garlic and onion, gently fry this until the onion is cooked about when all the water is evaporated. Next add the 3 cans of crushed tomato, Oregano, Cinnamon, 1/3 cup veg stock and Guar gum.  Gently simmer all this for 15-20mins until it begins to thicken then add the last teaspoon of dry veg stock and cook for about 5 more mins.  When done simply turn off the heat, don’t forget to check on your vegetables while doing this step 🙂 .

Tomato Sauce Awaiting the layering of the vegetables

Make the White Sauce

I should say slowly add all the ingredients together and mix, but honestly just stick them all in a blender and blend until you have a smooth white sauce.

Pulling it together

Grab a deep roasting pan, mine is 35.5 x 25.5 x 7.5 cms (14 x 10 x 3 inchs) and non-stick. I spray my roasting pan with spray oil just in case then start loading the vegetables in.  The order you want to go in from the bottom of the pan up is:

  • Eggplant
  • Grated Carrot (1/5)
  • Pumpkin
  • Grated Carrot (1/5)
  • Zucchini
  • Half the Tomato Sauce
  • Sweet Potato
  • Eggplant
  • Grated Carrot (1/5)
  • Pumpkin
  • Grated Carrot (1/5)
  • Zucchini (if your out of zucchini save a little Eggplant from the 2nd layer)
  • Grated Carrot (if any left) (1/5)
  • Remains of Tomato Sauce
  • All the White Sauce (spread over with a Spatula)
  • Sprinkle with 20g of Parmessan

Don’t worry to much if you don’t have enough for a full 2nd layer, just layer them the best you can. Next place the roasting pan in the oven on 200 c (400 F) for 40-50 mins until the top starts to go golden brown. Once ready remove from the oven and allow to cool for 10-15 mins and then cut into 8-12 serves.

Just out of the oven

 I roughly calculated the energy and fat in the whole Moussaka which is 13000 kj (3100 cal)  and 80 grams of fat. A 1/10 serve is 1300kj and 8 grams of fat. If you want to drop some of the energy and fat simply ditch the Parmesan cheese this will decrease the overall energy in the total Moussaka by 800kj and 16grams of fat.

Ready to Eat…Hmm needs some salad

Hope you enjoy it, if you make it 🙂

Carrot and Tomato Soup (Very Quick to Make)

Final Big bowl of carrot and tomato soup. I haven’t posted over the past few months as I’ve basically been working on to many projects at once plus trying to get a little healthier and working on losing the last little bit of weight I need to, to get into the “healthy” weight range. Although I’m feeling much fitter and healthier than I have in about 18months to 2 years, I do want to get back into that healthy weight range, I’m no Arnie after all :).

I found I needed a quick filling meal that didn’t take me an hour to make but still tasted okay. I present to you all the super quick tomato and carrot soup. Basically if you have a blender, teaspoon, bowl  and microwave you should be able to knock this soup together very quickly and for about $2.50 a serve. It is potentially a little high in salt so if you’ve got high blood pressure check the salt content of the canned stuff before making up a big batch.

Ingredients

1 Can of Garlic and Herb diced tomatoes (400g ish)

1 Can of baby carrots (400g ish)

1 heaped teaspon of minced garlic

1 heaped teaspoon of minced ginger

1 heaped teaspoon of red curry paste

1 teaspoon of vegetable stock

1 teaspoon of cummin seed (ground)

1 teaspoon of coriander (ground)

1. Open the Tomatoes and tip them into your blender, then pour the baby carrots on top (liquid and all)
2. Next up throw in the garlic, ginger, curry paste, veg stock, ground cummin and ground coriander.

3. Blend for about 1 min until the whole mixture looks smooth and pour into a microwave safe container, I swirl about 1/2 cup of water around the blender to get the last few bits of soup and pour that in on top.

4. Microwave on high for about 8 mins (my microwave is only 750 watt so if you have big microwave either cut the temp back a little or the time)

5. The above makes just under a liter of soup so either one really big bowl or two normal sized ones, the whole tub should work out to about 800kj (190cal) and 2 grams of fat. Top with a little pepper if you like 🙂

Final Big bowl of carrot and tomato soup.

The soups not perfect but it makes a quick easy and tasty meal. I’ve got a few more super quick easy meals which I’ll post up in the near future.

Pumpkin and Sweet Potato Soup

Not many updates over the last month, Annette has been very unwell pretty much restricted to a bed only and in a fair amount of pain, so I’ve been focused on looking after her and going to work. I have had time to refine my pumpkin and sweet potato soup recipe  which I’ll use a fair bit over winter. It’s a very healthy soup with very little fat content and should be okay for vegetarians as well.

Ingredients (makes about 3-4 litres)

2 Butternut Pumpkins

2-4 Sweet Potatoes (500g)

4 Onions (400-450g)

8-10 Carrots (700g peeled)

2 Fresh Chillies

2-3 Garlic Cloves

4 Tablespoons Carraway Seed

4 tablespoons Cumin Seed

8 Teaspoons Vegetable Stock

6-8 Cups of water

2.5 Cups of Skim Milk

  1. Preheat Oven to 200C.
  2. Cut the top and bottoms of the Pumpkin then cut them in half lengthwise and remove the seeds. Lightly grease a baking tray and place the pumpkin halves on the tray skin side up. Place into Oven and bake for 45-60 mins.
  3. While the pumpkin is roasting peel the onions, carrot and sweet potato and roughly cut them into chunks.
  4. Cut the chills up a little finer
  5. Place 6 cups of water in a large stock/soup pot
  6. Add the Garlic, Carraway, Cumin, Chilli and Veg stock to the water
  7. Place the cut Onion, Carrot and Sweet Potato into the water and bring to the boil.
  8. Boil for 45 to 60 mins top up with water as required to keep the volume about the same and stir to ensure it dosen’t burn.
  9. Once pumpkin is roasted (skin will be brown in places). Remove from the oven and leave to cool for a short time (15-20mins) then remove the skin from the pumpkin it should peel away reasonably easily (throw the skin away).
  10. Once the Vege’s  are cooked add the pumpkin to the pot and squash/mix it in with the Vege’s, you may need to lower the heat a little to prevent the mix from burning.
  11. After 5-10mins add 2 cups of milk to the pot and mix through, leave to simmer for a further 10mins.
  12. Run the whole mix through a blender or food processor, you should end up with a smooth consistency and the seeds will break up but wont dissolve completely.
  13. Use 1/2 a cup of milk to clean the blender/food processor and add this to the pot.
  14. Leave to simmer for 15mins stirring to ensure it dosen’t burn.
  15. Serve into bowls and top with fresh cracked pepper and/or a dolp of low fat cream or plain yoghurt in the  middle of the bowl.

The above soup can be frozen but it will seperate a little when thawed but as you heat it back up stir to combine it back together. The above makes a fairly mild soup with only a hint of spice for a spicer soup add more chilli’s. If you make it I hope you enjoy it :).

Mini Caramel Cups (Both versions)

Busy weekend for me with a friends birthday and Australia day coming up. This is a recipe I put together/modified last year, it’s a bit fiddly (the gluten free version is more so) to make but always a hit when served. Both the gluten free and regular recipe are below but the photo’s are from my latest batch of gluten free one’s. Feel free to sub my Potato and Rice flour mix for an off the shelf SF raising and plain gluten free flour. The gluten free version of the recipe below was assembled for a friend who’s also corn intolerant.

Ingredients (makes 24-26)

Base

Regular Gluten Free
85grams Butter 85grams Butter
50grams Self raising flour 60grams Rice flour
50grams Plain flour 70grams Potato flour
115grams Brown sugar 140grams Brown sugar
55grams Desiccated shredded coconut 1/2 teaspoon Bicarb Soda
1/8 teaspoon Guar gum (optional)
  1. Preheat Oven to 180C
  2. Melt Butter in large mixing bowl in microwave

  3. Add the Brown sugar to the butter and mix in then add the Coconut and mix in.
  4. Add both plain and self raising flour (or Rice and Potatoe Flour with guar gum mixed through) and mix in well (ensure no lumps). The mix will be dryish but should stick together.
  5. Loosely spoon the above mix into the 24 depressions in a Mini Muffin Tin (grease tin if not non-stick or silicon) each depression should be filled neatly to the top.
  6. Grab something with a flat end which is round and approximately 25 mm across (potatoe peeler end or wooden spoon) and push this into the middle of each of the mini muffin pan depressions, rock the object as you push down to help compact the sides. The mix should compact on the bottom and push into the sides firmly but the top edge will be ragged and untidy. Using your fingers level of the mixture with the top of the mini muffin pan (this is fiddly and time consuming) to make a neat edge. If you can see the bottom of the tin through the bottom of any cup add a little mix to the bottom and compact softly. Aim for a cup thats 1.5 to 2mm thick.
  7. Place the Cups into the Oven for approximately 5mins and watch them. They will expand and slowly fill the muffin depression. When you see this grab them out of the oven and push the sides and base back down using the wrong end of a butter knife or your wooden tool, so they are back into shape. Place back into the oven and watch again repeat the above if they deform, they will take approximatly 15-20mins to cook. Keep this up until the shells turn a golden brown (The gluten free ones don’t brown very much) then remove from oven and using your knife end or wooden tool push shells back into shape for the last time. Leave to cool for at least 20mins.
  8. Carefully turn the muffin pan upside down and bang (Wooden spoon) or pop/lift (if using a silicon tray) the shells out of the muffin pan and leave upside down on another tray to cool fully. As they cool the cups will harden. If your making the gluten free one’s do not bang or jar the shells they are a very fragile it’s best to make them in silicon bakeware and simply lift them out when they are cool or fill them with caramel and then lift them out.

In the below picture you can see the mixture has been compacted in and is ready to go in the oven, the object in the top left of the picture is what I use to compact the mixture into the muffin pan, a short piece of 25mm dowl.

Fresh out of the oven and finishing off their cooling

Filling (Same for both)

Regular/Gluten Free
30grams Butter
40gramsGolden syrup

(ensure it doesn’t use any nasty gluten thickeners if it does sub in 30grams brown sugar)

1 tablespoon Brown sugar
2 teaspoons Vanilla Essence
395g Sweetened Condensed Milk ( 1 Tin

I make my caramel in the microwave in a large rice cooker but you could use a microwave safe bowl with high sides. A word of warning caramel gets very hot (hotter than boiling water 150-200C) and can easily cause 2nd degree burns if you drop any on yourself while cooking it or spooning it into the cups. I have a nice 20 cent sized burn scar on my left hand where I got careless one day and some dripped on me. Don’t let anyone (or pet) lick the bowl until it’s well cooled.

  1. Place Butter into your microwave safe bowl

  2. Melt the butter in the container then add Golden Syrup/Vanilla Essence and Brown Sugar, Stir in well and then microwave on high for 30secs and re-stir, the Syrup should have gone more fluid. (My microwave is small and low powered 800 watt max so adjust times or power settings as needed)

  3. Add the can of sweetened condensed milk and mix in well.
  4. Warning with the following steps you must watch when microwaving and if you see the mix boiling over stop microwave immediately and stir the mixture. You’ll see it coming up the sides of the bowl.

  5. Microwave mix on high for 1 min remove and stir. Microwave mix on high for 1 min remove and stir. Microwave mix on high for 1 min remove and stir. Microwave mix on high for 1 min remove and stir.
  6. Microwave mix on high for 30secs remove and stir. Microwave mix on high for 30secs remove and stir. Microwave mix on high for 30secs remove and stir.
  7. After the above it should be nearly thick enough if not microwave for another min and stir repeat until it thickens. The caramel when at the right stage will be just a little runnier than whipped cream. When you stir the mix it will take 15-20 secs to settle back to a level surface. You can’t over thicken the caramel but if it’s to runny the caramel will make a mess when people eat them.
  8. Once your happy with the consistency of the caramel grab your tray with your 22-26 cups on it and flip the cups up the correct way.
  9. Using a large teaspoon/small desert spoon, spoon the caramel into the cups each cup will take 1-2 spoonfuls. I usually fill each cup to almost full then come back and top them up with any left over caramel. The caramel will hopefully end up with a peak in the middle just above the level of the cup wall.
  10. Leave the cups with caramel in them to cool fully. 3-4 hours in the fridge works best, but if your pushed for time 1 hour int he fridge works.

Below is a picture of my Caramel after it’s thickened, you can clearly see the stirring marks in the surface.

My cups filled with caramel and ready for the fridge, prior to them being capped with chocolate and/or coconut

Topping (Same for both)

Regular/Gluten Free
75grams Milk cooking/normal chocolate
75grams Dark cooking/normal chocolate
Desiccated Coconut to Sprinkle (optional)

For the gluten free ones you’ll have to locate gluten free chocolate (not to hard). I’ve topped with cooking chocolate and regular chocolate. If you use regular chocolate melt it more carefully as it burns easier and it’ll take longer to re-set.

  1. Melt the Dark or Milk chocolate. I do this in the microwave in a small bowl with about 30grams of the chocolate each time 30-40 secs on high is all that’s needed. It’s better to under melt the chocolate, stir and then do another 5 seconds than over melt and burn the chocolate.

  2. Using a Teaspoon spread the dark/milk chocolate over the top of one of the cups so the caramel is completely covered. Then sprinkle the top with desiccated coconut (if wanted). Move to the next cup and repeat Once you have done 12 with dark/milk chocolate repeat for the other 12 with milk/dark chocolate. Or if you prefer do all the cups with one type of chocolate
  3. put them back into the fridge until the chocolate has set. Once set the caramel cups can be eaten straight away, refrigerated and saved for later or frozen for a short time and used later on.

I need to make these quick

Okay sometimes you just don’t have the time to make the cups if this is the case grab a shallow rectangular tin approximately 25cmx15cmx3cm (line with baking paper for quick removal). Push the base into the bottom of the pan extending it a little up the sides and bake, then spread the caramel on top allow to cool for bit then spread the chocolate on top, leave to cool in fridge, lift it out of the tin and cut into squares.

Enjoy 🙂

Vanilla and Fruit Cheesecake

Wanted to work out a chilled Cheesecake recipe. Played around with the ingredient quantities so as to make 12 smaller muffin sized/single serve cheesecake portions rather than a  large single serve cheesecake.  Swapped in different biscuits for the base and adjusted the butter quantity to match. Added my favorite ingredient to the mix; vanilla,  everything tastes better with vanilla. Very happy with the outcome and it tastes nice as well. The below pictures are from my 2nd run through, I used raspberries on the first go through and strawberries with this one. I’m also working on a gluten friendly version.

Ingredients (makes 12-16 muffin sized cheesecakes)
Base
2 pkts Scotch Finger biscuits (500grams)
200 grams of butter melted

Cheesecake filling
250 grams Cream Cheese (Room Temp)
50 grams Caster Sugar
150 ml Cream
1 Teaspoon Vanilla Essence
30 ml boiling water
1.5 teaspoon Gelatin
80g fruit of your choice

Topping
80g Fruit (same as above)
30g Caster Sugar
1 Teaspoon Gelatin

Directions

1. Crush the biscuits up in a Food processor or by hand

2. Melt the butter and mix into the Crushed biscuit mix

3. Place a 1-2 tablespoons of the above mix into each muffin segment of the muffin pan (I used a silicon pan for easy removal). And squash the mix into the base of the pan and up around the sides, cover with plastic wrap and place in the fridge to set.

Chessecake casings in pan

4.  Put the Cream Cheese in a mixing bowl and using a mixer or a wooden spoon mix the cheese and sugar together well

5. In a small bowl mix the boiling water and Gelatin and allow to sit

6. Add the cream and vanilla essence to the  Cream Cheese and Sugar, mix well

7. Add the gelatin and water to the above Cheese/Cream/Sugar and mix in

8. Gently fold in the fruit of your choice into the above mix , make sure fruit chunks are no bigger than 2cm square (about blueberry size)

9. Spoon the mix into the base cups and place in the fridge to set:

10. Place some pieces of fruit to the  side to decorate

11. Blend remaining Fruit, Sugar and Gelatin until smooth

12. Place blended mix in microwave safe bowl and cook on high (mines a low powered microwave; 800watt) for 2mins and stir, 2mins and stir, 2mins and stir, 2mins and stir. Mix should be fairly thick, leave to cool.

13. While the above is cooling cut the fruit up if needed

14. Either decorate the top of the cheesecakes with the fruit and then spoon on the topping mix or spoon on the topping mix and put the fruit on last whichever you prefer. Place into fridge to finish setting (1-2 hours). Serve and enjoy. Don’t freeze the cheesecake, eat within about 3 days and keep in the fridge.

Hopefully I didn’t forget any steps 🙂


Project Status


WWII Project First Release

80%


B-tech Buildings Five

20%


Design Victorian era City

15%


Something Different

5%


Enter your email address to follow this blog and receive notifications of new posts by email.

Join 110 other subscribers

Content Released Under

Creative Commons License
This work is licensed under a Creative Commons Attribution-NonCommercial 3.0 Unported License.
Please Attribute to Sirrob01 with a link back to my blog