Archive Page 8

Tutorial – How to Build a Solar System

This is a little deviation from my usual project posts. Instead of showing a project I’ve finished I’ll run through a bit of a Tutorial/How to on designing your own Fantasy/Sci-Fi World Solar system. This is the process I used to design the Sarilo system in the previous post. In looking for this kind of information on the WWW, I pretty much came up blank -everything was either very high level or assumed your world was an earth clone except for the continental layout :). A word of caution: I’m no expert mathematician or physicists so I may have made some liberal assumptions with some of the formulas and maths below, if your reading this blog post for some sort of school project (unless it’s “Build a Fantasy/Sci-fi Solar system”), turn back now.

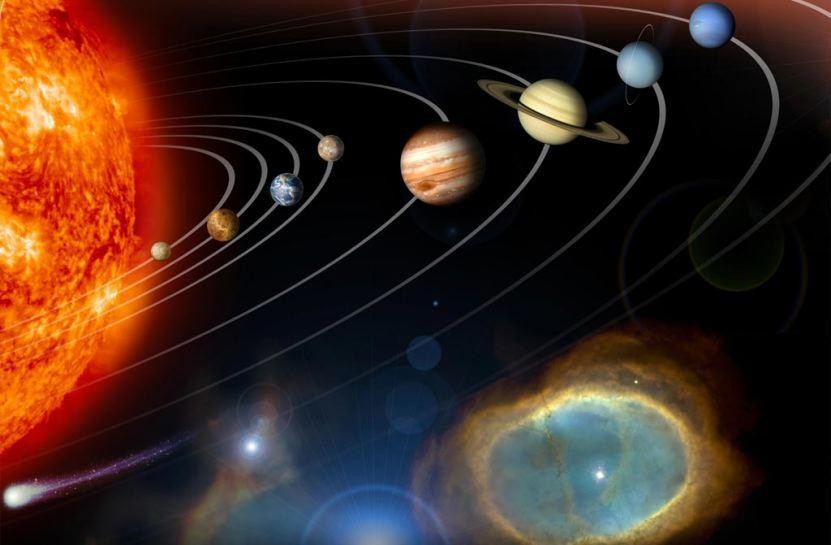
Jaw Dropping Picture for your Players

First up you’ll need to design  a Solar System layout, how many planets what types etc. If you’re going to all this trouble at some point your going to want to casually insert some kind of picture into your gaming session so the players can go “coooool”. So behold I have assembled the ultimate in solar system development tools, I’m possible over selling it a little. Below is a link to a very basic drag and drop solar system assembly page best viewed at 1280×1024 (+). It uses only CSS and Javascript to run no fancy flash around here :). I checked and it seems to function best in IE7 and 8 (just say yes to allowing active content if your asked). It functions tolerably well in Firefox although changing label names is irritating,  right click them first and then it’ll let you adjust the label name. Go forth and design a Solar System using the below or if your so inclined use Photoshop,  GIMP or something else:

Link to Builder

Link to Builder

Hopefully your back with a semi-pretty Solar system picture to throw at your players. Now we need to flesh out some of the details, how far is each planet from the sun how long does it take to orbit the sun etc. Now if you’ve stuck your habitable planet way out near where Pluto normally sits, now would be a good time to adjust it to somewhere closer to the sun rings 2-4 (possibly 5)are the best places for habitable planets. However it’s your Solar system so feel free to keep it that way but you’ll see the interesting impacts below.

Specify Planet Distance in AU

Don’t get to hung up on how far an AU is.  Just be aware a good range for Terrestrial (Earth like) planets is approximately 0.8 AU’s to 2 AU’s. Earth in our Solar System sits at 1 AU from the sun, Pluto hangs way out at 39 AU and Mercury at a toasty .4 AU’s. Now Assign each planet an AU Distance from the Solar System Star. The planets don’t have to be as spread out as much as our Solar System but do be aware big planets to close to each other could in reality have interesting effects on each others orbits, Feel free to play around with this Solar System builder. I punched in an approximation of the Sarilo System and ran it for a 100000 years (about 4-5 days) with no problem.  It’s interesting to try to create a stable solar system with one planet on an elliptical orbit that doesn’t wipe out your other planets, I have no idea why a comet hasn’t run into Earth yet :).

A little bit of Math

This bit is fairly glossed over, if you want to get into the full workings and understanding feel free to check out  Keplers Laws, for me I’m happy with the below. Basically grab your AU distance for your first planet and place it to the power 3/2, basically 1.5 and you’ll get the orbit of your planet in equivalent earth years. An example My primary planet Etena is 1.24 AU from the Star Ravi, 1.24 to the power of 1.5 equals 1.381 earth years or 504 earth days:

To make things super simple here is an Orbit calculator online (right at the very bottom of the page)or use this spreadsheet I assembled . Using the above does assume certain similarities between our Solar System and the fantasy one but unless you really want to get into some heavy math just live with the above :).

A little bit more Maths

So now you’ve got your planets and you know how many earth days it is to year for each planet. You can just see all your NPC’s running complex mathematical conversions every time they try to calculate what season it is. Time to give your planets unique day lengths etc. I’ll admit I stuck with an hour being 60mins for all the calculations I’m just not that dedicated to make up whole new time system. For each of your planets allocate the number of hours in a day, before giving your earth like planet a 500 hour day, think what impacts this would have on your planets society. I’d recommend to keep your earth like planets hours in a day between 20-30 for easier game play.

Once you have the number of hours in day for a planet  simply take your number of earth days in a year x by twenty four then divide by the number of hours in your planets days, this is the number of the planets days in a year, as an example Etena has 504 earth days in an orbit and 26 hours in a day. 504 x 24 = 12096 hours then 12096/26= 465.2. So there are 465 Etena days in a Year. If you like you can do the above calculation for all your planets. My handy spreadsheet will do these calculations for you :).

Adding the detail from the above

So you now have a Custom Year Calander for your planet which will if you need it to stand up to at least cursory mathematical checking. But what are some of the impacts gamewise? Below is a bit of dot point list of things to consider:

  • If your year is very long (in earth days), the seasons will be longer, more food might need to be stored for winter or a double cropping season might be carried out, plants might mature slower.
  • If your year is shorter (in earth days), plants might mature quicker, as winter is shorter less food needs to be stored.
  • Longer/Shorter Day length could impact working day length etc (shop opening hours)
  • People’s ages will be different younger or older depending on shorter or longer years, maybe you age by each season instead.
  • Certain events could be more or less important, ie if spring comes around every 100 days it’s going to seem less important to celebrate, however if winter is 250 days long your definitely going to have a big party when that’s over.  (or if your planets out by Pluto your whole life might be lived in “winter”)
  • Is your habitable planet closer or further to the sun, this could make it hotter or colder.

Basically think about how things would impact you if the days and years were of different lengths. Now that you know how many days are in your planets year you can design up a calendar for your players to use. Remember to include seasons, approximately one per each quarter of the year.

Hope this information is useful to other people building up a campaign world.

Orbit Calculator – Spreadsheet

Solar System Builder

World Building – Sarilo Star System Tapestry

I’ve been slowly writing and adding to my campaign world setting, I only really work on this when it’s late at night or if I’m very tired. The latest piece I’ve finished up is a solar system map. I decided to start right from the top and work my way down. So I had a feel for the Planets rotational period and year length etc I worked up a Solar System Map and a few Planetary Statistics:

Above is the Original image I assembled using elements from a few different NASA photos and images that NASA have made freely available. The planets are obviously not spaced out to any kind of scale. I’ve made the Sarilo System a dual Habitable planet system, although to start with I’ll only be detailing the Planet of Etena. Once I had the above created I ran it through a few filters to try and get a tapestry effect:

It’s not perfect but it does give the impression of a tapestry, I should have really added some aging like holes and ragged edges, but as it’s supposed to be a one of kind tapestry made by a famous Astromagus. It should be well looked after and protected so aging didn’t seem very appropriate. I pulled together rough statistics for each planet:

Name Sihnon Etena Ilvaya (ilvaya) Ceninia Onayel Aran Tevasi
Position 1st Planet 2nd Planet 3rd Planet 4th Planet 5th Planet 6th Planet 7th Planet
Type Hot Gas Giant Terrestrial (Life) Terrestrial (Life) Frozen/Ice Gas Giant Liquid Gas Barren Rock
Distance from Star 0.41 AU 1.24 AU 1.76 AU 3.2 AU 5.1AU 8.5AU 12 AU
Diameter (KM)
Day Length 7.5 hours 26 hours 27 hours 66 hours 16 hours 13.5 hours 350 hours
Days a Year 304 Sihnon Days 465 Etena Days 757 Hyrokkin Days 759 Ceninia Days 6306 Onayel Days 16081 Aran Days 1040 Tevasi Days
Equiv Earth Days 95 504 852 2090 4204 9045 15173
Moons 0 2 5 1 16 8 0
Rings 0 0 0 0 1 0 0

Assuming I’ve understood it correctly I used Keplers third law to calculate Orbital timeframes and I included an equivalency back to earth days. I realize using Keplers third law wont be a 100% accurate as I’m pretty much assuming that the Sarilo System is then the same as our Solar system but I figure for a Fantasy game setting it should be fine. The other figures are all made up, I’m still working on the Planetary Diameters, need to be a little more careful with those.

As I don’t get to GM very much (or at all any more) and I really enjoy world building I’m just going to do this Campaign world building project as something fun to do when I feel like it. I will continue to add to the world and will make posts here of anything of note. I have begun to upload some of the Info to a wiki but I’m not quiet ready to post the URL as it’s very empty at this stage :).

I’ll get back to Mayhem city and Hinterland builds.

(The layout of my image above was based on this one, although mines a very poor imitation 🙂 . I believe it appeared in or on a magazine cover at some point)

Turtle Clan – Paper Miniatures

I’ve  finished the Turtle Clan, which means I can sort of play through to the end of scenario 10 in Song of Fur and buttons, I really need to get those picnic bears done.  I haven’t added any extra troop types this time although there is an extra musician. I haven’t designed any flags but I might add a flag or two later on.

On with the show as they say, here are the pictures of the Turtle/Terrapins:

Turtle Command with Musicians


Terrapin Spears


Turtle Rifle


Turtle Bow


Turtle Snipers


Turtle Giants


Turtle War Anklyosaur


The files are below, you will need to rename the GSD files after you download them from .odt to .gsd(feel free to grab some bases from Onemonks site):

Turtle Clan Page 1 – PDF

Turtle Clan Page 1 – GSD

Turtle Clan Page 2 – PDF

Turtle Clan Page 2 – GSD

Turtle Clan Page 3 – PDF

Turtle Clan Page 3 – GSD

I’m going to be taking a little bit of a break from creating miniatures for fur and buttons as I need to get some terrain built. At the moment I have no gaming board to play Fur and Buttons on :). I will be coming back to these miniatures it just maybe 3-4 weeks before I get a chance to work on them again :).

WorldWorksGames Ruined Keep (Custom) – Papercraft Build

I’ve spent the past 4 -5 days working on some Worldworksgames terrain. Primarily I’m working on a largish Tlinx Hinterland (pending release)and Mayhem city layout. I will make separate posts for both those builds. To go with the Hinterland (out door type terrain) I wanted some drop down tiles. Pieces of terrain that stand independent of the surrounding game board which can be used with my Hinterland table or if we need can be scattered onto a more conventional tabletop. I’ve also converted Tlinx to use magnets but I’ll detail that more in it’s own post later on.

This is my first standalone tile a small ruined keep, which has turned out to be significant amount of work, a lot more than I originally intended (hence the lack of turtle miniatures 🙂 ). The additional work was mostly caused by the fact I had to convert Castleworks ultimate (CWU) to the Tlinx format or at least those bits I wanted to use.

First up I cut a base out of depron (straight foam), using my hotwire cutter to this I added some sloped/beveled edges to give the appearance of the ruin sitting on a slight rise. Once the foam was cut I inlaid some metal mount points into the tile and then covered the tile edges in hinterland grass texture. For the top of the base piece I created a custom graphic which combined elements of Castleworks Ultimate and Hinterland. The two texture types fit together very well which is a credit to the quality of work the WWG crew put out:

Depron Base with mounts inserted

(Yes those are old craftknife ends 🙂 )

Base Ready to Go

Next I started converting CWU textures to the Tlinx layout, I had to do walls, mounting posts and create a custom 1st floor destroyed/damage tile. I ended up creating a few other custom parts such as a “3 inch through wall” it hooks through the mid sized post and pokes out the other side to create a more solid destroyed wall effect. I also bashed some parts using Streets Of Legend-Destroyed as a guide but replacing the textures with CWU. Below you can see all the parts laid out and the through walls:

Through Walls


Laid out ready for assembly

The above may not look like a lot of work, but it took a fair amount of time to create those pieces. The good thing about Tlinx is it’s very flexible and with the parts I’ve created I could easily build a none destroyed keep. The downside is it’s very flexible so when you want to change elements or use different textures you have to convert a minimum number of parts so whether it’s one building or 10 the workloads about the same. Still I’m going to do a second stand alone outpost but undamaged and I wont need to bash any parts (okay maybe 1-2) so it’ll be much quicker. Here’s some pictures of the keep from 4 angles fully assembled and ready for gaming:

I know building the above sort of defeats the purpose of Tlinx as it’s not very flexible but for me being able to disassemble the whole thing and pack it easily for transport makes it well worth the while. Packing and carting air around with you is no fun 🙂

A few points of note, I’m using very small magnets 6mmx1mm these are plenty strong enough to hold the posts and building up, If I find I’m having problems I’ll drop a 2nd magnet on top of the first. The metal piece’s I’m now using (base used old craftknife ends) are square shade cloth holders I cut them into 4 or 2 depending on whether I’m doing corners or mid points, these save me from any polarity issues I might have with magnet to magnet joins, they also allow me to adjust the post locations a little if I need to (read build inaccuracies 🙂 ), I’ll cover this a bit more in later post :).

If you often travel for gaming or even just have limited storage space check out Tlinx terrain across at WWG :).

Green Tree Frog Clan – Paper Miniatures

I finished the Green tree Frog Clan today this means I’ve finished up enough miniatures to play through to the end of scenario 9 in Song of Fur and buttons.  I haven’t added any extra troop types this time although there are two extra musicians. I did create flags for the standard bearer but I don’t like the way they look so I didn’t glue one to my standard bearer but left them on the page as I thought someone might still get some use out of them :).

I have some idea’s and thoughts for some other troop types later on which I’ll add once I’ve finished all the mini’s I need to finish the  Song of Fur and buttons scenario’s. Below are the pictures of the Green Tree Frog Clan:

Command Group: Standard Bearer, Major and Hero


Spearfrogs


Turtle Crusher


Musketog’s or Musket Frogs 🙂


Musicians: Piper, Tambourine Player and Drummer


Toad Rider Cavalry


Onemonkeybeau’s daughter across on the cardboard-warriors forum asked for some Pink frogs. So I did I full set of re-colours to pink of the above frogs:

I learnt a lot doing the re-colours in Inkscape. The biggest issue was that when I changed the gradient fill colours in Inkscpae to the pink scheme I had to also change all the line colours, this was much more time consuming as I had to click every object and adjust the line colour. In future I’ll set all the line colours using a gradient with the same colour at both ends to make re-colours much faster and easier. I have now set the above frog files up in that manner and I can produce any colour I like very quickly :).

The files are below, as usual you will need to rename the GSD files after you download them (feel free to grab some bases from Onemonks site):

Green Tree Frog Page 1 – PDF

Green Tree Frog Page One – GSD

Green Tree Frog Page 2 – PDF

Green Tree Frog Page Two – GSD

Green Tree Frog Page 3– PDF

Green Tree Frog Page Three – GSD

Pink Versions:

Pink Tree Frog Page 1 – PDF

Pink Tree Frog Page 2 – PDF

Pink Tree Frog Page 3 – PDF

I’ll get the turtles laid out as quickly as I can, until then have fun :).

Fat Dragon Games Medieval Cog – Papercraft Build

To go with the pirate bears I really wanted some sort of ship. It’s never explicitly called for in the fur and buttons scenario’s but I thought it would look cool. I didn’t really want to design and build something myself at this stage and as I knew of several card model ships around the net I had a look at what was available. I eventually settled on the Fat Dragon Games medieval cog.

I ended up making a few modifications and changes to the Cog (I can’t leave anything stock 🙂 ). The first change I made was to cut a 1nch length out of the hull, I wanted to shorten the ship by 2 inchs but wasn’t sure what sort of impact that would have on the overall design so settled on a safe 1 inch shorter.

While I had been checking around for other card ships I had stumbled across this (One Picture below):

I really liked the rear stern-castle design so I decided to modify the stern-castle on the FDG Cog to emulate the above. First up I worked out the length of the rounded walls and bashed these from the existing stern-castle walls. I was able to keep the front wall of the stern castle as it was. Next was to design the floor insert for the floor of the cabin and glue it into place. Once this was done the stern-castle was glued to the rear deck:

Next was the angled top for the rounded stern-castle.  I made the topper 7inchs wide at the front approximately 6inchs long down each side and about 3 inchs across at the rear. As these were all straight piece’s bashing them up from the existing stern-castle top was very easy. The worst mistake I made was to use matte board to reinforce the floor of the stern-castle, matte board and PVA glue don’t like each other at all and the floor cupped quiet badly. It’s not very noticeable in the picture:

I am pretty happy with how the rounded Stern-castle turned out. Next I added a removable crows nest so I could still swap the sail over if I wanted, this turned out to be very easy. The crows nest is approximately 3×3 inchs but shaped like an Octagon, the walls are modded from the fore-castle walls. A small hole cut in the middle lets me slide it down the mast and it holds in place very well:

Last mod I made was to add the Bear skull and crossbones to the sail, but you can see that in the finished pictures below:

Even though it’s a bit the wrong century and my printer was playing up hence all the interesting colour variation, Captain Longfur and his pirates are very happy with their new Cog:

I seem to be able to share the bashed files, big thanks go’s to Tom for allowing this with his files. You’ll need to head over to Fat Dragon Games to buy the cog first so you can make use of the files. All the modified images  inside my files remain the property of Fat Dragon Games:

Forum Board Link – Yep you’ll need to login to get them 🙂

For anyone needing a smallish vessel for there gaming needs you can’t go past the FDG Cog.

Anyways back to laying out those frogs 🙂

Pirate Bears – Paper Miniatures

I’ve finally finished the Pirate bears that I need so I can finish Scenario 7 in Song of Fur and buttons. It’s been bit of long time between posts but I’ve been working on several things in tandem which has slowed me down a little but less risk of project burn out. I have expanded the troop types a little so that in the long term I can use the pirate’s as a general full faction for Song of Blades and Heros. I haven’t had a chance to stat up all the additional troop types yet so for the moment no stats but I will get to it.

I have tried as much as possible to give the pirates a ragtag appearance, so they are equipped with different looking muskets and clothes. I’m planning on using the fanciest sawshbucklerette (the one above on left) as a female pirate captain if I need one. I was a little stuck for musicians in the end the banjo player and Sea Shanty singer worked out unfortunately the Harmonica player didn’t look like anything. A picture is worth a thousand words as they say:

1st Mate Shagpile, Captain Longfur and a Banner bearer

Three Swashbucklerettes

Banjo player and a Sea Shanty Singer

Hulking Brutes, wielding small cannons

Cutlass Pirates

Musket Pirates

With these out of the way I’ll get onto the Frogs and Turtles, I’ve finished drawing both sets I just (can’t believe I said just 🙂 ) need to lay them out, create the GSD files and then test build them all. The files are below, as usual you will need to rename the GSD files after you download them (feel free to grab some bases from Onemonks site):

Pirate Bears Page 1 – PDF

Pirate Bear Page One – GSD

Pirate Bears Page 2 – PDF

Pirate Bear Page Two – GSD

I’ll get those frogs done asap 🙂

Paper Miniature – Sand Gecko (Paper Dunebuggy)

This was another project from late last year a paper Dunebuggy. I was working on it while I was sick so the progress was slow but I did get it finished. It was a much tougher project than I initially thought it would be and took a significant amount of time to complete. In the end the Sand Gecko was born, although with much trial and error.

The reason I started this project was that Jim over at One Monk Miniatures put out a very nice card tank. It was simple to construct had some really great texturing and a wide variety of colour schemes. If you need a paper tank for wargamming even as a proxy until your real metal/resin one turns up. I’d recommend heading over and grabbing the Wolverine. I found 95% print out to be a slightly better sizing but thats more my own personal taste.

Under Defiance or pretty much any generic Sci-fi wargamming rules I needed a more diverse range of vechiles than just a tank and troopers. I checked over what Jim had planned for the future of Terra-force and no dunebuggy was listed as a potential build (no point in doubling up). I had also been thinking about designing a paper dunebuggy for a long time but hadn’t been able to come up with any viable way to attach the wheels to an angled chassis.

First up came the design phase in the past I’d always tried to design papercraft items in blender/3d max. Those two programs always seemed to me to be massive overkill in terms of features and functionality for rather simple meshes that are required for paper models. After looking over a few options I decided to simply use sketchup as it was something I had used extensively for another project and I was most familiar with the interface at the time.

I had some problems initially with sketchup locating some of the more advanced options and sometimes the lack of fine increment control can be annoying but overall it turned out to be a great tool to use for designing the model and I’ll probably stick with it for all future models. With the design process I go through the scale of the object in sketchup is unimportant but the size and proportions of the objects on the model had to be correct. Also with grouping you can easily scale things up and down in sketchup if needed and once I was happy with the design I scaled it down to what I thought would be good size. After a few aborted designs I ended up with the below (This is exploded into parts):

I solved the Wheel to body issue by using a full length axle which interlocks with the body the wheels then attach to this. The mesh was exported as a Google earth file and imported to pepakura for unfolding layout and printing. Initially this was done at a 1:1 scale and the below was constructed, version 1:

A few problems became apparent with this model during assembly;

  1. It seemed a little on the big size when compared to the wolverine tank or a marine.
  2. The half round axles were an absolute nightmare to build.
  3. I’d forgotten to build an internal liner for the driver/passenger area.
  4. the single card thickness roll cage was to flimsy.

Most were minor issues and I doubled up the rollcage and eyeballed an internal liner while building version 1. The half round axle really worried me as it was a complete nightmare to build and very fiddly, additionally trying to build the axle at 15mm would have been near impossible.

Back to the drawing board, well sketchup. I thought a hexagon might be a better shape, easier to construct while not losing the perception of a round axle. The entire model was decreased in size to about 85% of the original and I duplicated the rollcage bars and drew in an internal liner. Version2 was born in all it’s glory (V1 Left, V2 Right):

I was much happier with the size but the axle although easier to build was still in the realm of annoyingly fiddly. I decided to try a square axle but mounted as a diamond shape so that a point was pointing upwards and forwards, again to give an illusion of roundness. I was also happy enough with the rest of the design that I decided to add the panel lines and detailing. Version 3 was born

I was very happy with the square axles, easy to assemble and they didn’t detract from the design at all, the panel lines were added in inkscape but this ended up being a partial waste of time as later I had to texture in Gimp and I ended up drawing/painting over all the inkscape work, it did however provide me with a design guide.

At about this point I thought I’m nearly finished just a few textures to slap down and I’m done…Boy was I wrong, I have nothing but the utmost respect for Onemonk I have no idea how he can texture so fast. He had the Wolverine textured in just 3 days, I ended up taking over 2 weeks on the dunebuggy. These were the issues I had to overcome during the process:

  1. Matching the Camo/Colours of the wolverine
  2. Matching the look (wear and tear) of the wolverine
  3. Developing my own texture style for tyres, seats, mud etc
  4. Putting it all together in a layered PDF
  5. Putting together the instructions
  6. Putting together the GSD file for Robocutters
  7. Doing a special 15mm version PDF/GSD

Most of the problems I had seemed to relate to workflow with a lot of double work occurring and finding free software to do what I needed to do. I completely underestimated how much work instructions are. Needless to say I learnt a lot solving the above issues and I was able to apply a lot of what I learnt to the dragonfly. I’m not going to detail all the problems and their solutions as that would make this post to big but some of the key points:

  1. Have good layer management in GIMP
  2. Save double backups while working, I lost a whole days work when GIMP crashed mid save corrupting my main working file.
  3. Don’t finish 1 piece and move to the next do everything on the model at once, ie colour everything, age/wear everything, add detail last
  4. Scribus didn’t generate layered PDF’s correctly, ie it would always print all layers no matter what was visible on the screen in the pdf, another onemonk forum user had the same issue (bug track). Although I don’t think the dev’s understand the problem and as far as I can tell it’s still pending repair.
  5. Instructions + GSD are almost as much work as texturing

Below are some final pictures of the Dunebuggy dubbed the Sand Gecko. For my first from scratch design with textures, I’m very happy with how it turned out. I learnt a lot during it’s development. The people over at one monk’s forum provided heaps of feedback and motivation to keep going. You can thank them all for the alternate rollbars and the racing versions 🙂 :

Files below as usual rename the odt files to .gsd. The PDF’s are layered so you can turn options on and off. The 15mm version is build-able (see above) but you’ll need tweezers, consider yourself warned :). The PDF’s are very big 20mb’s so best to do a save as rather than try and view in your web browser

Dunebuggy 30mm pdf

Dunebuggy 15mm pdf

Instructions Dunebuggy

DuneCut-page1 GSD

DuneCut-page2 GSD

Dunecut-15mm GSD

You can use the dunebuggy with Jims Terraforce marines or Slicks NCC Troopers. I did a test and a plastic/metal driver will also fit.
Terra Force Marines
NCC Troopers

Have fun….the bears are coming I promise 🙂

(This model is release under Attribution-NonCommercial-ShareAlike 3.0 Unported)

Gaming Weekend

This is not exactly a project but it was a fun wargaming weekend and it is what a lot of my projects work towards. I also used a significant amount of time preparing for the weekend over the past 10 days.  As we had a long weekend I headed to a friends place for 2 days of wargamming slaughter (mostly me being slaughtered).

First up was Defiance vital ground, which is a skirmish based  sci-fi game which you can use any models for. So the lego clone army was broken out for this game although I had managed to lose my troop list and had to use the generic star marines list. We had an 4000pt army on each side so I got to field a TX-130 for the first time as well as a couple of AT-PT’s and of course some scout and regular clone troopers. I don’t have any scout helmets so the clone troopers with no helmets represent scouts.

After the glory and excitement of the setup I proceeded to get my butt handed to me  by the opposing UNE force.  I did have one very nice maneuver were I killed of about 8 of the UNE infantry with an AT-PT but after that it was all downhill. Some lucky shots by some UNE infantry took out my AT-PT’s. Normally in defiance destroying  vehicles with infantry weapons is very very difficult so to have both of them destroyed by infantry was pretty unlucky. The Tx-130 likewise got unlucky losing it’s 2 best weapons in the first point of damage it took. After that it was all downhill, a couple of pictures from deployment:

(Sorry about photo quality)

After the UNE troops had finished giving the clone army a pasting they moved on to issue an even more humiliating defeat to the Space thugs (Orks). Making the UNE army the undefeated army of the weekend. Lessons learnt from the above make sure your infantry have some kind of anti-vehicle weapons.

We also played a giant game of Songs of Blades and Hero’s. This was one giant game of 300pts a person and 6 factions we had Barbarians, Kobolds+Wyvern, Goblins 1, Goblins 2, Adult dragon + Rat wolverine’s and Lizardmen.  We actually made the table a little big with about 6footx6foot playing area. Most of the players were learning as they played and I forgot a few rules which made for some interesting situations.  The game was ended in the end by adding an impromptu goal as we had to get up early the next day to clean the location and drive back home.  The Adult dragon was virtually unstoppable although it had some issues actually delivering a killer blow, the rats with it had no such problems dishing a quiet a significant amount of death.

The first goblin warband  dealt a significant amount of death to the lizardmen before being caught between the Wyvern/Kobold and the remaining lizardmen and being almost wiped out. Goblin2 band kept the dragon and rats busy although ii cost quiet a number of goblin warriors to do so. The barbarians quit the field early on due to problems with their general (player had to go home). Due to the size of the board and some very unlucky rolling the poor kobolds spent the whole time trying to move into combat range. Fun was had by all even with the rules mistakes and board size issues. A few pictures:

Goblin Warband 2 facing the Dragon

Goblin Warband1 facing the Lizardmen (Wyvern moving in, in background)

Dishing out and receiving some pain

Wyvern on oneside, Lizardmen on the other…time to run

It was great weekend and hopefully I’ll be able to do another one soon by then I hope to re-write my clone army list for defiance, My Onemonk marines will be done and I’ll have my WWG hinterland layout ready to go as well as some more SOBH warbands + all my frog/bear/turtle warbands.

I better get back onto those Pirate bears now 🙂

Native Bears – Paper Miniatures

Here are the next set of paper miniatures for Song of fur and buttons. Native bears, Oviraptors , Gallimimus dinosaurs and some egg markers. With these you can do the scenarios in Song of Fur and buttons up to the sixth one.

I based the native bears on the Koala’s and added a few extra troop types, so that later on I can use them as a more full faction for regular song of blades and hero’s games. First up the dinosaurs, I didn’t do nest marks for the Gallimimus but did do egg markers as these seemed more useful as they can be dropped if needed:

Next are the Oviraptors slightly smaller than the Gallimimus but very much more colourful, oddly enough most of the reference pictures I found for Oviraptors had them coloured brightly and oddly:

For the native bears I added a banner bearer, musicians and some Boomerang throwers. No cavalry for these guys but that seemed not in the spirit of the faction:

Native Spear

Native Elite

Native Ambushers

Native Boomerang Throwers

Native Musicians and Standard Bearer

Native Leaders(Sulpher Crest, Hero/Leader, Stitch Doctor)

The Elementals For the Stitch doctor to Summon

Here are the extra stats for the extra troop types:

Native Leaf Bearer – Troop
Points 26 Quality 3+ Combat 2
Special Rules: Forester, Standard Bearer

Native Musician Rattler – Troop
Points 16 Quality 3+ Combat 1
Special Rules:
Forester, Music

Native Musician Piper – Troop
Points 22 Quality 3+ Combat 1
Special Rules:
Forester, Music, Stealth

Native Boomerang Thrower – Troop
Points 33 Quality 4+ Combat 3
Special Rules: Forester, Shooter: Medium

I managed to work out some better settings on my camera so the pic’s are coming out slightly clearer. I basically put a homemade diffuser over the flash so I can use the flash without washing out the mini’s to much. This is in addition to the normal lightbox, it seems to have improved the pic’s a fair bit.

The files are below, as usual you will need to rename the GSD files after you download them (feel free to grab some bases from Onemonks site):

Gallimimus One Final – PDF

Gallimimus One – GSD

Oviraptor One Final – PDF

Oviraptor One – GSD

Bear Native One Final – PDF

Bear Native One – GSD

Bear Native Two Final – PDF

Bear Native Two – GSD

Bear Native Three Final – PDF

Bear Native Three -GSD

I’ll get to work on the pirate bears :).


Project Status


WWII Project First Release

80%


B-tech Buildings Five

20%


Design Victorian era City

15%


Something Different

5%


Enter your email address to follow this blog and receive notifications of new posts by email.

Join 110 other subscribers

Content Released Under

Creative Commons License
This work is licensed under a Creative Commons Attribution-NonCommercial 3.0 Unported License.
Please Attribute to Sirrob01 with a link back to my blog